Android
Testing in-app purchases on Android platform
There are two ways to test in-app purchases on Android.
Using test user account
Using license tester (Application licensing) - Recommended
Testing with Tester user account
Once after uploading your apk/aab with the right keystore to one of the alpha/beta tracks, you need to
Publish the app in those testing tracks
Get the testing opt-in link for the track
Pass the link to your tester'e email
Let your tester click on "Become a Tester" button and download the app from store
User purchases in test tracks result in actual charges to user accounts unless the user is also a license tester. However, the refund happens in 14 days from the date of purchase.
If you don't want to always upload the app to play store and download it from there to test it, you can side-load the app directly from unity if you maintain the same version code, app signing and package name similar to the one on test track. This will be handy for developers before publishing the app to QA team.
Testing with Application licensing (license tester)
To set up application licensing, start by adding your list of tester's Gmail addresses in the Play Console.
Go to your Play Console.
Select Settings
> Monetisation > License Testing.
Under "License Testing," add your testers' Gmail addresses by creating a new email list or add ot an existing one and save.
Using license testers provide the following benefits:
Ordinarily, the Google Play Billing Library is blocked for apps that aren't signed and uploaded to Google Play. License testers can bypass this check, meaning you can sideload apps for testing, even for apps using debug builds with debug signatures without the need to upload to the new version of your app. Note that the package name must match that of the app that is configured for Google Play, and the Google account must be a license tester for the Google Play Console account.
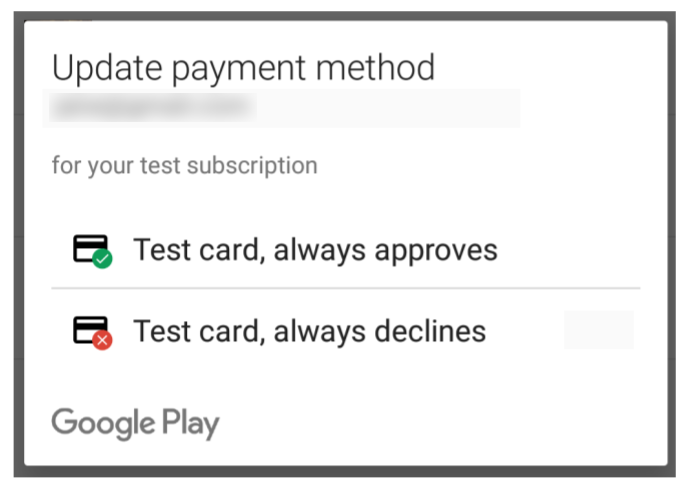
License testers have access to test payment methods that avoid charging the testers real money for purchases. You can also use test payment methods to simulate certain situations, such as when a payment is declined. Figure 1 shows these test forms of payment as they appear within the purchase flow.

Here are some additional details about the test purchase process:
Test purchases use the same app purchase flow used by actual purchases.
Taxes are not computed for test purchases.
Google Play indicates a test purchase by displaying a notice across the center of the purchase dialog.
You can confirm the account that is making a purchase by expanding the purchase dialog. Note the following:
Test accounts must be on the tester's Android device.
If the device has more than one account, the purchase is made with the account that downloaded the app.
If none of the accounts have downloaded the app, the purchase is made with the first account.
Before distributing your app, you can make use of Google Play test tracks to perform additional validation. For example, you can leverage test tracks to have your QA team qualify a new release.
With test tracks, users can install your app from Google Play and test a version of your app that is not yet publicly available. Users can make real purchases using any of their payment methods in Google Play.Note: User purchases in test tracks result in actual charges to user accounts unless the user is also a license tester.
To test your Google Play Billing Library integration using test tracks, do the following:
Publish your app to a test track. Note that after you publish an app to a testing track, it can take a few hours for the app to be available for testers.
Ensure each tester opts-in to your app's test. On your test's opt-in URL, your testers see an explanation of what it means to be a tester along with a link to opt-in.
Last updated