# Introduction
> Want to know which games are using Essential Kit? Click [here](https://42matters.com/sdks/ios/voxelbusters-essential-kit).
>
> Includes games from [**Voodoo**](https://www.boomboxgames.net/)**,** [**Azur Games**](https://azurgames.com/)**,** [**BoomBox**](https://www.boomboxgames.net/) and more!
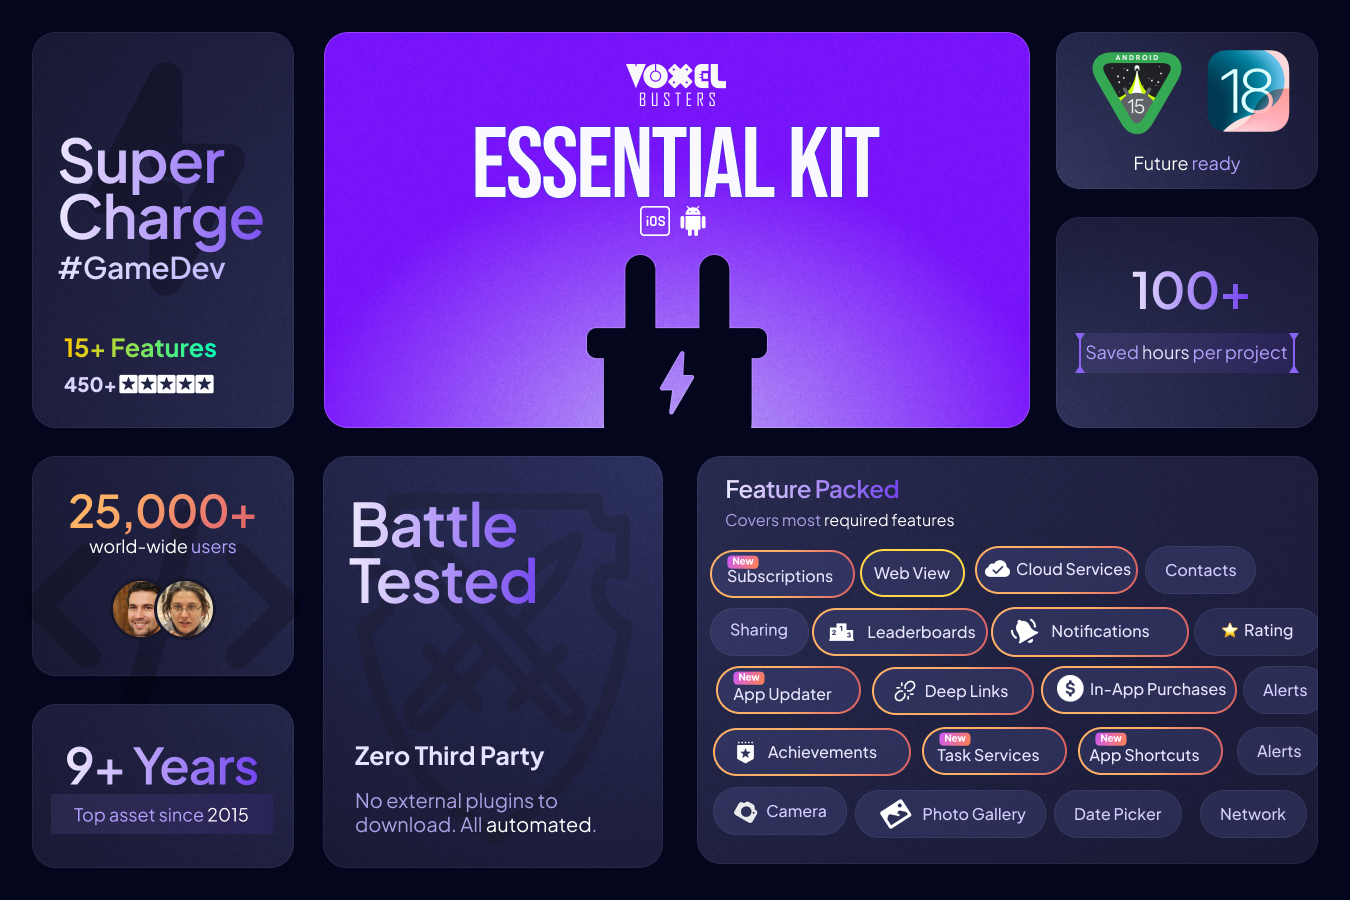
[**Essential Kit**](https://link.voxelbusters.com/essentialkit) (V3) a true cross platform tool for Unity which provides unique and unified way to access native functionality on mobile platforms.
> Supported platforms : **iOS 15+ (till iOS 18)** | **Android 21+ (till API 35) | tvOS (Beta) | Android PC (Beta)**
> **450+** 🌟🌟🌟🌟🌟 | Used by **25,000+ developers** world-wide
> As promised, all customers get [Ads Kit](https://link.voxelbusters.com/ads-kit) for Free - No Code Required!
***
### **Important links**
[Unity Forum Thread](https://link.voxelbusters.com/essential-kit-unity-forum) | [Tutorials](/plugin-overview/settings) | [Support](https://link.voxelbusters.com/essential-kit-support)
### **Highlights**
• **Unified** API design | **Never write** code **per platform**
• **Easy** installation
• No **knowledge** of native platform **services is required**
• **Simulate** most feature **behavior in the** Editor
• Generate Android **manifest** and **permissions** **as per** feature **usage**
• Automatically adds required **capabilities** on iOS and tvOS
• Only **select features** you need
• Complete **ASMDEF**
• Full **source code** is included
• Detailed **tutorials** with native platform setup
• **Unity cloud build** and batch mode compatible
• Actively supported **since 2015**
### **Feature set**
• Address Book - Access contacts of the user
• App Shortcuts - Utility for adding dynamic shortcuts to app icon for quick access of content
• App Updater - Prompt version updates to user
• Billing - Privacy First In-App purchases (Consumables/Non-Consumables/Subscriptions)
• Cloud Services - Save data in the cloud (iCloud & Saved Games)
• Deep Link Services (New!) - Connect your content/screen with a url
• Game Services - Leaderboards, Achievements done right
• Mail Sharing - Share data through mail
• Message Sharing - Share data as messages
• Media Library Services - Select, Capture, Save media content (Gallery/Camera)
• Native UI Popups (Alert Dialog, Date/Time Picker (New!) - Native alerts
• Network Connectivity - Check network connection
• Local Notification System - Schedule notifications
• Push Notification System - Receive remote notifications
• Rate My App - Get ratings
• Social Sharing (Facebook, Twitter, WhatsApp) - Share to social media
• Share Sheet - Share images and urls
• Task Services - Allows to run app in background
• WebView - Access browser within Unity
{% hint style="warning" %}
tvOS platform doesn't support features like Address Book, App Shortcuts, Media Library, Web View, Date Picker and Sharing - As these are natively not supported or allowed by tvOS platform.
However, rest of the features are supported and unsupported features has null implementations ready.
{% endhint %}
### Feature Details and Game-Centric Use Cases
\
📇 Address Book Access : Fetch device contacts using filters (e.g., only contacts with email or phone), with support for pagination.
* Invite-a-friend features using player contact lists
* Send rewards when friends install the game
* Matchmaking or co-op party suggestions from contact book
* Create guilds or teams from real-world friends
* Share referral codes through known contacts
⚡ Creating Dynamic App Shortcuts: Add or remove custom app icon shortcuts that deep link into specific app content.
* Shortcut to “Daily Rewards” or time-limited challenges
* Instant launch into multiplayer mode or last level
* Quick open for character customization or guild chat
* One-tap entry into co-op events or clan war
* Feature newly unlocked mode directly from home screen
🔄 App Updater Integration: Detect if a newer version of the app is available and prompt players (optional or forced).
* Enforce version upgrade before online play
* Prompt update after login during major patches
* Soft update for minor UI improvements
* Support content version compatibility for multiplayer
* Announce and enforce seasonal updates or new maps
💰 In-App Purchases (Billing Services / IAP): Uses StoreKit 2 (iOS, tvOS) and Google Billing 7.x (Android). Supports consumables, non-consumables, subscriptions with multiple offers.
* Selling skins, coins, or ad-free upgrades
* Battle pass or season ticket subscriptions
* Restore purchases after reinstall
* Time-limited offers during events
* One-time purchase for special characters
☁️ Cloud Save for Unity Mobile Games: Cross-device player data sync using iCloud (iOS, tvOS) and Google Play Saved Games (Android).
* Sync progress across devices
* Cloud backup for offline/online games
* Allow iPhone users to switch to iPad
* Resume levels across reinstalls
* Support shared progress in family account scenarios\\
🔗 Deep Link Handling in Unity: Support Universal Links and App Links with payload delivery.
* Invite links to a specific level or match
* Launch into in-game promotions or reward flows
* Enable streamers to share join links
* Referral codes encoded in deep links
* Return players to last session with context
🏆 Game Center & Google Play Game Services Integration: Full support for leaderboards, achievements, and player login.
* Show global leaderboards with score filters
* Progress-based achievements to reward milestones
* Weekly reset leaderboards for retention
* Friends-only scores for casual competition
* Reward unlocks tied to achievements
🎥 Unity Media Picker & Capture Integration: Select or capture media (images, videos) for gameplay, avatars, or sharing.
* Avatar creation using player camera
* Screenshot sharing of in-game achievements
* Photo-based puzzle or AR game mechanics
* Record short clips for social bragging
* Use photos as level textures or objects
🗓️ Native UI Dialogs and Pickers in Unity: Use platform-native alerts, confirmations, and pickers (date/time).
* Choose time for battle match scheduling
* Pick a farming cycle (plant/harvest dates)
* Alert players for irreversible choices
* Confirm restart of tough levels
* Plan weekly events with calendar picker\\
🌐 Network Connectivity Monitor: Monitor real-time online status with event callbacks.
* Auto-pause online matches on disconnect
* Save offline and sync when online returns
* Delay IAP flow until stable connection
* Notify users about server reconnection
* Warn during multiplayer lobbies\\
🔔 Push & Local Notifications: Schedule notifications with calendar/time triggers, repeat, and reboot persistence.
* Daily login reminder at 9AM
* Notify when energy refills
* Remind of upcoming boss fight
* Push promo offers near expiration
* Alert for ranked match open window\\
⭐ App Rating Prompt: Native rating dialog, optional pre-check logic (e.g., after positive event).
* After completing a hard level
* After a streak of wins
* After purchase or reward unlock
* Periodic prompt after active sessions
* Trigger based on happy in-game behavior\\
📤 Social Sharing Support: Native OS share sheet with support for media, text, and urls.
* Share win screen or high score
* Post screenshots to Instagram or Twitter
* Send in-game messages via WhatsApp\\
🔄 Background Task Execution: Execute important background tasks even when the game is minimized or the device is locked. Supports time-limited operations to keep your game state up-to-date without requiring the app to be active.
* Synchronize player progress with backend
* Persist crafting/building timers in real-time even when the player switches apps.
* Upload player session data (kills, score, XP) in battle royale games when the app is backgrounded during match exit.
* Queue asset preloading or downloads (e.g., upcoming event content) while the game is backgrounded.
* Perform final save encryption or checkpoint sync before app sent to background.
\
⚙️ Utilities – Settings & Store Links: Quickly open app settings or direct users to your store page.
* Open app permissions for camera/mic
* Take users to update/download page
* Link to companion app or spin-off game\\
🌍 Web View Integration: Load local or remote webpages inside your game with messaging and JS support.
* Show patch notes or event calendars
* Link to player profile on community hub
* Host user-generated levels in HTML
* Run surveys or feedback forms
* Display marketplace listings or DLC
**Note**
• Plugin doesn't include Facebook SDK.
• Works with Unity Cloud Build.
### Why Choose Us?
* Custom-coded and privacy-first: We don’t rely on third-party plugins, ensuring full control over your product’s functionality and privacy.
* Fast updates: We’re often the first to integrate updates for native libraries (e.g., StoreKit 2, Billing Client V6, V7).
* Extensive automation: Includes features like manifest generation, dependency handling, and build post-processing.
* Future plans: We’re working on open-sourcing major parts of the plugin to avoid vendor lock-in and ensure long-term flexibility.
***
**If you are upgrading from version 2.x, please follow** [**this guide**](/whats-new-in-v3/upgrade-from-v2)**.**
**Third Party Plugins Compatibility**
• Plays nicely with [Anti-Cheat Toolkit](https://assetstore.unity.com/packages/slug/202695)
***
### **Our other products**
[Cross Platform **Screen Recorder Kit**](http://u3d.as/1nN3)
[**Easy ML Kit**](https://u3d.as/2PMe)
[**Ads Kit**](https://www.github.com/voxelbusters/ads-kit) **(Free & Open Source)**
[**Permissions Kit**](https://www.github.com/permissions-kit) **(Free & Open Source)**
[Reporting Kit](https://u3d.as/2Q6p)
[Cross Platform **Snapchat Kit**](http://u3d.as/1gWc)
[Cross Platform **Story Kit(Instagram)**](http://u3d.as/1pMn)
***
### [Upgrade Strategy & Pricing Overview](https://www.voxelbusters.com/essential-kit.html#upgrade-strategy)
# Features Overview
List of available features in Essential Kit (V3)
***
#### Looking for integrating Ads? Download from [here](https://u3d.as/37du).
***
#### Address Book
* Read contacts from user's address book
* Apply constraints to have certain attributes like email, phone number etc
* Supports pagination
#### App Shortcuts
* Add dynamic shortcuts to the app icon
* Quick access to specific in-app content or actions
* Supports multiple shortcuts with custom labels and icons
#### App Updater
* Fetch if any updates available for the app
* Prompt user to update either forcefully or optionally
#### Billing Services
* Fetch Product details from store
* Supports Consumable and Non-Consumable products
* Supports Subscriptions
* Supports multiple offers per subscription
* Restore purchases
* Uses latest Store Kit v2 on iOS and Billing Client 7.1.1 on Android
#### Cloud Services
* Sync data across devices for free
* Auto syncs based on app lifecycle
* Multiple data types supported (long, string, byte array...)
#### Deep Link Services
* Supports Universal links (or App Links)
* Supports Schemes
* Seamless access for deep link data
#### Extras (Utilities)
* Open application settings
* Open store page
#### Game Services
* Authentication (Game Center on iOS, Google Play Services on Android)
* Submit scores in leaderboards
* Report progress for achievements
* Custom leaderboards & Achievements user-interface support
* Attach tags (context) to leaderboard scores
#### Media Services
* Select media content
* Capture media content
* Save media content
* Permission-less implementation (where ever applicable)
* Multiple media content types supported
#### Native UI
* Alert dialogs
* Date Picker and Time Picker
#### Network Services
* Access network connection status
* Event based
#### Notification Services
* Local notifications
* Remote/Push notifications
* Time based trigger support
* Calendar based trigger support
* Custom payload keys support
* Repeat scheduling allowed
* Retains scheduled notifications after reboot
#### Rate My App
* Auto trigger based on prior settings
* Prompt store rating dialog to users
* Pre-confirmation dialog support
#### Sharing
* Generic share sheet support
* Message sharing
* Mail sharing
* Social sharing (Facebook, Whatsapp, Twitter)
* Multiple attachments support
#### Web View
* Load local webpages
* Load remote urls
* Dimensions control
* Javascript evaluation support
* Receive messages from web page to unity
* Native camera and file dialog access support
{% content-ref url="/pages/-MJnxKkfyTW3RfTt0cKm" %}
[Broken mention](broken://pages/-MJnxKkfyTW3RfTt0cKm)
{% endcontent-ref %}
{% content-ref url="/pages/-MJnxN9neCaHHjfhkVv3" %}
[Broken mention](broken://pages/-MJnxN9neCaHHjfhkVv3)
{% endcontent-ref %}
{% content-ref url="/pages/-MJnxPztvxkvbmPzUCwn" %}
[Broken mention](broken://pages/-MJnxPztvxkvbmPzUCwn)
{% endcontent-ref %}
{% content-ref url="/pages/-MLDDc2B\_FmZxqCGyVfW" %}
[Broken mention](broken://pages/-MLDDc2B_FmZxqCGyVfW)
{% endcontent-ref %}
{% content-ref url="/pages/-MJnxSpH0GMGuIG3eQIJ" %}
[Broken mention](broken://pages/-MJnxSpH0GMGuIG3eQIJ)
{% endcontent-ref %}
{% content-ref url="/pages/-MJnxVQEAfCyxAe3uzcF" %}
[Broken mention](broken://pages/-MJnxVQEAfCyxAe3uzcF)
{% endcontent-ref %}
{% content-ref url="/pages/-MJnx\_SW03I4jVOWHRGb" %}
[Broken mention](broken://pages/-MJnx_SW03I4jVOWHRGb)
{% endcontent-ref %}
{% content-ref url="/pages/-MJnxdRRY0nQedEknT1B" %}
[Broken mention](broken://pages/-MJnxdRRY0nQedEknT1B)
{% endcontent-ref %}
{% content-ref url="/pages/-MLDBl4B0KCr3y8npdjY" %}
[Broken mention](broken://pages/-MLDBl4B0KCr3y8npdjY)
{% endcontent-ref %}
{% content-ref url="/pages/-MJnxgTP9bn8cpcpQifH" %}
[Broken mention](broken://pages/-MJnxgTP9bn8cpcpQifH)
{% endcontent-ref %}
{% content-ref url="/pages/-MJnxi--unGsRXK9PxzK" %}
[Broken mention](broken://pages/-MJnxi--unGsRXK9PxzK)
{% endcontent-ref %}
{% content-ref url="/pages/-MJnxkDONB9qdLoQ38zU" %}
[Broken mention](broken://pages/-MJnxkDONB9qdLoQ38zU)
{% endcontent-ref %}
# Installation
Steps to install the plugin
1. Open Package Manager from Unity Editor
2. Under My Assets category, Search for "Essential Kit"
3. Import the plugin into your project
4. Do a force resolve from top menu bar -> Assets -> External Dependency Manager -> Android Resolver -> Force Resolve
5. Configure the features you want in [Essential Kit Settings](/plugin-overview/settings#essential-kit-settings)
{% hint style="warning" %}
If you already have an earlier version of the plugin installed, check the [upgrade guide](/upgrade-guide).
{% endhint %}
{% hint style="danger" %}
If you have an error related to iOS/XCode assemblies from External Dependency Manager, make sure you have iOS module installed in Unity Editor.
{% endhint %}
## FAQs
### I see this error when making Android build - "Failed to install the following Android SDK packages as some licences have not been accepted.". How to resolve this?
This happens because of not accepting licenses when installing the sdk. Let me get you the steps to accept the license.\
**On Windows**
> ```
> C:\Users\xxx\AppData\Local\Android\Sdk\tools\bin\sdkmanager --licenses
> ```
>
> or
>
> ```
> PATH-TO-UNITY-ANDROID-SDK\tools\bin\sdkmanager --licenses
> ```
**On Mac**
> ```
> cd /Users/YOUR_MAC_USER/Library/Android/sdk/tools/bin ./sdkmanager --licenses
> ```
>
> or
>
> ```
> /Applications/Unity/Hub/Editor/UNITY_VERSION/PlaybackEngines/AndroidPlayer/SDK/tools/bin/sdkmanager --licenses
> ```
Press 'y' to accept the licenses.
# Upgrade Guide
On every update, make sure you follow the below steps to avoid any issues.
1. Delete Assets/Plugins/VoxelBusters/EssentialKit and CoreLibrary folders.
2. Delete Assets/ExternalDependencyManager folder (If we updated to latest version)
3. Import the new update
### Version Specific
| Upgrading to Version | Recomendations |
| -------------------- | ------------------------------------------------------------------------------------------------------------------------------------------------------------------------------------------------------------------------------------------------------------------------------------------------------------------------------------------------------------------------------------------------------------------------------------------------------ |
| **3.7.0** |
When making XCode builds, Replace rather thanAppend for the firsttime - As we removed completely .xcframewok files and included the source code(swift files) for easy debugging.
Also, as Declared Age Api's are used, please make sure you are on latest xcode version(as of now 26.2) which has 26.2 iOS SDK.
|
| **3.5.0** | When making XCode builds, **Replace** rather **than** **Append** for the **first** **time** - As we removed including sub xcode projects and started shipping XCFrameworks with dSYM files for better compatibility with ios build plugins on Windows. |
| | |
# Settings
## Essential Kit Settings
{% embed url="" %}
Essential Kit Settings is the control panel for all the features covered in [**Essential Kit**](https://link.voxelbusters.com/essential-kit).\
You can enable and disable the features based on your requirement.
Access the settings from **Window -> Voxel Busters -> Essential Kit -> Open Settings**
Open Essential Kit Settings
{% hint style="success" %}
Once you import the plugin for the first time, you need to access the Essential Kit Settings for enabling the features you want to use.
{% endhint %}
Enable the features you want to use and disable the rest.
{% hint style="success" %}
Disabling the features that you don't use will let the plugin to not export the features that are unused.
{% endhint %}
General section is common to all features and the values need to be set before you publish the app to app stores.
### General Settings
Set Debug Info Level
Store Id's & Permission Descriptions
| Properties | Description |
| ----------------- | ----------------------------------------------------------------------------------------------------------------------------------------------------------------------------------------------------------------------------------------------------------------------------------------------------------------------------------------------------------------------------------------------- |
| Log Level | Setting to None will disable all logs from the plugin. Set it to Critical to show the main critical logs or set to info for more debugging. |
| Store Ids |
iOS : Set the "Apple Id" value from Appstore Connect -> Select your App -> General -> App Information -> General information (check below screenshot ). This is a numeric value. Ex: 1210072186
Android : Set the package name of your app here. Ex: com.voxelbusters.essentialkit
|
| Usage Permissions |
These are the descriptions shown when a permission is shown on the native platform. Currently these descriptions are shown only on iOS as on Android it's not possible to have custom permission messages.
$productName will be replaced with the app product name
|

## [External Dependency Manager](https://github.com/googlesamples/unity-jar-resolver)
Plugin uses [**External Dependency Manager**](https://github.com/googlesamples/unity-jar-resolver) for resolving the dependencies on Android. In order to resolve the dependencies once after selecting the features you want to use, activate Force Resolve to download the required libraries.
{% hint style="success" %}
Activate Force Resolve from Assets -> External Dependency Manager -> Android Resolver -> Force Resolve
{% endhint %}

# Folder Structure
All Voxel Busters Plugins will be inside Assets/Plugins/VoxelBusters folder. EssentialKit folder contains the plugin files related to this plugin.
Plugin comes with [**External Dependency Manager**](https://github.com/googlesamples/unity-jar-resolver) which is a plugin maintained by Google. This plugin minimises the conflicts with external plugins. As of now we use this for resolving android libraries.
| Folder | Description |
| ---------------------------------------- | --------------------------------------------------------------------------------------------------------------------------------------------------------------- |
| Assets/External Dependency Manager | Folder where [**External Dependency Manager**](https://github.com/googlesamples/unity-jar-resolver) plugin exists. |
| Assets/Plugins/VoxelBusters | Root folder for all Voxel Busters plugins |
| Assets/Plugins/VoxelBusters/EssentialKit | Essential Kit plugin main folder |
| Assets/Resources | Folder where the [Essential Kit Settings](/plugin-overview/settings#essential-kit-settings) are stored. Make sure you don't delete this folder while upgrading. |
{% hint style="success" %}
When you are trying to upgrade the plugin, make sure your Essential Kit Settings asset under **Assets/Resources** is committed to version control or have a backup.
{% endhint %}
{% hint style="success" %}
All modules within the plugin uses assembly definition files(.asmdef). So these won't affect any of your project compilation times!
{% endhint %}
# Localisation
Have your own localised text for the strings used within the plugin
There is a provision to configure the plugin to provide your own text based on the language selected by your user :tada:\
\
There are two easy steps to have the plugin localised.
### 1. Implement ILocalisationServiceProvider Interface
You need to implement ILocalisationServiceProvider which has **GetLocalisedString** method. It takes two parameters key and default value.
**key :** Key contains the value used to identify the string ([Refer here](#key-constants-class-for-each-feature) for keys used in the plugin)
**default :** This is usually the string in english language we use internally if no localisation exists.
```
namespace YourOwnNameSpace
{
public class MyLocalisationServiceProvider : ILocalisationServiceProvider
{
#region ILocalisationServiceProvider implementation
public string GetLocalisedString(string key, string defaultValue)
{
string localisedValue = defaultValue;//Replace defaultValue with your own mecanism to find localised text which has the "key"
return localisedValue;
}
#endregion
}
}
```
### 2. Set the ILocalisationServiceProvider
You need to set the above implemented localisation provider to ExternalServiceProvider.LocalisationServiceProvider once your first scene is loaded
```
ExternalServiceProvider.LocalisationServiceProvider = new MyLocalisationServiceProvider();
```
## Key constants used in Rate My App feature
Key Used
Attribute Text Description
RateMyAppLocalisationKey.kTitle
Rate My App Title
RateMyAppLocalisationKey.kDescription
Rate My App Description
RateMyAppLocalisationKey.kOkButton
Rate My App Ok Button
RateMyAppLocalisationKey.kCancelButton
Rate My App Cancel Button
RateMyAppLocalisationKey.kRemindLaterButton
Rate My App Remind Later Button
# PlayMaker
Use Essential Kit mobile features through PlayMaker actions (no-code).
Essential Kit provides a cross-platform way to access native **iOS/Android** functionality from Unity (in-app purchases, notifications, deep links, sharing, web view, cloud save, native UI, network status, and more).\
The **Essential Kit for PlayMaker** integration exposes these features as PlayMaker custom actions, so you can build flows without writing code.
## Get Started
1. Have [**Essential Kit**](https://link.voxelbusters.com/essential-kit) installed in your project.
2. Have **PlayMaker** installed in your project.
3. [Download](https://u3d.as/3LwU) and import **Essential Kit for PlayMaker** (free):
After importing, you should see the integration under `Assets/Plugins/VoxelBusters/EssentialKit/ThirdPartySupport/PlayMaker/`.
## Enable Essential Kit Features
Enable only the features you plan to use (for example: Billing Services, Notification Services, Deep Link Services).
* Open the Essential Kit settings and enable the required feature modules.
* Refer to the settings guide for details: [Settings](/plugin-overview/settings)
## Finding PlayMaker Actions
In your FSM, add an action and search by **feature name** (common prefixes):
* `BillingServices*`, `NotificationServices*`, `DeepLinkServices*`, `GameServices*`, `CloudServices*`, `WebView*`, `Sharing*`, `MediaServices*`, `NativeUI*`, `NetworkServices*`, `TaskServices*`, `RateMyApp*`, `AppShortcuts*`, `AppUpdater*`, `AddressBook*`, `Utilities*`
**Common pattern**
* Add the feature’s **listener** action (for events/callbacks) in a state that stays active.
* Call the **trigger** action (to start the operation).
* On success/failure events, use the matching **Get\*** action to read cached results/errors.
## Feature Docs (Actions + Use Cases)
Each feature has PlayMaker docs under its tutorial section. Use these links to jump straight to the PlayMaker pages:
| Feature | PlayMaker Docs | Use Cases |
| --------------------- | ------------------------------------------------- | ---------------------------------------------------------------- |
| Address Book | [Docs](/features/address-book/playmaker) | [Use Cases](/features/address-book/playmaker/use-cases) |
| App Shortcuts | [Docs](/features/app-shortcuts/playmaker) | [Use Cases](/features/app-shortcuts/playmaker/use-cases) |
| App Updater | [Docs](/features/app-updater/playmaker) | [Use Cases](/features/app-updater/playmaker/use-cases) |
| Billing Services | [Docs](/features/billing-services/playmaker) | [Use Cases](/features/billing-services/playmaker/use-cases) |
| Cloud Services | [Docs](/features/cloud-services/playmaker) | [Use Cases](/features/cloud-services/playmaker/use-cases) |
| Deep Link Services | [Docs](/features/deep-link-services/playmaker) | [Use Cases](/features/deep-link-services/playmaker/use-cases) |
| Game Services | [Docs](/features/game-services/playmaker) | [Use Cases](/features/game-services/playmaker/use-cases) |
| Media Services | [Docs](/features/media-services/playmaker) | [Use Cases](/features/media-services/playmaker/use-cases) |
| Native UI | [Docs](/features/native-ui/playmaker) | [Use Cases](/features/native-ui/playmaker/use-cases) |
| Network Services | [Docs](/features/network-services/playmaker) | [Use Cases](/features/network-services/playmaker/use-cases) |
| Notification Services | [Docs](/features/notification-services/playmaker) | [Use Cases](/features/notification-services/playmaker/use-cases) |
| Rate My App | [Docs](/features/rate-my-app/playmaker) | [Use Cases](/features/rate-my-app/playmaker/use-cases) |
| Sharing | [Docs](/features/sharing/playmaker) | [Use Cases](/features/sharing/playmaker/use-cases) |
| Task Services | [Docs](/features/task-services/playmaker) | [Use Cases](/features/task-services/playmaker/use-cases) |
| Utilities | [Docs](/features/utilities/playmaker) | [Use Cases](/features/utilities/playmaker/use-cases) |
| Web View | [Docs](/features/web-view/playmaker) | [Use Cases](/features/web-view/playmaker/use-cases) |
# Version 3 vs Version 2
Improvements and other changes in Version3 compared to Version 2
## Improvements
#### Free Ads Kit (v1)
Get a free copy of [Ads Kit](https://link.voxelbusters.com/ads-kit) with V3. Ads Kit offer single api for adding any supported ad network. It has no-code work flow too and very limited api calls for supporting different ad types.
#### Complete Custom Implementation
We started V3 in the thought of including Unity IAP for subscriptions. But, we scrapped it and implemented our own for below reasons
* Unity IAP's workflow is quite different from our simple workflow
* We don't want our users to have any analytics dependency
* Not sure when Unity's Store Kit 2 implementation on iOS will be done as its the latest recommended billing framework
Now we have zero dependencies despite added new features. Have a look at our [release notes](/whats-new-in-v3/release-notes) on what has changed and what's new!
#### New Features
We added four main new features **App Shortcuts**, **App Updater, Task Services(Background Processing)** and **Subscriptions** with multi-offer support along with serval other enhancements in terms of feature functionalities.
Added tvOS and Android PC(In progress) support.
#### Better Error Handling
V3 now sends error codes along with the error message for all features. This helps in communicating and debugging the errors easily.
#### Latest Compatibility
V3 is currently compatible with Android API 35 and iOS 18
{% hint style="success" %}
Billing Services on iOS uses **Store Kit 2** and latest **Google Billing Client** **v7** (at the time of this writing), **Unity 6** compatible
{% endhint %}
#### Intuitive API (based on lots of feedback)
We refactored each and every feature's api to adapt to the feedback we got for V2 (since 2020).
#### Fail Fast Approach
V3 throws errors at build time if any expected configuration is not setup correctly. This can save lots of time (actually for us too ;) - as customer setup issues are difficult for our support team to debug)
#### Follows Latest Recommended Guidelines
V3 aims to follow latest native recommended guidelines and implemented accordingly where ever applicable (Photo picker, Store Kit 2, Permission-less access etc...)
You can check the complete [release notes](/whats-new-in-v3/release-notes) here for the list of all changes in V3.
# Release Notes
### Features & Enhancements
* \[Enhancement] \[Address Book] Implemented page based access
* \[Enhancement] \[Address Book] Added API to access based on constraints (MustIncludeName, MustIncludePhoneNumber, MustIncludeEmail)
* \[Feature] \[App Shortcuts] Add app shortcuts to your application icon
* \[Feature] \[App Updater] Seamless access of app updates across supported platforms
* \[Feature] \[Billing Services] Added Subscriptions
* \[Feature] \[Billing Services] Added Multi-offer support and redemption (Introductory, Promotional offer types)
* \[Feature] \[Billing Services] Added access to PayOut information per billing product
* \[Enhancement] \[Billing Services] Implemented Store Kit 2 on iOS and Google Billing Client V7 on Android
* \[Enhancement] \[Billing Services] Providing product access in billing transaction
* \[Enhancement] \[Billing Services] Providing access to both purchased quantity and requested quantity for billing transaction
* \[Enhancement] \[Billing Services] Added option to force refresh restore purchases (passing true for forceRefresh may trigger login prompt on iOS)
* \[Enhancement] \[Billing Services] Restore purchases called internally automatically at the time of initialisation
* \[Enhancement] \[Billing Services] Added support to mark unused billing products in-active for backward compatibility
* \[Enhancement] \[Billing Services] Provided access to raw transaction data via rawData property along with other details based on platform (on android additionally signature property is added)
* \[Enhancement] \[Billing Services] Removed dependency on OpenSSL as it's difficult to maintain security updates and binary size
* \[Feature] \[Cloud Services] Added auto data sync based on app lifecycle
* \[Enhancement] \[Cloud Services] Syncronize call is thread safe now and allows calls in parallel
* \[Fix] \[Deep Link Services] Fixed deep link launch event
* \[Feature] \[Game Services] Added option to add context(string) to the submitted score
* \[Feature] \[Game Services] Added Friends access api
* \[Enhancement] \[Game Services] Upgraded to Google Play Services V2 on Android
* \[Enhancement] \[Game Services] Updated Game Center native calls to latest api
* \[Enhancement] \[Game Services] Fetch server credentials with refresh token on Android
* \[Enhancement] \[Game Services] Added LegacyId(for backward compatibility), GameScopeId and DeveloperScopeId
* \[Enhancement] \[Game Services] Added LegacyId(for backward compatibility), GameScopeId and DeveloperScopeId
* \[Enhancement] \[Media Services] Refactored api to have more functionality. Now Select, Capture and Save all takes additional options
* \[Enhancement] \[Media Services] Allowing save media content to set custom file name and album
* \[Enhancement] \[Media Services] Api now supports more media content types than just images
* \[Feature] \[Notification Services] Added calendar trigger with repeat functionality
* \[Feature] \[Notification Services] Added option to set notification priority level
* \[Enhancement] \[Notification Services] Past time scheduled notifications will throw error now
* \[Enhancement] \[Rate My App] Added option to control auto show rate dialog (Now you can just set the settings, disable auto show and check if conditions are satisfied with IsAllowedToRate method)
* \[Enhancement] \[Rate My App] Added option to instantly rate by optionally showing a pre-confirmation dialog
* \[Enhancement] \[Social Sharing] Now share more generic content with attachments (compared to only images earlier)
* \[Feature] \[Task Services] Allow your app tasks to finish in background
* \[Enhancement] tvOS Support
### Breaking
* \[Billing Services] Use Product, RequestedQuantity, PurchasedQuantity properties in IBillingTransaction instead of Payment property
* \[Media Services] Permission request calls are removed for ease. Instead directly use SelectMediaContent, CaptureMediaContent and SaveMediaContent with options.
* \[Notification Services] Earlier HIGH was the priority set by default. **Now** it's configurable and **default value is Medium.**
* \[Game Services] If you are using LocalPlayer.Id to identify your account, make sure you handle it carefully as it returns gameScopeId instead of old Id(teamScopeId ≥ 2.7.3, legacyId < 2.7.3). If you want to still use old id, please use legacyId or teamScopeId as per the version you are from.
### Misc
* Added error codes along with native descriptions for all features
* Removed and updated deprecated native methods usage
* Cleaner settings inspector display with backgrounds
* .gitignore files are added to skip tracking regenerated files
### Deprecated
* \[Deprecated] \[Billing Services] Payment property in IBillingTransaction is now obsolete
* \[Deprecated] \[Billing Services] Tag property in Billing Product obsolete. Use Payouts instead.
* \[Deprecated] \[Billing Services] AndroidProperties in IBillingTransaction is now obsolete. Use rawData instead.
* \[Deprecated] \[Game Services] IScore is is now obsolete. Use ILeaderboardScore instead.
* \[Deprecated] \[Game Services] LoadPlayers is is now obsolete due to platform restrictions.
Removed
* \[Removed] \[Billing Services] VerifyPaymentReceipts option in settings removed as we auto verify locally by default
* \[Removed] \[Cloud Services] SyncInterval is now removed in settings and we auto sync based on app lifecycle
* \[Removed] \[Game Services] Removed idToken and emailId properties access
* \[Removed] \[Media Services] Removed permission api calls as we handle the permission directly in the first call of the related functionality
* \[Removed] \[Rate My app] Removed IRateMyAppController for better api usability. Check new methods in RateMyApp class for achieving similar functionality
* \[Removed] \[Notification Services] Removed location based trigger as it's not used
# Upgrade from V2
1. Delete following folders
1. Assets/Plugins/VoxelBusters/EssentialKit and Assets/Plugins/VoxelBusters/CoreLibrary
2. Assets/Plugins/Android/com.voxelbusters.essentialkit (.androidlib)
3. Assets/ExternalDependencyManager
2. Import latest V3 from Package Manager
3. Fix compilation errors (if any).
> All obsolete methods are documented with required info.
>
> If you need any help, please contact our [support](https://link.voxelbusters.com/essential-kit-support).
4. Run Assets -> External Dependency Manager -> Android -> Force Resolve from "top menu bar"
{% hint style="danger" %} \[Game Services] If you are using LocalPlayer.Id to identify your account, make sure you handle it carefully as it returns gameScopeId instead of old Id(teamScopeId ≥ 2.7.3, legacyId < 2.7.3).
If you want to still use old id, please use legacyId or teamScopeId as per the version you are from.
{% endhint %}
{% hint style="info" %}
Once after importing the package successfully, cross check if Essential Kit Settings has all required data. We have added few new properties which you can fill out (for ex: Payouts in Billing Products).
{% endhint %}
# Address Book
Address Book unlocks contact-powered social features for Unity games without custom native plugins
Essential Kit's Address Book feature lets Unity teams read device contacts, detect friends already playing, and power invite flows without maintaining platform-specific code. This tutorial covers setup, permissions, core APIs, testing, and troubleshooting so you can safely build contact-powered experiences.
{% hint style="info" %}
Using PlayMaker? See the PlayMaker guide: [PlayMaker](/features/address-book/playmaker).
{% endhint %}
{% embed url="" %}
Address Book Video Tutorial
{% endembed %}
{% hint style="info" %}
Looking for a working reference? Open the demo scene at `Assets/Plugins/VoxelBusters/EssentialKit/Examples/Scenes/AddressBookDemo.unity` and the companion script at `Assets/Plugins/VoxelBusters/EssentialKit/Examples/Scripts/AddressBookDemo.cs` to see the full API in action.
{% endhint %}
## What You'll Learn
* Request contacts access with a custom rationale screen and handle every permission state
* Read and filter contacts with `ReadContactsOptions` plus pagination for large address books
* Load contact properties (names, numbers, emails, thumbnails) and recover when access is denied
## Why Address Book Matters
* **Social Growth**: Find friends already playing and drive invite-a-friend loops or referral rewards
* **Faster UX**: Autofill player names, email fields, or support forms directly from saved contacts
* **Cross-Platform**: One API spans iOS Contacts and Android Contacts Provider, including limited access states
## Tutorial Roadmap
1. [Setup](/features/address-book/setup) – Enable the feature, configure permissions, and assign placeholder assets
2. [Usage](/features/address-book/usage) – Handle permission prompts, read contacts, filter data, and load images
3. [Testing](/features/address-book/testing) – Validate behaviour in the simulator and on real devices
4. [FAQ](/features/address-book/faq) – Troubleshoot permissions, pagination, and missing data
## Key Use Cases
* Detect friends already playing and light up invite buttons in onboarding
* Trigger referral rewards when a player texts or emails selected contacts
* Show contact pickers inside support flows to auto-fill recipient details
* Populate co-op lobbies with verified phone numbers or emails for quick invites
## Prerequisites
* Unity project with Essential Kit v3 installed and Address Book enabled in Essential Kit Settings
* iOS targets require a clear `NSContactsUsageDescription` explaining why contacts are needed
* Android targets rely on system-managed permission prompts; plan supporting UI copy in-game
* Test devices (or the Essential Kit simulator) to validate permission flows before release
{% content-ref url="/pages/2aVEXcMQdho7gaYPD8Ff" %}
[Setup](/features/address-book/setup)
{% endcontent-ref %}
{% content-ref url="/pages/-MJoMcEatijf\_luXdQm3" %}
[Usage](/features/address-book/usage)
{% endcontent-ref %}
{% content-ref url="/pages/HIbQMas1eq21GEzQbQNN" %}
[Testing](/features/address-book/testing)
{% endcontent-ref %}
{% content-ref url="/pages/T5oW3ynfLkHZ4IItyVm2" %}
[FAQ](/features/address-book/faq)
{% endcontent-ref %}
# Setup
Configuring Address Book
## Prerequisites
* Essential Kit imported into the project from My Assets section of Package Manager.
* iOS builds require a `NSContactsUsageDescription` entry that explains why you need address book access. Configure it under **Essential Kit Settings > General > Usage Permissions > Address Book** before exporting.
* Android uses the system-provided contacts permission dialog copy. Plan to communicate the "why" inside your own UI because the prompt text cannot be customised.
## Setup Checklist
1. Open **Essential Kit Settings** (`Window > Voxel Busters > Essential Kit > Open Settings`), switch to the **Services** tab, and enable **Address Book**.
2. Assign a **Default Image** placeholder if you plan to display contacts without profile photos. Use a square texture for best results.
3. Provide the contacts usage description under **General > Usage Permissions > Address Book** so the App Store reviewers and players understand why you need contacts access. (Android relies on the platform message.)
4. Changes to the settings asset are saved automatically. If you use source control, commit the updated `Resources/EssentialKitSettings.asset` file.
### Configuration Reference
| Setting | Platform | Required? | Notes |
| ----------------------------------------------------------------------- | -------- | --------- | ---------------------------------------------------------------------------------------------------------------------------------- |
| Enable Address Book | All | Yes | Toggles the feature in builds; disabling strips related native code. |
| Default Image | All | Optional | Placeholder texture returned when a contact lacks an image or while async loading occurs. |
| Contacts Usage Description (General > Usage Permissions > Address Book) | iOS | Yes | Appears in the contacts permission alert; must clearly state the benefit (e.g., "We use contacts to find friends you can invite"). |
| Android Permission Usage Description | Android | N/A | Android displays system-managed text for contacts permissions; customise messaging inside your own UI instead. |
{% hint style="info" %}
Need a working baseline? Run the sample at `Assets/Plugins/VoxelBusters/EssentialKit/Examples/Scenes/AddressBookDemo.unity` to confirm your settings before wiring the feature into production screens.
{% endhint %}
# Usage
Address Book allows cross-platform contact access on mobile devices.
Essential Kit wraps the native iOS Contacts framework and Android Contacts Provider into a single Unity API. The first call to `AddressBook.ReadContacts` automatically handles permissions, so you can focus on delivering contact-driven gameplay loops.
## Table of Contents
* [Permission Workflow](#permission-workflow)
* [Optional: Check Permission Status](#optional-check-permission-status)
* [Reading Contacts](#reading-contacts)
* [Filtering and Constraints](#filtering-and-constraints)
* [Paginated Reads (Advanced)](#paginated-reads-advanced)
* [Contact Data Properties](#contact-data-properties)
* [Loading Contact Images](#loading-contact-images)
* [Core APIs Reference](#core-apis-reference)
* [Error Handling](#error-handling)
* [Related Guides](#related-guides)
## Permission Workflow
Call `AddressBook.ReadContacts` directly. Essential Kit requests permission automatically on the first call and returns an error when the player denies access.
```csharp
using UnityEngine;
using VoxelBusters.CoreLibrary;
using VoxelBusters.EssentialKit;
public class ContactsLoader : MonoBehaviour
{
private void Start()
{
var options = new ReadContactsOptions.Builder()
.WithLimit(25) // Show a small preview list
.WithConstraints(ReadContactsConstraint.MustIncludeName)
.Build();
AddressBook.ReadContacts(options, OnContactsRead);
}
private void OnContactsRead(AddressBookReadContactsResult result, Error error)
{
if (error != null)
{
if (error.Code == (int)AddressBookErrorCode.PermissionDenied)
{
// Let players know why contacts matter, then
Utilities.OpenApplicationSettings();
}
return;
}
foreach (var contact in result.Contacts)
{
Debug.Log($"Contact: {contact.FirstName} {contact.LastName}");
}
}
}
```
{% hint style="success" %}
Show your own rationale screen before the first read call. Apps that explain the benefit of sharing contacts see higher opt-in rates and fewer support tickets.
{% endhint %}
## Optional: Check Permission Status
Use `AddressBook.GetContactsAccessStatus()` only when you need to customize UI copy before launching the native prompt or to detect the `Limited` state on iOS 14+.
```csharp
var status = AddressBook.GetContactsAccessStatus();
switch (status)
{
case AddressBookContactsAccessStatus.Authorized:
case AddressBookContactsAccessStatus.Limited:
// Show friends list immediately
break;
case AddressBookContactsAccessStatus.NotDetermined:
// Encourage user to continue so ReadContacts can request access
break;
case AddressBookContactsAccessStatus.Denied:
case AddressBookContactsAccessStatus.Restricted:
// Show recovery UI + OpenApplicationSettings button
break;
}
```
{% hint style="warning" %}
Avoid blocking on `GetContactsAccessStatus()` before every read. The main operation already covers permission prompts and keeps platform behaviour consistent.
{% endhint %}
## Reading Contacts
`ReadContactsOptions` lets you control page size and skip counts. Set `Limit` to a reasonable number (25–100) for scrolling lists and `Offset` to zero for the first batch.
```csharp
int _nextOffset = 0;
void LoadInitialContacts()
{
var options = new ReadContactsOptions.Builder()
.WithLimit(50)
.WithOffset(_nextOffset)
.Build();
AddressBook.ReadContacts(options, OnContactsRead);
}
void OnContactsRead(AddressBookReadContactsResult result, Error error)
{
if (error != null)
{
Debug.LogError($"Contacts read failed: {error.Description}");
return;
}
Debug.Log($"Loaded {result.Contacts?.Length ?? 0} contacts.");
_nextOffset = result.NextOffset;
}
```
{% hint style="info" %}
Starting small lets you show a fast-loading list while additional contacts continue loading in the background.
{% endhint %}
## Filtering and Constraints
Combine constraints to filter out incomplete entries (e.g., require both a name and phone number before showing an invite button).
```csharp
var inviteOptions = new ReadContactsOptions.Builder()
.WithLimit(100)
.WithConstraints(ReadContactsConstraint.MustIncludeName | ReadContactsConstraint.MustIncludePhoneNumber)
.Build();
```
| Constraint | Purpose |
| ----------------------------------------------- | --------------------------------------------- |
| `ReadContactsConstraint.None` | Return every contact (default) |
| `ReadContactsConstraint.MustIncludeName` | Skip entries with no first/last name |
| `ReadContactsConstraint.MustIncludePhoneNumber` | Only contacts with at least one phone number |
| `ReadContactsConstraint.MustIncludeEmail` | Only contacts with at least one email address |
{% hint style="danger" %}
Combining all three constraints (`Name + Phone + Email`) often yields fewer contacts than expected. Start broad and tighten filters based on telemetry.
{% endhint %}
## Paginated Reads (Advanced)
Use the `NextOffset` returned in each result to load more contacts as players scroll. Essential Kit returns `-1` when you've reached the end.
```csharp
int _nextOffset = 0;
bool _isLoading;
public void LoadMoreIfNeeded()
{
if (_isLoading || _nextOffset < 0)
return;
_isLoading = true;
var options = new ReadContactsOptions.Builder()
.WithLimit(25)
.WithOffset(_nextOffset)
.Build();
AddressBook.ReadContacts(options, (result, error) =>
{
_isLoading = false;
if (error == null)
{
Debug.Log($"Appended {result.Contacts?.Length ?? 0} contacts.");
_nextOffset = result.NextOffset; // -1 means done
}
});
}
```
## Contact Data Properties
| Property | Type | Notes |
| ------------------------------------- | ---------------------------- | ---------------------------------------------------------------------- |
| `FirstName`, `MiddleName`, `LastName` | `string` | Empty when a contact only has a company name |
| `CompanyName` | `string` | Useful for B2B apps or support forms |
| `PhoneNumbers` | `string[]` | Iterate and display type labels in your own UI |
| `EmailAddresses` | `string[]` | Often empty on phone-focused contacts |
| `LoadImage(callback)` | `EventCallback` | Async load; returns placeholder texture when the contact lacks a photo |
## Loading Contact Images
`LoadImage` is async and safe to call on the main thread. Provide a default sprite while the callback resolves.
```csharp
[SerializeField] private Texture _placeholder;
void ShowAvatar(IAddressBookContact contact, RawImage target)
{
target.texture = _placeholder;
contact.LoadImage((textureData, error) =>
{
if (error == null && textureData != null)
{
target.texture = textureData.GetTexture();
}
});
}
```
{% hint style="success" %}
Cache textures per contact ID in memory to avoid reloading images every time a scroll view recycles a cell.
{% endhint %}
## Core APIs Reference
| API | Purpose | Returns |
| --------------------------------------------- | ---------------------------------------------------- | ----------------------------------------------------------- |
| `AddressBook.ReadContacts(options, callback)` | Requests permission if needed, then returns contacts | `AddressBookReadContactsResult` via callback |
| `ReadContactsOptions.Builder()` | Configure pagination and constraints | Chain `.WithLimit()`, `.WithOffset()`, `.WithConstraints()` |
| `AddressBook.GetContactsAccessStatus()` | **Optional**: inspect current permission state | `AddressBookContactsAccessStatus` enum |
| `IAddressBookContact.LoadImage(callback)` | Load a contact's profile picture asynchronously | `TextureData` with texture or placeholder |
## Error Handling
| Error Code | Trigger | Recommended Action |
| --------------------------------------- | ------------------------------------------- | --------------------------------------------------------------- |
| `AddressBookErrorCode.PermissionDenied` | Player denied or restricted contacts access | Show rationale, direct to `Utilities.OpenApplicationSettings()` |
| `AddressBookErrorCode.Unknown` | Platform returned an unexpected failure | Retry, log for diagnostics, or fall back to manual friend codes |
## Related Guides
* Demo scene: `Assets/Plugins/VoxelBusters/EssentialKit/Examples/Scenes/AddressBookDemo.unity`
* Pair with **Sharing Services** to pre-fill SMS or email invites using selected contacts
* Ready to validate your flow? Head to the [Testing guide](/features/address-book/testing) next
# Testing
Validate Address Book permissions and data flow before releasing
Use these checks to confirm your Address Book integration before release.
## Editor Simulation
* When you run in the Unity Editor, the Address Book simulator is active automatically.
* Populate simulator contacts in **Essential Kit Settings → Simulator** to test specific edge cases (no email, missing photos, etc.).
* Click **Reset Simulator** to clear granted permissions and fake contacts before re-testing onboarding flows.
* Remember: simulator responses mimic native behaviour but are not a substitute for on-device testing.
## Device Testing Checklist
* Install on both iOS and Android devices to verify system permission prompts display your configured usage descriptions.
* Test `NotDetermined`, `Authorized`, `Denied`, and iOS `Limited` flows. Confirm your UI reflects each result and offers a recovery CTA.
* Validate pagination by scrolling through large address books; monitor memory allocations when `Limit` is high or unset.
* Confirm profile images load correctly, cache as expected, and fall back to the default placeholder when unavailable.
* Exercise invites or referral flows that depend on phone numbers/emails to ensure constraint filters match real-world data sparsity.
## Pre-Submission Review
* Reset app permissions in device settings, relaunch, and verify the first-run experience (rationale screen + native prompt) still feels polished.
* Capture screenshots or screen recordings of the permission flow for compliance documentation or app review notes.
* If testers report mismatched behaviour, reproduce the case using `AddressBookDemo.unity` to determine whether the issue originates from your project or the plugin.
# FAQ
Solve common Address Book permission and data issues quickly
## Permissions & Setup
### Do I need to add contacts permissions manually in my project settings?
No. Essential Kit injects the required entries into `AndroidManifest.xml` and `Info.plist` during the build. You only need to supply the usage descriptions in Essential Kit Settings so the platform prompts display the correct copy.
On **iOS**, you provide the custom message via the "iOS Usage Description" field in Address Book settings. On **Android**, the system displays a standard permission dialog that cannot be customized.
### The permission dialog never appears—what's wrong?
Check that Address Book is enabled in Essential Kit Settings under the Services tab. If it's disabled, the feature is excluded from the build and no permission prompt will show.
Also verify you're testing on a real device or iOS Simulator—permissions work differently in the Unity Editor (it uses the simulator).
### Players denied access—how do I let them enable it later?
Handle the error in your `ReadContacts` callback and guide users to settings:
```csharp
void OnContactsLoaded(AddressBookReadContactsResult result, Error error)
{
if (error != null && error.Code == (int)AddressBookErrorCode.PermissionDenied)
{
// Show UI explaining the benefit, then:
Utilities.OpenApplicationSettings();
return;
}
// Process contacts
}
```
You can also check `AddressBook.GetContactsAccessStatus()` if you need to show status-specific UI before attempting another read.
### How can I test Limited access on iOS?
In iOS 14 or newer, the permission dialog offers "Select Contacts..." instead of full access. Tap that option and choose specific contacts.
After granting limited access, call `AddressBook.GetContactsAccessStatus()`—it returns `Limited`. Your UI should explain that only selected contacts are visible and offer a way to request full access.
## Reading Contacts
### My contact list is empty even though permission is granted—what should I check?
Confirm your `ReadContactsOptions` constraints aren't too restrictive. For example, requiring both `MustIncludeEmail` and `MustIncludePhoneNumber` will exclude any contact missing either field.
Test with `ReadContactsConstraint.None` to verify the plugin returns contacts:
```csharp
var options = new ReadContactsOptions.Builder()
.WithConstraints(ReadContactsConstraint.None)
.Build();
```
If this returns contacts but your filtered query doesn't, your constraints are eliminating valid entries.
### Contact images aren't loading—what's the issue?
Contact images load asynchronously via `contact.LoadImage(callback)`. If a contact has no photo, the callback receives your default placeholder image from Essential Kit Settings (under Address Book → Default Image).
Verify you assigned a default image in settings. If that field is empty, missing photos will return null textures.
### Can I read contacts synchronously instead of using callbacks?
No. Reading contacts always requires a callback because it involves permission checks and native API calls that run asynchronously. This design prevents blocking the main thread.
### How do I handle pagination for large contact lists?
Use `AddressBookReadContactsResult.NextOffset` to track your position:
```csharp
void OnContactsLoaded(AddressBookReadContactsResult result, Error error)
{
if (error == null && result.NextOffset >= 0)
{
// More contacts available—call ReadContacts with .WithOffset(result.NextOffset)
}
}
```
When `NextOffset` is `-1`, you've reached the end of the contact list.
## Testing & Debugging
### Where can I confirm plugin behaviour versus my implementation?
Run `Assets/Plugins/VoxelBusters/EssentialKit/Examples/Scenes/AddressBookDemo.unity`. If the sample works but your scene does not, compare:
* Essential Kit Settings configuration
* ReadContactsOptions constraints
* Error handling in your callback
### How do I reset test data in the simulator?
Open Essential Kit Settings (`Window > Voxel Busters > Essential Kit > Open Settings`), go to the Simulator section, and click **Reset Simulator**. This clears simulated contacts and resets permission states.
### Does Address Book work in the Unity Editor?
Yes, via the simulator. The Editor uses fake contact data you can configure in Essential Kit Settings. Always test on real devices before release to verify actual permission flows and contact data handling.
# PlayMaker
Read device contacts using Essential Kit’s AddressBook feature via PlayMaker custom actions.
## Actions (6)
* `AddressBookGetContactsAccessStatus` (sync): get current permission status (fires `authorizedEvent`, `deniedEvent`, `notDeterminedEvent`, `limitedEvent`).
* `AddressBookReadContacts` (async): reads contacts using `limit`, `offset`, and `mustInclude*` filters; fires `successEvent`/`failureEvent` and caches the result.
* `AddressBookGetReadContactsSuccessResult` (sync): reads cached `contactCount` and `nextOffset` after a successful read.
* `AddressBookGetReadContactsError` (sync): reads cached `errorCode` and `errorDescription` after a failed read.
* `AddressBookGetContactInfo` (sync): reads one contact by `contactIndex` from the cached result (includes `phoneNumbers` and `emailAddresses` arrays).
* `AddressBookLoadContactImage` (async): loads a contact image by `contactIndex` (fires `successEvent`/`failureEvent`).
## Quick flow
1. (Optional) `AddressBookGetContactsAccessStatus` → route denied/restricted to your “permission help” UI.
2. `AddressBookReadContacts`
* `successEvent` → `AddressBookGetReadContactsSuccessResult` → loop `contactIndex = 0..contactCount-1` with `AddressBookGetContactInfo`.
* `failureEvent` → `AddressBookGetReadContactsError`.
3. For phone/email arrays returned by `AddressBookGetContactInfo`, use PlayMaker Array actions (get length, get element, etc.).
## Pagination
Use `limit` + `offset` on `AddressBookReadContacts`. After each page, read `nextOffset` from `AddressBookGetReadContactsSuccessResult`. When `nextOffset == -1`, you’re done.
## Use cases
Start here: `use-cases/README.md`
## Platform notes
* iOS: provide “Contacts Usage Description” in the Essential Kit settings / Info.plist.
* Android: ensure contacts permission is declared and granted before reading contacts.
# Use Cases
Quick-start guides showing minimal implementations of common AddressBook tasks using PlayMaker custom actions.
## Available Use Cases
### 1. [Check Permission and Read Contacts](/features/address-book/playmaker/use-cases/use-case-1-permission-and-read)
* **What it does:** Verify contact access permission and read all contacts
* **Complexity:** Basic
* **Actions:** 3 (GetContactsAccessStatus, ReadContacts, GetReadContactsSuccessResult)
* **Best for:** First-time setup, permission flow testing
***
### 2. [Display Contact List](/features/address-book/playmaker/use-cases/use-case-2-display-contact-list)
* **What it does:** Read contacts and display all names in a UI list
* **Complexity:** Basic with iteration
* **Actions:** 3 (ReadContacts, GetReadContactsSuccessResult, GetContactInfo in loop)
* **Best for:** Simple contact pickers, small contact lists (<50 contacts)
***
### 3. [Paginated Contact Loading](/features/address-book/playmaker/use-cases/use-case-3-paginated-loading)
* **What it does:** Load large contact lists efficiently in pages (e.g., 20 at a time)
* **Complexity:** Intermediate
* **Actions:** 3 (ReadContacts with pagination, GetReadContactsSuccessResult, GetContactInfo in loop)
* **Best for:** Large contact lists (50+ contacts), performance-sensitive apps
***
### 4. [Show Contact with Photo](/features/address-book/playmaker/use-cases/use-case-4-contact-with-photo)
* **What it does:** Display contact details including profile photo
* **Complexity:** Intermediate
* **Actions:** 4 (ReadContacts, GetReadContactsSuccessResult, GetContactInfo, LoadContactImage)
* **Best for:** Contact detail views, rich contact UI
***
## Choosing the Right Use Case
**Start Here:**
* New to AddressBook? → **Use Case 1**
* Building a simple contact picker? → **Use Case 2**
* Handling many contacts (50+)? → **Use Case 3**
* Need to show contact photos? → **Use Case 4**
## Quick Action Reference
| Action | Purpose | Used In |
| --------------------------------------- | -------------------- | ----------------- |
| AddressBookGetContactsAccessStatus | Check permission | Use Case 1 |
| AddressBookReadContacts | Fetch contacts | All use cases |
| AddressBookGetReadContactsSuccessResult | Get count/metadata | All use cases |
| AddressBookGetReadContactsError | Get error details | Error handling |
| AddressBookGetContactInfo | Extract contact data | Use Cases 2, 3, 4 |
| AddressBookLoadContactImage | Load profile photo | Use Case 4 |
## Related Documentation
* [**README.md**](/features/address-book/playmaker) - Actions + quick flow
# Check Permission and Read Contacts
## Goal
Verify that your app has permission to access device contacts and read all contacts from the address book.
## Actions Required
| Action | Purpose |
| --------------------------------------- | --------------------------------- |
| AddressBookGetContactsAccessStatus | Check current permission status |
| AddressBookReadContacts | Fetch contacts from device |
| AddressBookGetReadContactsSuccessResult | Get contact count and metadata |
| AddressBookGetReadContactsError | Get error details when read fails |
## Variables Needed
* accessStatus (Enum: AddressBookContactsAccessStatus)
* contactCount (Int)
* nextOffset (Int)
* errorCode (Int)
* errorDescription (String)
## Implementation Steps
### 1. State: CheckPermission
**Action:** AddressBookGetContactsAccessStatus
* **Outputs:**
* accessStatus → accessStatus variable
* **Events:**
* authorizedEvent → ReadContacts
* notDeterminedEvent → ReadContacts (will auto-prompt)
* deniedEvent → ShowError
* limitedEvent → ReadContacts (iOS 14+ partial access)
### 2. State: ReadContacts
**Action:** AddressBookReadContacts
* **Inputs:**
* limit: 10 (read 10 contacts - Pass -1 to read all contacts)
* offset: 0 (start from beginning)
* mustIncludeName: true
* mustIncludePhoneNumber: false
* mustIncludeEmail: false
* **Events:**
* successEvent → ExtractResult
* failureEvent → ExtractError
**Note:** This action waits for the callback internally and caches results in AddressBookUtils.
### 3. State: ExtractResult
**Action:** AddressBookGetReadContactsSuccessResult
* **Outputs:**
* contactCount → contactCount variable
* nextOffset → nextOffset variable
* **Transition:** Go to DisplayCount
### 4. State: ExtractError
**Action:** AddressBookGetReadContactsError
* **Outputs:**
* errorCode → errorCode variable (Int)
* errorDescription → errorDescription variable (String)
* **Transition:** Go to ShowError
### 5. State: DisplayCount
Display the contactCount value in your UI (e.g., "Found 150 contacts").
## Common Issues
* **Permission Denied**: If accessStatus is Denied, guide users to device Settings to enable contacts permission
* **No Contacts**: contactCount may be 0 if device has no contacts or filters are too restrictive
* **nextOffset = -1**: Indicates all contacts were loaded (no more pages available)
## Flow Diagram
```
CheckPermission
├─ Authorized → ReadContacts
├─ NotDetermined → ReadContacts (prompts user)
└─ Denied → ShowError
ReadContacts (waits for callback)
├─ Success → ExtractResult
└─ Failure → ExtractError
ExtractResult
└─ DisplayCount
ExtractError
└─ ShowError
```
# Display Contact List
## Goal
Read contacts from the device and display all contact names in a UI list.
## Actions Required
| Action | Purpose |
| --------------------------------------- | ---------------------------------- |
| AddressBookReadContacts | Fetch contacts from device |
| AddressBookGetReadContactsSuccessResult | Get contact count for loop |
| AddressBookGetContactInfo | Extract individual contact details |
## Variables Needed
* contactCount (Int)
* contactIndex (Int) = 0
* firstName (String)
* lastName (String)
* fullName (String)
* phoneNumbers (Array: String) - PlayMaker Array (set element type to String)
* emailAddresses (Array: String) - PlayMaker Array (set element type to String)
## Implementation Steps
### 1. State: ReadAllContacts
**Action:** AddressBookReadContacts
* **Inputs:**
* limit: 0 (read all)
* offset: 0
* mustIncludeName: true
* mustIncludePhoneNumber: false
* mustIncludeEmail: false
* **Events:**
* successEvent → GetCount
* failureEvent → ShowError
### 2. State: GetCount
**Action:** AddressBookGetReadContactsSuccessResult
* **Outputs:**
* contactCount → contactCount variable
* **Transition:** Set contactIndex = 0, go to LoopStart
### 3. State: LoopStart
**Logic:** Int Compare
* If contactIndex < contactCount → GetContactDetails
* If contactIndex >= contactCount → Complete
### 4. State: GetContactDetails
**Action:** AddressBookGetContactInfo
* **Inputs:**
* contactIndex → contactIndex variable
* **Outputs:**
* firstName → firstName
* lastName → lastName
* fullName → fullName
* phoneNumbers → phoneNumbers array
* emailAddresses → emailAddresses array
* **Transition:** Go to AddToList
### 5. State: AddToList
Add fullName (or firstName + lastName) to your UI list component.
* Increment contactIndex by 1
* Return to LoopStart
## Loop Pattern
```
contactIndex = 0
While (contactIndex < contactCount):
GetContactInfo(contactIndex)
AddToList(fullName)
contactIndex++
```
## Common Issues
* **Index Out of Range**: Ensure loop condition is `contactIndex < contactCount` (not <=)
* **Empty Names**: Some contacts may have empty firstName/lastName; use fullName as fallback
* **Large Lists**: For >50 contacts, consider pagination (see UseCase3)
* **Array Access**: phoneNumbers and emailAddresses are arrays; check Length before accessing
## Performance Tip
For large contact lists (100+), use pagination instead of loading all contacts at once to prevent UI freezing.
# Paginated Contact Loading
## Goal
Load large contact lists efficiently by fetching contacts in pages (e.g., 20 contacts at a time) to prevent UI freezing.
## Actions Required
| Action | Purpose |
| --------------------------------------- | ----------------------------------------- |
| AddressBookReadContacts | Fetch one page of contacts |
| AddressBookGetReadContactsSuccessResult | Get page count and next offset |
| AddressBookGetContactInfo | Extract contact details from current page |
## Variables Needed
* pageSize (Int) = 20
* currentOffset (Int) = 0
* nextOffset (Int)
* contactCount (Int)
* contactIndex (Int) = 0
* fullName (String)
* totalContactsLoaded (Int) = 0
## Implementation Steps
### 1. State: ReadPage
**Action:** AddressBookReadContacts
* **Inputs:**
* limit: pageSize (20)
* offset: currentOffset
* mustIncludeName: true
* mustIncludePhoneNumber: false
* mustIncludeEmail: false
* **Events:**
* successEvent → ExtractPageInfo
* failureEvent → ShowError
**Note:** First call uses offset: 0; subsequent calls use the nextOffset value from previous page.
### 2. State: ExtractPageInfo
**Action:** AddressBookGetReadContactsSuccessResult
* **Outputs:**
* contactCount → contactCount (contacts in this page)
* nextOffset → nextOffset (-1 if no more pages)
* **Transition:** Set contactIndex = 0, go to ProcessPageLoop
### 3. State: ProcessPageLoop
**Logic:** Int Compare
* If contactIndex < contactCount → GetContactFromPage
* If contactIndex >= contactCount → CheckForMorePages
### 4. State: GetContactFromPage
**Action:** AddressBookGetContactInfo
* **Inputs:**
* contactIndex → contactIndex variable
* **Outputs:**
* fullName → fullName
* **Transitions:**
* Add fullName to UI list
* Increment contactIndex
* Increment totalContactsLoaded
* Return to ProcessPageLoop
### 5. State: CheckForMorePages
**Logic:** Int Compare
* If nextOffset > -1:
* Set currentOffset = nextOffset
* Go to ReadPage (load next page)
* If nextOffset == -1:
* All contacts loaded, go to Complete
### 6. State: Complete
Display total: "Loaded \[totalContactsLoaded] contacts"
## Pagination Flow
```
Page 1: offset=0, limit=20 → contactCount=20, nextOffset=20
Page 2: offset=20, limit=20 → contactCount=20, nextOffset=40
Page 3: offset=40, limit=20 → contactCount=15, nextOffset=-1 (done)
Total: 55 contacts loaded across 3 pages
```
## Common Issues
* **nextOffset Confusion**: nextOffset = -1 means "no more pages", NOT an error
* **First Page Empty**: If contactCount = 0 on first page, check permission and filters
* **Infinite Loop**: Always check nextOffset > -1 before reading next page
* **UI Updates**: Update UI after each page or batch pages for smoother experience
## Performance Tips
**Optimal Page Sizes:**
* Small devices: 10-15 contacts per page
* Standard devices: 20-30 contacts per page
* Tablets: 50 contacts per page
**When to Use Pagination:**
* Contact lists with 50+ expected contacts
* Slow devices or limited memory
* Real-time search/filter features
**Alternative:** For small lists (<50 contacts), use UseCase2 (load all at once) for simpler implementation.
# Show Contact with Photo
## Goal
Display contact details including their profile photo by loading contact information and asynchronously fetching the contact's image.
## Actions Required
| Action | Purpose |
| --------------------------------------- | ---------------------------- |
| AddressBookReadContacts | Fetch contacts from device |
| AddressBookGetReadContactsSuccessResult | Get contact count |
| AddressBookGetContactInfo | Extract contact details |
| AddressBookLoadContactImage | Load contact's profile photo |
## Variables Needed
* contactCount (Int)
* selectedIndex (Int) - Contact to display
* firstName (String)
* lastName (String)
* fullName (String)
* phoneNumbers (Array: String) - PlayMaker Array (set element type to String)
* emailAddresses (Array: String) - PlayMaker Array (set element type to String)
* contactImage (Texture) - Output of AddressBookLoadContactImage
* errorCode (Int)
* errorDescription (String)
## Implementation Steps
### 1. State: ReadContacts
**Action:** AddressBookReadContacts
* **Inputs:**
* limit: 0 (read all)
* offset: 0
* mustIncludeName: true
* **Events:**
* successEvent → GetCount
* failureEvent → ShowError
### 2. State: GetCount
**Action:** AddressBookGetReadContactsSuccessResult
* **Outputs:**
* contactCount → contactCount
* **Transition:** Display contact list, wait for user selection
### 3. State: GetContactDetails
**Action:** AddressBookGetContactInfo
* **Inputs:**
* contactIndex: selectedIndex (user-selected contact)
* **Outputs:**
* firstName → firstName
* lastName → lastName
* fullName → fullName
* phoneNumbers → phoneNumbers array
* emailAddresses → emailAddresses array
* **Transition:** Go to LoadImage
### 4. State: LoadImage
**Action:** AddressBookLoadContactImage
* **Inputs:**
* contactIndex: selectedIndex (same as GetContactInfo)
* **Outputs:**
* contactImage → contactImage (Texture2D)
* errorCode → errorCode
* errorDescription → errorDescription
* **Events:**
* successEvent → DisplayContactWithImage
* failureEvent → DisplayContactWithPlaceholder
**Note:** This is an async operation; wait for the event before proceeding.
### 5. State: DisplayContactWithImage
Display in UI:
* Image component.texture = contactImage
* Text: fullName
* Text: phoneNumbers\[0] (if array Length > 0)
* Text: emailAddresses\[0] (if array Length > 0)
### 6. State: DisplayContactWithPlaceholder
If image loading failed (no photo available):
* Display default avatar/placeholder image
* Show contact details normally
## Image Loading Flow
```
ReadContacts
└─ GetCount
└─ User selects contact (sets selectedIndex)
└─ GetContactDetails(selectedIndex)
└─ LoadImage(selectedIndex)
├─ Success → Show photo
└─ Failure → Show placeholder
```
## Common Issues
* **No Image Available**: Not all contacts have photos; always handle failureEvent with a placeholder
* **Image Load Delay**: LoadContactImage is async; don't update UI until successEvent fires
* **Wrong Index**: Ensure selectedIndex matches between GetContactInfo and LoadContactImage
* **Texture Memory**: Loaded Texture2D objects use memory; dispose or cache wisely for large lists
## Performance Tips
**Lazy Loading:** Only load images when user views a contact, not for entire contact list upfront.
**Image Caching:** Cache loaded images to avoid re-loading when user revisits same contact.
**Placeholder Strategy:** Show placeholder immediately, load image in background, update UI on success.
**Memory Management:** For contact lists showing multiple photos, consider loading/unloading images as user scrolls.
# App Shortcuts
Add dynamic app icon shortcuts to boost user engagement and feature access in Unity mobile games
Essential Kit's App Shortcuts feature lets Unity teams add dynamic shortcuts to the app icon without maintaining platform-specific code. This tutorial walks you through setup, key APIs, testing, and troubleshooting so you can add quick-access shortcuts with confidence.
{% hint style="info" %}
Using PlayMaker? See the PlayMaker guide: [PlayMaker](/features/app-shortcuts/playmaker).
{% endhint %}
{% hint style="info" %}
Looking for a working reference? Open the demo scene at `Assets/Plugins/VoxelBusters/EssentialKit/Examples/Scenes/AppShortcutsDemo.unity` and the companion script at `Assets/Plugins/VoxelBusters/EssentialKit/Examples/Scripts/AppShortcutsDemo.cs` to see the full API in action.
{% endhint %}
## What You'll Learn
* Create dynamic shortcuts that appear when users long-press your app icon
* Handle shortcut taps to deep-link users directly into specific game features
* Manage shortcut lifecycle by adding and removing shortcuts based on player progress
## Why App Shortcuts Matter
* **Boost Engagement**: Surface daily rewards, challenges, or unfinished levels right from the home screen
* **Improve Retention**: Let players jump directly into multiplayer lobbies or continue their last game session
* **Enhance Discovery**: Showcase premium features or limited-time events with prominent shortcuts
## Tutorial Roadmap
1. [Setup](/features/app-shortcuts/setup) – Enable the feature and configure shortcut icons.
2. [Usage](/features/app-shortcuts/usage) – Add shortcuts, handle clicks, and manage lifecycle.
3. [Testing](https://github.com/voxelbusters/essential-kit-docs/blob/master/tutorials/v3/features/app-shortcuts/testing.md) – Simulate in editor and verify on devices.
4. [FAQ](https://github.com/voxelbusters/essential-kit-docs/blob/master/tutorials/v3/features/app-shortcuts/faq.md) – Troubleshoot common issues.
## Key Use Cases
* **Daily Rewards**: Add a "Collect Daily Bonus" shortcut that appears after first login
* **Continue Playing**: Show "Resume Level X" shortcuts for players with active sessions
* **Quick Multiplayer**: Surface "Quick Match" or "Invite Friends" for social engagement
* **Event Promotions**: Highlight limited-time events or new content releases
## Prerequisites
* Unity project with Essential Kit v3 installed and App Shortcuts feature enabled in settings.
* iOS or Android target with proper icon assets configured in Essential Kit Settings.
* Test device to validate long-press shortcuts before release (simulator behavior may differ).
{% content-ref url="/pages/VUBWOj9vbQHR0iGltwXM" %}
[Setup](/features/app-shortcuts/setup)
{% endcontent-ref %}
{% content-ref url="/pages/aDRsJCeWaifsBu3e8stZ" %}
[Usage](/features/app-shortcuts/usage)
{% endcontent-ref %}
{% content-ref url="" %}
{% endcontent-ref %}
{% content-ref url="" %}
{% endcontent-ref %}
# Setup
Configuring App Shortcuts
## Prerequisites
* Essential Kit imported into the project from My Assets section of Package Manager.
* Icon assets prepared as Texture2D (PNG recommended) for your shortcuts.
* iOS builds support up to 4 shortcuts; Android varies by device launcher.
## Setup Checklist
1. Open **Essential Kit Settings** (`Window > Voxel Busters > Essential Kit > Open Settings`), switch to the **Services** tab, and enable **App Shortcuts**.
2. Add your shortcut icons to the **Icons** list. These textures will be referenced by filename when creating shortcuts.
3. Changes to the settings asset are saved automatically. If you use source control, commit the updated `Resources/EssentialKitSettings.asset` file.
### Configuration Reference
| Setting | Platform | Required? | Notes |
| -------------------- | -------- | --------- | ------------------------------------------------------------------------------------------------------------- |
| Enable App Shortcuts | All | Yes | Toggles the feature in builds; disabling strips related native code. |
| Icons | All | Optional | List of Texture2D assets referenced by filename in `SetIconFileName()`. Icons not in this list won't display. |
{% hint style="info" %}
Need a working baseline? Run the sample at `Assets/Plugins/VoxelBusters/EssentialKit/Examples/Scenes/AppShortcutsDemo.unity` to confirm your settings before wiring the feature into production screens.
{% endhint %}
## Platform Notes
### iOS
* Maximum of 4 shortcuts displayed via 3D Touch or long-press on devices running iOS 9+.
* Icons should be square (recommended 35x35 pt for single-scale images).
### Android
* Shortcuts supported on Android 7.1 (API level 25) and above.
* Different launchers may display shortcuts differently; test on target devices.
* Icons automatically adapt to device launcher theming.
# Usage
App Shortcuts lets you add dynamic quick actions to your app icon on mobile devices
Essential Kit wraps native iOS Quick Actions and Android App Shortcuts into a single Unity interface. Shortcuts appear when users long-press your app icon and persist across app launches until explicitly removed.
## Table of Contents
* [Understanding App Shortcuts](#understanding-app-shortcuts)
* [Import Namespaces](#import-namespaces)
* [Event Registration](#event-registration)
* [Creating Shortcuts](#creating-shortcuts)
* [Handling Shortcut Clicks](#handling-shortcut-clicks)
* [Removing Shortcuts](#removing-shortcuts)
* [Core APIs Reference](#core-apis-reference)
* [Advanced: Runtime Initialization](#advanced-runtime-initialization)
* [Related Guides](#related-guides)
## Understanding App Shortcuts
App Shortcuts are quick actions that appear when users long-press your app icon on the home screen. They provide direct access to specific features without navigating through your app's UI.
**Key characteristics:**
* Shortcuts persist until explicitly removed or app is uninstalled
* iOS supports up to 4 shortcuts; Android varies by launcher
* Each shortcut has a unique identifier, title, optional subtitle, and optional icon
* Clicking a shortcut launches your app and triggers the `OnShortcutClicked` event
**Examples:**
* Daily reward collection shortcuts
* Continue game shortcuts showing current level
* Quick access to multiplayer or leaderboards
## Import Namespaces
```csharp
using VoxelBusters.EssentialKit;
using VoxelBusters.CoreLibrary;
```
## Event Registration
Register for the shortcut click event in `OnEnable` and unregister in `OnDisable`:
```csharp
void OnEnable()
{
AppShortcuts.OnShortcutClicked += OnShortcutClicked;
}
void OnDisable()
{
AppShortcuts.OnShortcutClicked -= OnShortcutClicked;
}
void OnShortcutClicked(string shortcutId)
{
Debug.Log($"Shortcut clicked: {shortcutId}");
}
```
| Event | Trigger |
| ------------------- | ------------------------------------------------ |
| `OnShortcutClicked` | When user taps a shortcut from the app icon menu |
{% hint style="success" %}
Essential Kit caches shortcut clicks that occur during app launch. The event fires once you register the listener, ensuring you never miss a click even if the app wasn't running.
{% endhint %}
## Creating Shortcuts
### Why Shortcuts Improve Engagement
Shortcuts reduce friction by letting players jump directly into features they care about. A "Continue Level 5" shortcut is more compelling than opening the app and navigating through menus.
This ensures:
* Faster access to frequently used features
* Higher conversion rates for daily rewards or events
* Better discovery of premium or multiplayer content
### Implementation
Use `AppShortcutItem.Builder` to configure shortcuts before adding them:
```csharp
void AddDailyRewardShortcut()
{
var shortcut = new AppShortcutItem.Builder("daily-reward", "Daily Reward")
.SetSubtitle("Your rewards are waiting!")
.SetIconFileName("daily-reward.png")
.Build();
AppShortcuts.Add(shortcut);
}
```
**AppShortcutItem.Builder Properties:**
* `identifier` (required): Unique ID to identify this shortcut in click events
* `title` (required): Primary text displayed in the shortcut menu
* `SetSubtitle(string)`: Secondary text (may not display on all Android launchers)
* `SetIconFileName(string)`: Filename matching a texture in Essential Kit Settings → Icons list
* `Builder.Build()`: Finalize the builder and return an `AppShortcutItem` instance
**AppShortcutItem Properties (read-only):**
* `Identifier`: String identifier returned when the shortcut is tapped
* `Title`: Primary label shown in the shortcut menu
* `Subtitle`: Optional secondary label (can be null if not set or not supported)
* `IconFileName`: Filename used to bind to an icon from settings (null if omitted)
{% hint style="warning" %}
Icons must be added to the **Icons** list in App Shortcuts settings. If the filename doesn't match an entry in that list, the shortcut appears without an icon. See [Setup](/features/app-shortcuts/setup) for configuration details.
{% endhint %}
### Dynamic Shortcuts Based on Game State
Update shortcuts to reflect player progress:
```csharp
void UpdateContinueShortcut(int currentLevel)
{
// Remove old continue shortcut
AppShortcuts.Remove("continue-game");
// Add updated shortcut with current level
var shortcut = new AppShortcutItem.Builder("continue-game", $"Continue Level {currentLevel}")
.SetSubtitle("Pick up where you left off!")
.SetIconFileName("continue-game.png")
.Build();
AppShortcuts.Add(shortcut);
}
```
### Multiple Shortcuts
Add multiple shortcuts in sequence. They display in the order added (platform-dependent):
```csharp
void SetupGameShortcuts()
{
var quickMatch = new AppShortcutItem.Builder("quick-match", "Quick Match")
.SetSubtitle("Jump into a quick game")
.SetIconFileName("quick-match.png")
.Build();
AppShortcuts.Add(quickMatch);
var dailyChallenge = new AppShortcutItem.Builder("daily-challenge", "Daily Challenge")
.SetSubtitle("Complete today's challenge")
.SetIconFileName("challenge.png")
.Build();
AppShortcuts.Add(dailyChallenge);
}
```
## Handling Shortcut Clicks
When a user taps a shortcut, the app launches (or resumes) and the `OnShortcutClicked` event fires with the shortcut's identifier:
```csharp
void OnShortcutClicked(string shortcutId)
{
switch (shortcutId)
{
case "daily-reward":
Debug.Log("Open the daily rewards screen.");
break;
case "continue-game":
Debug.Log("Load the last saved level.");
break;
case "quick-match":
Debug.Log("Start multiplayer matchmaking.");
break;
default:
Debug.LogWarning($"Unknown shortcut: {shortcutId}");
break;
}
}
```
{% hint style="info" %}
The event may fire before your game UI is ready. Consider queueing the action and executing it after scene loads or UI initialization completes.
{% endhint %}
## Removing Shortcuts
Remove shortcuts by identifier when they're no longer relevant:
```csharp
void RemoveShortcut(string shortcutId)
{
AppShortcuts.Remove(shortcutId);
}
// Example: Remove continue shortcut when level is completed
void OnLevelComplete()
{
AppShortcuts.Remove("continue-game");
}
```
Removing a non-existent shortcut ID is safe and produces no error.
## Core APIs Reference
| API | Purpose | Returns |
| ------------------------------------ | ------------------------------------------ | ------------------------------ |
| `AppShortcuts.Add(AppShortcutItem)` | Add a shortcut to the app icon menu | None |
| `AppShortcuts.Remove(string)` | Remove a shortcut by identifier | None |
| `AppShortcuts.OnShortcutClicked` | Event fired when user taps a shortcut | `string` (shortcut identifier) |
| `AppShortcutItem.Builder(id, title)` | Create a shortcut with required properties | Builder instance for chaining |
| `Builder.SetSubtitle(string)` | Add optional subtitle text | Builder instance |
| `Builder.SetIconFileName(string)` | Reference icon from settings | Builder instance |
| `Builder.Build()` | Construct the final `AppShortcutItem` | `AppShortcutItem` |
## Advanced: Runtime Initialization
{% hint style="danger" %}
Most projects should use the automatic initialization via Essential Kit Settings. Only use manual initialization if you need to dynamically configure shortcut icons at runtime based on server data or user preferences.
{% endhint %}
### Understanding Manual Initialization
**Default Behavior:** Essential Kit automatically initializes App Shortcuts using the settings configured in the inspector.
**What `Initialize` does:** Calling `AppShortcuts.Initialize(AppShortcutsUnitySettings settings)` assigns the settings to `AppShortcuts.UnitySettings`, creates the native interface, and hooks the internal listener that later raises `AppShortcuts.OnShortcutClicked`.
**When to call it manually:** Use `AppShortcuts.Initialize()` only when you need to:
* Load shortcut icon configurations from a remote server
* Change shortcut icons based on user preferences or A/B tests
* Dynamically configure icons without modifying the settings asset
**Guidelines:**
* Call `Initialize` once before adding or removing shortcuts.
* Reusing it later replaces the native interface, so avoid repeated calls during gameplay.
* Keep a reference to the settings instance if you need to inspect or reuse the icons list.
### Implementation
Override default settings at runtime before adding any shortcuts:
```csharp
void Awake()
{
var settings = new AppShortcutsUnitySettings(
isEnabled: true,
icons: runtimeIconList); // Populate from Addressables, remote configs, etc.
AppShortcuts.Initialize(settings);
}
```
{% hint style="warning" %}
Call `Initialize()` only once—ideally during startup and before adding shortcuts. For most games, prefer [standard setup](/features/app-shortcuts/setup) via Essential Kit Settings.
{% endhint %}
## Related Guides
* Demo scene: `Assets/Plugins/VoxelBusters/EssentialKit/Examples/Scenes/AppShortcutsDemo.unity`
* Pair with **Deep Link Services** to handle shortcut actions that require specific app states
* Use with **Notification Services** to create shortcuts for notification-driven features
# PlayMaker
Create and manage home screen shortcuts, and listen for shortcut click events.
## Actions (5)
* `AppShortcutsAddShortcut` (sync): add/update a shortcut (`shortcutId`, `title`, optional `subtitle`, `iconFileName`). Fires `successEvent` / `failureEvent`.
* `AppShortcutsGetAddShortcutError` (sync): read cached `errorCode` / `errorDescription` after `AppShortcutsAddShortcut` failure.
* `AppShortcutsRemoveShortcut` (sync): remove a shortcut by `shortcutId`. Fires `successEvent` / `failureEvent`.
* `AppShortcutsGetRemoveShortcutError` (sync): read cached `errorCode` / `errorDescription` after `AppShortcutsRemoveShortcut` failure.
* `AppShortcutsOnShortcutClicked` (listener): stays active and fires `clickedEvent` with the clicked `shortcutId`.
## Quick flows
### Register shortcuts (startup)
Call `AppShortcutsAddShortcut` once per shortcut you want available.
### Route when clicked
Keep a state active with `AppShortcutsOnShortcutClicked`, then route based on `shortcutId` in your next state (String Compare / Switch).
### Remove a shortcut
Call `AppShortcutsRemoveShortcut(shortcutId)`; on failure, call `AppShortcutsGetRemoveShortcutError`.
## Use cases
Start here: `use-cases/README.md`
## Platform notes
* iOS / Android: shortcuts appear on long-press of the app icon (platform limits apply; commonly \~4 dynamic shortcuts).
* If you use `iconFileName`, it must match an icon configured in Essential Kit Settings → App Shortcuts.
# Use Cases
Quick-start guides for home screen shortcuts and quick actions using PlayMaker custom actions.
## Available Use Cases
### 1. [Register And Route](/features/app-shortcuts/playmaker/use-cases/use-case-1-register-and-route)
* **What it does:** Register shortcuts and route when user clicks one
* **Actions:** 2 (`AppShortcutsAddShortcut`, `AppShortcutsOnShortcutClicked`)
### 2. [Add/Update/Remove Policy](/features/app-shortcuts/playmaker/use-cases/use-case-2-add-update-remove-policy)
* **What it does:** Add/update/remove shortcuts based on app state
* **Actions:** 2 (`AppShortcutsAddShortcut`, `AppShortcutsRemoveShortcut`)
### 3. [Custom Icons](/features/app-shortcuts/playmaker/use-cases/use-case-3-custom-icons)
* **What it does:** Use `iconFileName` correctly (via AppShortcuts settings Icons list)
* **Actions:** 1 (`AppShortcutsAddShortcut`)
## Quick Action Reference
| Action | Purpose |
| ---------------------------------- | -------------------------------------- |
| AppShortcutsAddShortcut | Create or update home screen shortcut |
| AppShortcutsGetAddShortcutError | Read cached error after add failure |
| AppShortcutsRemoveShortcut | Remove specific shortcut by ID |
| AppShortcutsGetRemoveShortcutError | Read cached error after remove failure |
| AppShortcutsOnShortcutClicked | Listen for shortcut click events |
## Platform Support
* **iOS**: 3D Touch/Haptic Touch shortcuts (iOS 9+)
* **Android**: Long-press app icon shortcuts (API 25+)
* **Limit**: Platform limits apply (commonly 4 shortcuts)
## Related Documentation
* [**README.md**](/features/app-shortcuts/playmaker)
# Register And Route Shortcut Clicks
## Goal
Register a few app shortcuts and route the user when they click a shortcut.
## Actions Used
* `AppShortcutsAddShortcut`
* `AppShortcutsOnShortcutClicked`
* `AppShortcutsGetAddShortcutError` (optional)
## Variables
* `shortcutId` (String) - output from `AppShortcutsOnShortcutClicked`
## FSM Steps
1. **Bootstrap/RegisterShortcuts**: call `AppShortcutsAddShortcut` once per shortcut you want (repeat the action in the state, or use multiple states).
2. **ShortcutListener (keep active)**: add `AppShortcutsOnShortcutClicked` and transition to your router state on `clickedEvent`.
3. **Route**: compare `shortcutId` and jump to the matching FSM state/scene (fallback to main menu for unknown IDs).
## Failure Handling
* If `AppShortcutsAddShortcut` fires `failureEvent`, call `AppShortcutsGetAddShortcutError` to read `errorCode` + `errorDescription`.
## Notes
* Keep the listener state active in your app’s bootstrap scene so you can catch clicks that launch the app.
* If you set `iconFileName` in `AppShortcutsAddShortcut`, it must match an icon configured in Essential Kit settings (see Use Case 3).
# Add/Update/Remove Shortcut Policy
## Goal
Update shortcuts based on your app state (progression, entitlement, season, user preferences).
## Actions Used
* `AppShortcutsAddShortcut`
* `AppShortcutsRemoveShortcut`
* `AppShortcutsGetAddShortcutError` (optional)
* `AppShortcutsGetRemoveShortcutError` (optional)
## Variables
* `shortcutIdsToKeep` (String list/array you maintain)
* `shortcutIdToRemove` (String)
## FSM Steps
1. **Decide your set**: build `shortcutIdsToKeep` in your own logic (there is no “get current shortcuts list” action/API exposed here).
2. **Add or update**: call `AppShortcutsAddShortcut` for each ID you want available right now.
3. **Remove outdated**: when you know an ID should be removed (e.g., expired event), call `AppShortcutsRemoveShortcut(shortcutIdToRemove)`.
## Failure Handling
* Add failure → `AppShortcutsGetAddShortcutError`
* Remove failure → `AppShortcutsGetRemoveShortcutError`
## Notes
* Adding with the same `shortcutId` updates/replaces the existing shortcut.
* Apply policy changes during safe moments (main menu, after a level, etc.).
# Custom Shortcut Icons (Settings + AddShortcut)
## Goal
Use custom shortcut icons reliably (primarily Android) when calling `AppShortcutsAddShortcut`.
## Actions Used
* `AppShortcutsAddShortcut`
* `AppShortcutsGetAddShortcutError` (optional)
## Setup (Essential Kit Settings)
1. Open: **Window → Essential Kit → Settings → App Shortcuts**
2. Add your shortcut icon textures to the **Icons** list.
## FSM Steps
1. Call `AppShortcutsAddShortcut`.
2. Set `iconFileName` to the icon file name you want to use (must include extension, e.g., `play.png`).
## Failure Handling
* If `AppShortcutsAddShortcut` fails, call `AppShortcutsGetAddShortcutError` to read `errorCode` + `errorDescription`.
## Notes
* `iconFileName` must refer to a texture present in the AppShortcuts settings **Icons** list; otherwise the icon won’t show up.
# App Updater
App Updater for Unity mobile games - check for updates and prompt users to stay current
Essential Kit's App Updater feature lets Unity teams check for app updates and prompt users without maintaining platform-specific code. This tutorial walks you through setup, key APIs, testing, and troubleshooting so you can keep your users on the latest version with confidence.
{% hint style="info" %}
Using PlayMaker? See the PlayMaker guide: [PlayMaker](/features/app-updater/playmaker).
{% endhint %}
Update Prompt
Installation
{% hint style="info" %}
Looking for a working reference? Open the demo scene at `Assets/Plugins/VoxelBusters/EssentialKit/Examples/Scenes/AppUpdaterDemo.unity` and the companion script at `Assets/Plugins/VoxelBusters/EssentialKit/Examples/Scripts/AppUpdaterDemo.cs` to see the full API in action.
{% endhint %}
## What You'll Learn
* Check for available updates programmatically
* Show customizable update prompts with optional or forced updates
* Handle in-app updates on Android with progress tracking
* Direct users to app stores on iOS for updates
## Why App Updater Matters
* **Version Control**: Ensure users are on versions compatible with your backend
* **Bug Fixes**: Push critical bug fixes by requiring updates
* **Feature Adoption**: Drive users to new features with optional update prompts
* **Security**: Enforce security patches through mandatory updates
## Tutorial Roadmap
1. [Setup](/features/app-updater/setup) – Enable the feature and configure app store identifiers
2. [Usage](/features/app-updater/usage) – Check for updates, show prompts, handle different update flows
3. [Testing](/features/app-updater/testing) – Test update detection in editor and verify on devices
## Key Use Cases
* **Critical Bug Fixes**: Force users to update before continuing
* **Optional Updates**: Suggest new features without blocking gameplay
* **Version Compatibility**: Ensure minimum app version for server compatibility
* **Soft Launch**: Control rollout by prompting updates to beta testers first
## Prerequisites
* Unity project with Essential Kit v3 installed and App Updater feature included in the build
* iOS or Android target platform with valid app store identifiers configured
* Published app on App Store or Google Play for testing update detection
{% content-ref url="/pages/8YXIJ3ZVCM0N6SrbSivg" %}
[Setup](/features/app-updater/setup)
{% endcontent-ref %}
{% content-ref url="/pages/kCnxus49ovIVhG5KqKWQ" %}
[Usage](/features/app-updater/usage)
{% endcontent-ref %}
{% content-ref url="/pages/izNquMExSbPmJfPGxumR" %}
[Testing](/features/app-updater/testing)
{% endcontent-ref %}
# Setup
Configuring App Updater
## Prerequisites
* Essential Kit imported into the project from My Assets section of Package Manager
* iOS or Android build target configured in Unity
* Published app on App Store or Google Play (required for testing actual update detection)
* Valid bundle identifier matching your published app
## Setup Checklist
### 1. Enable App Updater
Open **Essential Kit Settings** (`Window > Voxel Busters > Essential Kit > Open Settings`), switch to the **Services** tab, and enable **App Updater**.
App Updater Settings
### 2. Configure Default Prompt Messages (Optional)
In the App Updater section, you can customize the default update prompt text:
| Setting | Description | Default |
| -------------------------- | ------------------------------------------------------------ | ------------------------------------------------------------------------------------- |
| **Default Prompt Title** | Title shown in update prompts if not overridden at runtime | "New version available" |
| **Default Prompt Message** | Message shown in update prompts if not overridden at runtime | "A new version of this app is available with exciting new features and improvements." |
{% hint style="success" %}
These defaults are used when you don't provide custom text via `PromptUpdateOptions.Builder`. You can override them per-prompt for specific update campaigns.
{% endhint %}
### 3. Configure App Store Identifiers
Switch to the **General** tab in Essential Kit Settings and configure platform-specific identifiers:
**iOS:**
* **Bundle Identifier**: Must match your App Store app (e.g., `com.yourstudio.yourgame`)
* **App Store ID**: Your app's numeric ID from App Store Connect (e.g., `123456789`)
**Android:**
* **Package Name**: Must match your Google Play app (e.g., `com.yourstudio.yourgame`)
{% hint style="warning" %}
App Updater queries iTunes Store API on iOS and Google Play API on Android. Without valid identifiers, update checks will fail. Ensure these match your published app exactly.
{% endhint %}
### 4. Save and Build
Changes to the settings asset are saved automatically. If you use source control, commit the updated `Resources/EssentialKitSettings.asset` file.
Essential Kit handles platform integration automatically during build - no manual configuration needed.
## Configuration Reference
| Setting | Platform | Required? | Notes |
| --------------------------- | -------- | --------- | ------------------------------------------------------------------- |
| Enable App Updater | All | Yes | Toggles the feature in builds; disabling strips related native code |
| Default Prompt Title | All | Optional | Used when not providing custom title in `PromptUpdateOptions` |
| Default Prompt Message | All | Optional | Used when not providing custom message in `PromptUpdateOptions` |
| Bundle Identifier (General) | iOS | Yes | Must match App Store Connect bundle ID for iTunes API queries |
| App Store ID (General) | iOS | Yes | Numeric ID from App Store Connect; required for update detection |
| Package Name (General) | Android | Yes | Must match Google Play package name for update queries |
## Platform-Specific Behavior
### iOS
* Uses iTunes Store API to check for updates
* Shows native alert dialog to redirect users to App Store
* No in-app update downloads - users must visit App Store manually
* Update detection works for published apps only (not TestFlight)
### Android
* Uses Google Play In-App Update API for seamless updates
* Supports flexible and immediate update flows with progress tracking
* Falls back to Play Store redirect if In-App Update fails
* Update detection works for published apps and internal testing tracks
{% hint style="info" %}
Need a working baseline? Run the sample at `Assets/Plugins/VoxelBusters/EssentialKit/Examples/Scenes/AppUpdaterDemo.unity` to confirm your settings before integrating into production.
{% endhint %}
{% hint style="warning" %}
Update detection only works with published apps. During development, use the editor simulator or test with an older version of your published app installed.
{% endhint %}
# Usage
App Updater allows checking for new app versions and prompting users to update.
Essential Kit wraps native iOS iTunes Store API and Android Google Play In-App Update API into a single Unity interface. Check for updates, show customizable prompts, and guide users through the update process seamlessly.
## Table of Contents
* [Update Flow at a Glance](#update-flow-at-a-glance)
* [Understanding Update Flow](#understanding-update-flow)
* [Import Namespaces](#import-namespaces)
* [Check Availability](#check-availability)
* [Check for Updates](#check-for-updates)
* [Show Update Prompt](#show-update-prompt)
* [Force Updates vs Optional Updates](#force-updates-vs-optional-updates)
* [Platform-Specific Behavior](#platform-specific-behavior)
* [Core APIs Reference](#core-apis-reference)
* [Error Handling](#error-handling)
* [Advanced: Manual Initialization](#advanced-manual-initialization)
* [Related Guides](#related-guides)
## Update Flow at a Glance
```
[Game session starts or player opens Settings]
↓
[AppUpdater.RequestUpdateInfo]
↓
[Store response → AppUpdaterUpdateInfo]
↓
[Decide prompt type (optional vs force)]
↓
[AppUpdater.PromptUpdate]
↓
[Platform-specific UI → restart or resume]
```
## Understanding Update Flow
App Updater follows a two-step process:
**1. Request Update Info** Query the app store to check if a newer version exists.
**2. Prompt Update** If an update is available, show a prompt and handle the update flow.
**Platform Differences:**
* **iOS**: Shows an alert that redirects users to the App Store
* **Android**: Supports in-app updates with progress tracking, or redirects to Play Store
## Import Namespaces
```csharp
using VoxelBusters.EssentialKit;
using VoxelBusters.CoreLibrary;
```
## Check Availability
Call `IsAvailable()` before making requests so you can gracefully fall back if the feature is stripped from the build:
```csharp
if (!AppUpdater.IsAvailable())
{
Debug.LogWarning("App Updater is not available on this platform or build.");
return;
}
```
## Check for Updates
Request update information from the app store:
```csharp
void CheckForUpdates()
{
if (!AppUpdater.IsAvailable())
{
Debug.LogWarning("App Updater is not available on this platform or build.");
return;
}
AppUpdater.RequestUpdateInfo((result, error) =>
{
if (error != null)
{
Debug.LogError($"Failed to check for updates: {error.Description}");
return;
}
Debug.Log($"Update status: {result.Status}");
switch (result.Status)
{
case AppUpdaterUpdateStatus.Available:
Debug.Log("Update available!");
ShowUpdatePrompt(isForceUpdate: false);
break;
case AppUpdaterUpdateStatus.Downloaded:
Debug.Log("Update already downloaded, ready to install");
InstallDownloadedUpdate();
break;
case AppUpdaterUpdateStatus.NotAvailable:
Debug.Log("App is up to date");
break;
case AppUpdaterUpdateStatus.InProgress:
Debug.Log("Update is already in progress");
break;
case AppUpdaterUpdateStatus.Unknown:
Debug.LogWarning("Could not determine update status");
break;
}
});
}
```
### Update Status Values
| Status | Meaning | Next Action |
| -------------- | -------------------------------------------------- | ----------------------------------------------------------------- |
| `Available` | New version exists on the store | Call `PromptUpdate()` to show update dialog |
| `Downloaded` | Update downloaded but not installed (Android only) | Call `PromptUpdate()` with `AllowInstallationIfDownloaded = true` |
| `NotAvailable` | App is up to date | No action needed |
| `InProgress` | Update is currently downloading | Wait for completion |
| `Unknown` | Unable to determine status | Check error for details |
{% hint style="info" %}
`Downloaded` status appears only on Android when using In-App Update flexible flow. The update is ready to install without additional downloads.
{% endhint %}
## Show Update Prompt
After confirming an update is available, show a prompt:
```csharp
void ShowUpdatePrompt(bool isForceUpdate)
{
var options = new PromptUpdateOptions.Builder()
.SetPromptTitle("Update Available")
.SetPromptMessage("A new version with bug fixes and improvements is ready!")
.SetIsForceUpdate(isForceUpdate)
.Build();
AppUpdater.PromptUpdate(options, (progress, error) =>
{
if (error != null)
{
Debug.LogError($"Update failed: {error.Description}");
return;
}
Debug.Log($"Update progress: {progress * 100}%");
if (progress >= 1.0f)
{
Debug.Log("Update completed successfully");
}
});
}
```
### PromptUpdateOptions Builder
| Method | Parameter | Description |
| ---------------------------------------- | ------------ | ------------------------------------------------------------------------------------------------ |
| `SetPromptTitle(string)` | Title text | Title displayed in update dialog |
| `SetPromptMessage(string)` | Message text | Message explaining why user should update |
| `SetIsForceUpdate(bool)` | true/false | If true, user cannot dismiss the prompt (default: false) |
| `SetAllowInstallationIfDownloaded(bool)` | true/false | Android: install immediately if the flexible flow already downloaded the package (default: true) |
| `Build()` | - | Returns configured `PromptUpdateOptions` instance |
### Progress Callback
The progress callback fires multiple times during the update:
**iOS Behavior:**
* Fires once with `progress = 1.0f` if user chose to update
* Fires with `progress = 0.0f` if user dismissed the prompt (only for optional updates)
**Android Behavior:**
* Fires multiple times with progress from `0.0f` to `1.0f` during in-app download
* Falls back to iOS behavior if In-App Update is unavailable
{% hint style="success" %}
Show a loading indicator during Android in-app updates by tracking progress. The callback fires frequently with updated progress values.
{% endhint %}
## Force Updates vs Optional Updates
### Optional Updates (Default)
Allow users to dismiss the prompt and continue using the app:
```csharp
void ShowOptionalUpdate()
{
var options = new PromptUpdateOptions.Builder()
.SetPromptTitle("New Features Available!")
.SetPromptMessage("Update now to try our new tournament mode!")
.SetIsForceUpdate(false) // User can dismiss
.Build();
AppUpdater.PromptUpdate(options, (progress, error) =>
{
if (error == null && progress >= 1.0f)
{
Debug.Log("User accepted update");
}
else if (error == null && progress == 0.0f)
{
Debug.Log("User dismissed update");
}
});
}
```
### Force Updates (Blocking)
Prevent users from dismissing until they update:
```csharp
void ShowForceUpdate()
{
var options = new PromptUpdateOptions.Builder()
.SetPromptTitle("Critical Update Required")
.SetPromptMessage("This update contains important security fixes and is required to continue.")
.SetIsForceUpdate(true) // Cannot dismiss
.Build();
AppUpdater.PromptUpdate(options, (progress, error) =>
{
if (error != null)
{
Debug.LogError($"Force update failed: {error.Description}");
Debug.LogError("Show retry UI so the player can attempt the update again.");
}
else if (progress >= 1.0f)
{
Debug.Log("Force update completed");
}
});
}
```
{% hint style="warning" %}
Use force updates sparingly. Users cannot play your game until they update, which may lead to frustration. Reserve for critical bugs or security issues.
{% endhint %}
## Platform-Specific Behavior
### iOS
* Uses iTunes Store API to query for updates
* Shows native alert dialog with App Store redirect
* No progress tracking (binary result: updated or dismissed)
* Requires valid App Store ID in Essential Kit Settings
```csharp
// iOS prompt flow
AppUpdater.PromptUpdate(options, (progress, error) =>
{
if (progress >= 1.0f)
{
// User tapped "Update" and was redirected to App Store
// App will terminate when user returns after updating
}
});
```
### Android
* Uses Google Play In-App Update API for seamless updates
* Shows in-app update UI with progress tracking
* Falls back to Play Store redirect if In-App Update fails
* Requires valid package name in Essential Kit Settings
```csharp
void PromptUpdateWithProgress()
{
// Android prompt flow with progress
AppUpdater.PromptUpdate(options, (progress, error) =>
{
// Android fires multiple times with increasing progress
if (progress > 0 && progress < 1.0f)
{
Debug.Log($"Downloading: {progress * 100}%");
Debug.Log($"Update progress bar to {progress * 100}%.");
}
else if (progress >= 1.0f)
{
Debug.Log("Download complete, installing...");
}
});
}
```
### Install Downloaded Update (Android)
If status is `Downloaded`, install without re-downloading:
```csharp
void InstallDownloadedUpdate()
{
var options = new PromptUpdateOptions.Builder()
.SetPromptTitle("Install Update")
.SetPromptMessage("Update is ready to install. App will restart.")
.SetAllowInstallationIfDownloaded(true)
.Build();
AppUpdater.PromptUpdate(options, (progress, error) =>
{
if (error == null && progress >= 1.0f)
{
Debug.Log("Installing update...");
}
});
}
```
## Core APIs Reference
| API | Purpose | Returns |
| -------------------------------------------- | ----------------------------------------------------- | ----------------------------------------------- |
| `AppUpdater.RequestUpdateInfo(callback)` | Query app store for available updates | `AppUpdaterUpdateInfo` with status via callback |
| `AppUpdater.PromptUpdate(options, callback)` | Show update prompt to user | Float progress (0-1) via callback |
| `AppUpdater.IsAvailable()` | Check if App Updater is available on current platform | `bool` |
| `PromptUpdateOptions.Builder()` | Configure update prompt | Chain `.SetX()` methods → `Build()` |
## Error Handling
Handle errors in both `RequestUpdateInfo` and `PromptUpdate` callbacks:
```csharp
void CheckForUpdates()
{
AppUpdater.RequestUpdateInfo((result, error) =>
{
if (error != null)
{
HandleUpdateError(error);
return;
}
if (result.Status == AppUpdaterUpdateStatus.Available)
{
ShowUpdatePrompt(false);
}
});
}
void HandleUpdateError(Error error)
{
var code = (AppUpdaterErrorCode)error.Code;
switch (code)
{
case AppUpdaterErrorCode.NetworkIssue:
Debug.LogWarning("No internet connection - cannot check for updates.");
Debug.LogWarning("Show an in-game network error prompt with retry.");
break;
case AppUpdaterErrorCode.UpdateInfoNotAvailable:
Debug.LogWarning("Call RequestUpdateInfo before prompting the update.");
break;
case AppUpdaterErrorCode.UpdateNotAvailable:
Debug.Log("User already has the latest version.");
break;
case AppUpdaterErrorCode.UpdateInProgress:
Debug.Log("Update is already running in another flow. Show progress UI.");
break;
case AppUpdaterErrorCode.UpdateNotCompatible:
Debug.LogError("Device cannot install the target build (architecture or version mismatch).");
break;
case AppUpdaterErrorCode.UpdateCancelled:
Debug.LogWarning("User cancelled the update.");
break;
default:
Debug.LogError($"Update check failed: {error.Description}");
break;
}
}
```
### Common Error Codes
| Error Code | Trigger | Recommended Action |
| ------------------------ | ------------------------------------------------ | ------------------------------------------------------- |
| `NetworkIssue` | No internet connection | Show error message and retry button |
| `UpdateInfoNotAvailable` | `PromptUpdate` called before `RequestUpdateInfo` | Request info first or handle null result |
| `UpdateNotAvailable` | Store reports no newer build | Hide update UI and continue |
| `UpdateInProgress` | Another update flow is already running | Reuse or resume that flow instead of starting a new one |
| `UpdateCancelled` | User backed out of the update UI | Offer a "Try again" button or continue gameplay |
| `UpdateNotCompatible` | Device cannot install the target build | Inform player and prompt them to update their OS/device |
| `Unknown` | Platform-specific error | Log for diagnostics, show generic error to user |
{% hint style="info" %}
Always handle errors gracefully. Update checks can fail due to network issues, store API changes, or configuration problems.
{% endhint %}
## Advanced: Manual Initialization
Essential Kit auto-initializes App Updater from the Essential Kit Settings asset. Only use manual initialization for runtime configuration:
```csharp
void Awake()
{
var settings = new AppUpdaterUnitySettings(
isEnabled: true,
defaultPromptTitle: "Server-driven title",
defaultPromptMessage: "Server-driven message");
AppUpdater.Initialize(settings);
}
```
**Use Cases for Manual Initialization:**
* Setting custom update prompt defaults from server configuration
* Configuring different update policies for beta vs production builds
* Loading app store URLs dynamically from server
* Implementing A/B testing for update messaging
{% hint style="warning" %}
Advanced initialization is for specific scenarios only. For most games, use [standard setup](/features/app-updater/setup) with Essential Kit Settings.
{% endhint %}
## Related Guides
* Demo scene: `Assets/Plugins/VoxelBusters/EssentialKit/Examples/Scenes/AppUpdaterDemo.unity`
* Pair with **Network Services** to check connectivity before requesting updates
* Use with **Notification Services** to remind users about pending updates
* Combine with **Native UI** for custom update dialog designs
{% hint style="success" %}
Ready to test? Head to the [Testing Guide](/features/app-updater/testing) to validate your implementation.
{% endhint %}
# Testing
Keep the scenarios below in mind while validating App Updater. The flow depends heavily on the distribution channel because the feature talks to the real app stores.
## Quick Checklist
* ✅ App Updater enabled in Essential Kit Settings and identifiers configured
* ✅ Build version on device is lower than the version you expect the store to report
* ✅ `RequestUpdateInfo` is called before `PromptUpdate`
* ✅ Network connection available (Wi-Fi or cellular)
## iOS
Apple only returns update information for apps that are already live on the App Store.
1. Publish a build (version `X`) to the App Store. Install it on the test device from the store.
2. In Unity, increase the build number and version to `X + 1`, build the project, and install it locally.
3. Run the new build, call `RequestUpdateInfo`, and confirm that the status is `NotAvailable` (because the installed version already matches the store).
4. Downgrade the local build to `X - 1`, install that build on the device, and run `RequestUpdateInfo` again. You should see `Available`, then `PromptUpdate` will redirect to the App Store.
No live build yet? Temporarily point the “App Store ID” setting to another app that *is* published so you can exercise the flow, but remember to revert the ID immediately after testing.
## Android
Google restricts in-app updates to packages distributed through the Play Store. The easiest way to test is **Internal App Sharing** or an **Internal Testing track**.
1. Upload APK/AAB version `X` to Internal App Sharing.
2. Upload version `X + 1` to the same channel.
3. Install version `X` using the generated tester link.
4. Launch the app, call `RequestUpdateInfo`, and expect `Available`.
5. Call `PromptUpdate` to try both flows:
* **Flexible flow**: decline the final install step to verify the `Downloaded` status.
* **Immediate flow**: accept the update to check that your app handles the restart.
6. Watch device logs (`adb logcat`) for progress values and ensure your UI reacts correctly.
{% hint style="info" %}
The demo scene at `Assets/Plugins/VoxelBusters/EssentialKit/Examples/Scenes/AppUpdaterDemo.unity` already wires up both buttons. Use it to verify the flow before integrating into your game UI.
{% endhint %}
## Troubleshooting
* `Unknown` status usually indicates the store APIs could not identify your package. Double-check bundle identifier, package name, and that the app is uploaded to the same channel you are testing against.
* A `NetworkIssue` error means the device could not reach the store; retry with a reliable connection.
* If the callback reports `progress == 0` after prompting, the user dismissed the update. Decide whether to re-prompt or continue gameplay.
# PlayMaker
Check for new versions and show the native “update app” flow.
## Actions (6)
* `AppUpdaterRequestUpdateInfo` (async): requests update status. Fires `successEvent` / `failureEvent` and caches the result.
* `AppUpdaterGetRequestUpdateInfoSuccessResult` (sync): read cached `updateStatus` after `AppUpdaterRequestUpdateInfo` SUCCESS.
* `AppUpdaterGetRequestUpdateInfoError` (sync): read cached `errorCode` / `errorDescription` after `AppUpdaterRequestUpdateInfo` FAILURE.
* `AppUpdaterPromptUpdate` (async): shows the native update prompt/flow. Fires `successEvent` / `failureEvent` and optional `progressUpdateEvent`.
* `AppUpdaterGetPromptUpdateProgress` (sync): read cached `progress` (0..1) after `progressUpdateEvent` (Android only).
* `AppUpdaterGetPromptUpdateError` (sync): read cached `errorCode` / `errorDescription` after `AppUpdaterPromptUpdate` FAILURE.
## Quick flows
### Check, then prompt (recommended)
1. `AppUpdaterRequestUpdateInfo`
2. `AppUpdaterGetRequestUpdateInfoSuccessResult` → branch by `updateStatus`
3. If update is available, call `AppUpdaterPromptUpdate`
### Forced update with progress (Android)
1. `AppUpdaterPromptUpdate` with `isForceUpdate = true` and `stayActive = true`
2. On `progressUpdateEvent`, call `AppUpdaterGetPromptUpdateProgress` and update your UI.
### Manual “Update App” button
Call `AppUpdaterPromptUpdate` directly from your settings/help screen (and handle FAILURE with `AppUpdaterGetPromptUpdateError`).
## Notes
* `AppUpdaterRequestUpdateInfo` will fail if AppUpdater isn’t available on the current platform.
* Progress updates are typically meaningful only on Android.
## Use cases
Start here: `use-cases/README.md`
# Use Cases
Quick-start guides for checking app updates and prompting updates using PlayMaker custom actions.
## Available Use Cases
### 1. [Request Update Info And Prompt](/features/app-updater/playmaker/use-cases/use-case-1-request-update-info-and-prompt)
* **What it does:** End-to-end flow: check update status and (optionally) prompt the user to update
* **Actions:** 3 (`AppUpdaterRequestUpdateInfo`, `AppUpdaterGetRequestUpdateInfoSuccessResult`, `AppUpdaterPromptUpdate`)
### 2. [Silent Policy Check](/features/app-updater/playmaker/use-cases/use-case-2-silent-policy-check)
* **What it does:** Check for updates periodically without blocking UI
* **Actions:** 2 (`AppUpdaterRequestUpdateInfo`, `AppUpdaterGetRequestUpdateInfoSuccessResult`)
### 3. [Prompt Update (Manual Trigger)](/features/app-updater/playmaker/use-cases/use-case-3-prompt-update)
* **What it does:** Trigger a store update prompt from a settings/help screen
* **Actions:** 1 (`AppUpdaterPromptUpdate`)
## Quick Action Reference
| Action | Purpose |
| ------------------------------------------- | --------------------------------------- |
| AppUpdaterRequestUpdateInfo | Request update status (cached) |
| AppUpdaterGetRequestUpdateInfoSuccessResult | Read cached update status after success |
| AppUpdaterGetRequestUpdateInfoError | Read cached error after request failure |
| AppUpdaterPromptUpdate | Show native update prompt / flow |
| AppUpdaterGetPromptUpdateProgress | Read cached progress (Android only) |
| AppUpdaterGetPromptUpdateError | Read cached error after prompt failure |
## Output Variables
| Variable | Type | Description |
| ------------ | ----------------------------- | ---------------------------------------------------------- |
| updateStatus | Enum (AppUpdaterUpdateStatus) | `Available` / `NotAvailable` / `InProgress` / `Downloaded` |
| progress | Float (0..1) | PromptUpdate progress (Android only) |
## Best Practices
* Check once per day maximum
* Show forced updates immediately
* Allow users to dismiss optional updates
* Track last check time in PlayerPrefs
* Don't interrupt critical user flows
* Test update flows with TestFlight/internal testing
## Platform Support
* **iOS**: App Store version checking
* **Android**: Google Play Store version checking
* Both platforms require network connection
## Related Documentation
* [**README.md**](/features/app-updater/playmaker)
# Request Update Info And Prompt (End-to-end)
## Goal
Check App Store/Play Store for newer app version and prompt user to update if available.
This use-case intentionally combines:
* the “check” part (UseCase2)
* the “prompt” part (UseCase3)
If you only need one side of the flow, use those focused use-cases instead.
## Actions Required
| Action | Purpose |
| ------------------------------------------- | ------------------------------------------ |
| AppUpdaterRequestUpdateInfo | Query store for update status (cached) |
| AppUpdaterGetRequestUpdateInfoSuccessResult | Read updateStatus after SUCCESS |
| AppUpdaterPromptUpdate | Show native update prompt/flow |
| AppUpdaterGetRequestUpdateInfoError | Read error after FAILURE (optional) |
| AppUpdaterGetPromptUpdateError | Read error after prompt FAILURE (optional) |
## Variables Needed
* updateStatus (Enum: AppUpdaterUpdateStatus)
* isForceUpdate (Bool) (your policy)
## Implementation Steps
### 1. RequestUpdateInfo (Entry State)
**Action:** AppUpdaterRequestUpdateInfo
* **Events:**
* successEvent → GetStatus
* failureEvent → (Optional) ReadRequestError
### 2. GetStatus
**Action:** AppUpdaterGetRequestUpdateInfoSuccessResult
* **Outputs:**
* updateStatus → updateStatus
### 3. EvaluateStatus
* If updateStatus == Available or Downloaded → PromptUpdate
* Else → ContinueNormal
### 4. PromptUpdate
**Action:** AppUpdaterPromptUpdate
* **Inputs:**
* isForceUpdate: isForceUpdate
* promptTitle / promptMessage: optional
* **Events:**
* successEvent → ContinueNormal
* failureEvent → (Optional) ReadPromptError
* progressUpdateEvent → (Optional) UpdateUIProgress (Android only)
### 5. (Optional) ReadRequestError / ReadPromptError
* Use **AppUpdaterGetRequestUpdateInfoError** / **AppUpdaterGetPromptUpdateError** to read `errorCode` + `errorDescription`.
### 6. ContinueNormal
Proceed to main app experience
## Common Issues
* **Network dependency**: Requires internet connection
* **Store caching**: Version info may lag actual deployment
* **Frequency**: Check on app launch, not mid-session
* **User experience**: Don't spam update prompts
## Platform Behavior
* **iOS**: Opens App Store app page
* **Android**: Opens Google Play Store app page
## Use When
* App launch (cold start only)
* After resuming from background (optional)
* Critical security patches
* Breaking backend API changes
# Silent Policy Check
## Goal
Check for updates silently without blocking UI, and conditionally show update prompt based on policy.
## Actions Required
| Action | Purpose |
| ------------------------------------------- | -------------------------------------- |
| AppUpdaterRequestUpdateInfo | Query store for update status (cached) |
| AppUpdaterGetRequestUpdateInfoSuccessResult | Read updateStatus after SUCCESS |
## Variables Needed
* updateStatus (Enum: AppUpdaterUpdateStatus)
* lastCheckTime (DateTime)
* checkInterval (Int) - hours between checks
## Implementation Steps
### 1. CheckIfTimeToCheck (Entry State)
Calculate time since lastCheckTime:
* If >= checkInterval → PerformCheck
* If < checkInterval → Skip
### 2. PerformCheck
**Action:** AppUpdaterRequestUpdateInfo
* Run asynchronously in background
* **Events:**
* successEvent → GetStatus
* failureEvent → Skip
### 3. GetStatus
**Action:** AppUpdaterGetRequestUpdateInfoSuccessResult
* **Outputs:**
* updateStatus → updateStatus
### 4. ProcessResult
Save current time to lastCheckTime.
* If updateStatus == Available or Downloaded → ApplyUpdatePolicy
* Else → Skip
### 5. ApplyUpdatePolicy
Apply business logic:
* Critical update → Show immediate alert
* Major version → Show on next launch
* Minor version → Show badge/banner (non-intrusive)
* Patch version → Log only, no UI
### 6. Skip
Continue normal app flow without interruption
## Common Issues
* **Check frequency**: Don't check too often (recommend: 24 hours)
* **Battery/data**: Avoid checks on cellular if large metadata
* **Persistence**: Save lastCheckTime to PlayerPrefs
* **Background limits**: iOS/Android may throttle background checks
## Best Practices
* Check once per day maximum
* Use PlayerPrefs to track last check time
* Show update UI only for significant versions
* Respect user's "Don't show again" preference
## Flow Diagram
```
CheckIfTimeToCheck
├─ Time elapsed → PerformCheck
│ ├─ SUCCESS → GetStatus → ProcessResult
│ │ ├─ Available/Downloaded → ApplyUpdatePolicy → [UI based on severity]
│ │ └─ NotAvailable → Skip
│ └─ FAILURE → Skip
└─ Too soon → Skip
```
## Use When
* Daily app launch checks
* Non-intrusive version monitoring
* Gradual rollout strategies
* A/B testing update prompts
# Prompt Update (Manual Trigger)
## Goal
Prompt the user to update from a settings/help screen.
## Actions Required
| Action | Purpose |
| --------------------------------- | --------------------------------------------- |
| AppUpdaterPromptUpdate | Show native update prompt/flow |
| AppUpdaterGetPromptUpdateError | Read cached error after failure (optional) |
| AppUpdaterGetPromptUpdateProgress | Read cached progress (Android only, optional) |
## Variables Needed
* progress (Float) (Android only, optional)
## Implementation Steps
### 1. UserPressedUpdateButton (Entry State)
From your Settings screen, when user presses “Check for Updates” / “Update App”:
* Go to PromptUpdate
### 2. PromptUpdate
**Action:** AppUpdaterPromptUpdate
* **Inputs:**
* isForceUpdate: false
* promptTitle / promptMessage: optional
* **Events:**
* successEvent → Done
* failureEvent → (Optional) ReadPromptError
* progressUpdateEvent → (Optional) UpdateProgressUI (Android only)
### 3. (Optional) UpdateProgressUI
**Action:** AppUpdaterGetPromptUpdateProgress
* **Outputs:**
* progress → progress
### 4. (Optional) ReadPromptError
**Action:** AppUpdaterGetPromptUpdateError
* **Outputs:** errorCode, errorDescription
## Common Issues
* **App backgrounding**: App may go to background during the update flow
* **Platform support**: PromptUpdate behavior differs between iOS/Android
## Platform Differences
* **iOS**: Typically opens App Store / update prompt UI
* **Android**: Uses Play Core update flow (progressUpdateEvent supported)
## Use When
* User-initiated “Update App” action
* Support/help flows directing users to update
# Billing Services
Cross-platform in-app purchase system for Unity mobile games with consumables, non-consumables, subscriptions, and transaction management
Essential Kit's Billing Services feature lets Unity teams monetize mobile games with in-app purchases without maintaining platform-specific code. This tutorial walks you through setup, key APIs, testing, and troubleshooting so you can add consumables, non-consumables, and subscriptions with confidence.
{% hint style="info" %}
Using PlayMaker? See the PlayMaker guide: [PlayMaker](/features/billing-services/playmaker).
{% endhint %}
{% embed url="" %}
Billing Services Video Tutorial
{% endembed %}
{% hint style="info" %}
Looking for a working reference? Open the demo scene at `Assets/Plugins/VoxelBusters/EssentialKit/Examples/Scenes/BillingServicesDemo.unity` and the companion script at `Assets/Plugins/VoxelBusters/EssentialKit/Examples/Scripts/BillingServicesDemo.cs` to see the full API in action.
{% endhint %}
## What You'll Learn
* Configure products in Essential Kit Settings and platform stores (App Store Connect, Google Play Console)
* Initialize the store connection and retrieve localized product pricing
* Purchase products and handle transaction states (success, failure, deferred, restored)
* Restore purchases for non-consumables and subscriptions
* Finish transactions and manage pending purchases (advanced server verification)
## Why Billing Services Matters
* **Revenue Generation**: Primary monetization driver for mobile games with secure, native purchase flows
* **Cross-Platform Consistency**: Single API works across iOS App Store and Google Play Store
* **Security Built-In**: Local receipt verification on iOS (StoreKit2), optional server verification for Android
* **App Store Compliance**: Automatic platform setup with restore functionality required by Apple guidelines
## Tutorial Roadmap
1. [Setup](/features/billing-services/setup) - Configure products in Essential Kit Settings and platform stores
2. [Usage](/features/billing-services/usage) - Initialize store, purchase products, restore purchases, handle transactions
3. [Testing](/features/billing-services/testing) - Test with sandbox accounts and validate on devices
4. [FAQ](/features/billing-services/faq) - Troubleshoot common purchase and configuration issues
## Key Use Cases
### Sell Virtual Goods
Use consumable products to sell in-game items like coins, gems, lives, or power-ups that players can purchase repeatedly. Offer multiple value tiers ($0.99, $4.99, $9.99) to maximize revenue across different player segments.
### Premium Upgrades
Sell permanent features with non-consumable products like ad removal, character unlocks, or premium level packs. Once purchased, these items are owned forever and automatically restored across devices.
### Subscriptions
Implement VIP memberships, battle passes, or season passes with recurring billing. Offer flexible durations (weekly, monthly, yearly) with introductory offers and free trials to increase conversion.
### Multi-Currency Systems
Support multiple virtual currencies (coins, gems, tickets) using payout definitions. A single purchase can grant multiple currency types for complex economy systems.
### Remove Ads
Offer an ad-free experience with a non-consumable product. Use `IsProductPurchased()` to check ownership status and hide ads permanently for paying users.
## Prerequisites
* Unity project with Essential Kit v3 installed and Billing Services feature included in the build
* **iOS**: App Store Connect account with products configured and banking information complete
* **Android**: Google Play Console account with products configured and app uploaded for testing
* Test device or sandbox accounts to validate purchases before release
{% content-ref url="/pages/-MJr4SfrvIe3EJE4W95X" %}
[Setup](/features/billing-services/setup)
{% endcontent-ref %}
{% content-ref url="/pages/-MJr4XnUAj\_-S1CZ3S-q" %}
[Usage](/features/billing-services/usage)
{% endcontent-ref %}
{% content-ref url="/pages/-MJr4Zke9RPtM1EDjEzo" %}
[Testing](/features/billing-services/testing)
{% endcontent-ref %}
{% content-ref url="/pages/-MJr4cPTiFGrMCCTPDNt" %}
[FAQ](/features/billing-services/faq)
{% endcontent-ref %}
# Setup
Configuring Billing Services
## Prerequisites
* Essential Kit imported into the project from My Assets section of Package Manager
* **iOS**: App Store Connect account with Tax and Banking Information completed
* **Android**: Google Play Console account with signed APK/AAB uploaded for testing
* Product IDs created in both platform stores (use matching IDs for cross-platform consistency)
## Platform Store Setup
Before configuring Essential Kit, you must create products in your platform stores. Detailed platform-specific instructions:
{% content-ref url="/pages/-MJr4pMU7okaS5UBRaGn" %}
[iOS](/features/billing-services/setup/ios)
{% endcontent-ref %}
{% content-ref url="/pages/-MJr4sIzKyFAHKQNhVyU" %}
[Android](/features/billing-services/setup/android)
{% endcontent-ref %}
### Quick Overview
**iOS App Store Connect:**
1. Complete Tax and Banking Information
2. Create products in **Features > In-App Purchases**
3. Use unique identifiers like `com.yourgame.coins_100`
4. Set localized pricing tiers
**Google Play Console:**
1. Upload signed APK/AAB (required for testing)
2. Create products in **Monetization > In-app products**
3. Use matching IDs from iOS for consistency
4. Configure local currency pricing
{% hint style="warning" %}
Product IDs must match exactly between iOS, Android, and Essential Kit Settings. Use reverse domain notation (e.g., `com.yourgame.product_name`) for uniqueness.
{% endhint %}
## Essential Kit Configuration
### Enable Feature
Open **Essential Kit Settings** (`Window > Voxel Busters > Essential Kit > Open Settings`), switch to the **Services** tab, and enable **Billing Services**.
Billing Services Settings
### Configuration Properties
| Setting | Platform | Required? | Notes |
| ------------------------------------ | -------- | --------- | ---------------------------------------------------------------------------------------------------------------------------------------------------------------------------------------------------------------------------------------------- |
| Enable Billing Services | All | Yes | Toggles the feature in builds; disabling strips related native code |
| Products | All | Yes | Array of product definitions with platform-specific IDs |
| Auto Finish Transactions | All | Optional | Default: true. Set to false only for server-side receipt verification (advanced) |
| Auto Handle External Product Actions | All | Optional | Default: true. If disabled, handle `BillingServices.OnExternalProductPurchaseAction` and start the purchase yourself (for example, when a user taps a buy button on the store page and the platform forwards the purchase intent to your app). |
| Android Public Key | Android | Yes | Base64-encoded public key from Google Play Console |
### Adding Billing Products
Click **Add Product** to create a new billing product entry:
#### Billing Product Properties
| Property | Description | Example |
| --------------------- | --------------------------------------------------- | ------------------------------------------------------------------------------------ |
| Id | Unique identifier used in code | `coins_100` |
| Platform Id | Common platform ID (if same across platforms) | `com.yourgame.coins_100` |
| Platform Id Overrides | Platform-specific IDs (iOS/Android) |
iOS: com.yourgame.coins\_100 Android: coins\_100
|
| Product Type | Consumable / NonConsumable / Subscription | Consumable |
| Title | Display title (fallback if store fetch fails) | 100 Gold Coins |
| Description | Display description (fallback if store fetch fails) | Get 100 gold coins |
| Payouts | Metadata for currency grants (advanced) | See Multi-Currency section below |
#### Product Types
| Type | Description | Examples |
| ------------- | ------------------------------- | ---------------------------- |
| Consumable | Can be purchased multiple times | Coins, lives, power-ups |
| NonConsumable | One-time permanent purchase | Ad removal, premium features |
| Subscription | Time-bound recurring billing | VIP membership, battle pass |
#### Example Configuration
```
Product 1:
Id: coins_100
Type: Consumable
iOS ID: com.yourgame.coins_100
Android ID: com.yourgame.coins_100
Product 2:
Id: remove_ads
Type: NonConsumable
iOS ID: com.yourgame.remove_ads
Android ID: com.yourgame.remove_ads
Product 3:
Id: vip_monthly
Type: Subscription
iOS ID: com.yourgame.vip_monthly
Android ID: com.yourgame.vip_monthly
```
### Auto Finish Transactions
**Default: Enabled** - Essential Kit automatically completes transactions after the `OnTransactionStateChange` event fires.
**When to disable:**
* You need server-side receipt verification (recommended for Android apps with significant user base)
* You want manual control over when transactions are marked complete
* You're implementing custom verification flows
If disabled, you must call `BillingServices.FinishTransactions()` after granting purchased content to the user.
{% hint style="success" %}
For most games, keep Auto Finish Transactions enabled. iOS uses StoreKit2 with built-in local verification. Only disable for advanced server verification scenarios.
{% endhint %}
### Multi-Currency Systems (Advanced)
Use payouts to grant multiple virtual currencies from a single purchase:
```
Product: mega_pack
Payouts:
- Type: coins, Quantity: 500
- Type: gems, Quantity: 100
- Type: tickets, Quantity: 25
```
In your code, process payouts when granting content:
```csharp
var product = BillingServices.GetProductWithId("mega_pack");
foreach (var payout in product.Payouts)
{
switch (payout.Variant)
{
case "coins": PlayerData.AddCoins(payout.Quantity); break;
case "gems": PlayerData.AddGems(payout.Quantity); break;
case "tickets": PlayerData.AddTickets(payout.Quantity); break;
}
}
```
### Android Public Key
For Android builds, you must add your app's Base64-encoded public key:
1. Open Google Play Console
2. Navigate to **Monetization Setup > Licensing**
3. Copy the **Base64-encoded RSA public key**
4. Paste into **Android Properties > Public Key** in Essential Kit Settings
{% hint style="info" %}
Changes to the settings asset are saved automatically. If you use source control, commit the updated `Resources/EssentialKitSettings.asset` file.
{% endhint %}
## Verification
Before proceeding to usage:
1. Verify all product IDs match exactly between platform stores and Essential Kit Settings
2. Confirm product types (Consumable/NonConsumable/Subscription) are correct
3. Test the demo scene (`BillingServicesDemo.unity`) to confirm basic configuration works
4. Check that products are approved and active in App Store Connect and Google Play Console
{% hint style="info" %}
Need a working baseline? Run the sample at `Assets/Plugins/VoxelBusters/EssentialKit/Examples/Scenes/BillingServicesDemo.unity` to confirm your settings before wiring the feature into production screens.
{% endhint %}
# iOS
In-App purchases setup for iOS platform
## Configure in App Store Connect
Configure in‑app purchases in[ App Store Connect](https://appstoreconnect.apple.com/), and include details such as name, pricing, and description that highlights the features and functionality of your in‑app purchase.
### Create an in-app purchase
1. From My Apps, select your app.
2. In the sidebar under In-App Purchases, click Manage.
3. To add an in-app purchase, go to In-App Purchases (for subscriptions, go to Subscriptions section) and click the Add button (+).
4. Select Consumable, Non-Consumable, or Non-Renewing Subscriptions (for subscriptions, create a group and add subscriptions) and click Create.
5. Add the reference name, product Id, and a localized display name.
6. Click Save, or Submit for Review.
{% hint style="success" %}
### Product Id you set in step 5 needs to be used as Platform Id in [Billing Services settings](/features/billing-services/setup#billing-products) for iOS platform.
{% endhint %}

Identifiers you need to fill for Platform Id's in Essential Kit
### **Publish your app and in-app purchase on the App Store**
When you are done testing your in-app purchases, you'll be able to submit for review. Check its in-app purchase status to make sure you aren't missing information and ensure that you've selected your in-app purchase pricing. Products are reviewed when you submit your app as part of the app review process.

{% hint style="danger" %}
For in-app purchases to work, you need to make sure you finish your tax and legal agreements on App Store Connect. Else, you won't get any results when you fetch the billing product details.
{% endhint %}
# Android
In-App purchases setup for Android platform
{% hint style="warning" %}
To enable billing on Android, you first need to upload your app to play store in any of alpha/beta / internal track's.
{% endhint %}
## Create In-App products
Once after uploading the app and publish in any of the tracks, you will get an option to add in-app products.

Identifiers you need to fill for Platform Id's in Essential Kit
## Public Key
> #### Public key needs to be set in the [Essential Kit Settings](/features/billing-services#configuration-properties) and can be obtained from Monetisation Setup of Monetise section.
###

{% hint style="info" %}
Public key is used internally by the plugin to validate a purchased receipt on Android
{% endhint %}
# Usage
Billing Services allows cross-platform in-app purchases on mobile devices
Essential Kit wraps native iOS StoreKit and Android Google Play Billing APIs into a single Unity interface. Essential Kit automatically initializes Billing Services - you just need to connect to the store and start making purchases.
## Table of Contents
* [Understanding Product Types](#understanding-product-types)
* [Import Namespaces](#import-namespaces)
* [Event Registration](#event-registration)
* [Store Initialization](#store-initialization)
* [Making Purchases](#making-purchases)
* [Restoring Purchases](#restoring-purchases)
* [Subscriptions](#subscriptions)
* [Core APIs Reference](#core-apis-reference)
* [Advanced: Manual Transaction Finishing](#advanced-manual-transaction-finishing)
* [Advanced: Runtime Product Configuration](#advanced-runtime-product-configuration)
* [Error Handling](#error-handling)
* [Related Guides](#related-guides)
## Understanding Product Types
Before diving into implementation, it's important to understand the three types of in-app purchase products:
### Consumable Products
Items that can be purchased multiple times and are "consumed" after use. When a player buys a consumable product, they receive the content, use it, and can purchase it again.
**Examples:**
* 100 gold coins pack
* 5 extra lives
* Health potions
* Ammo packs
**Key characteristics:**
* Can be purchased repeatedly
* Not restored across devices
* `IsProductPurchased()` always returns false (no permanent ownership)
### Non-Consumable Products
Permanent purchases that unlock content or features forever. Once purchased, the player owns it permanently across all their devices.
**Examples:**
* Remove all ads
* Premium features unlock
* Character unlocks
* Level pack access
**Key characteristics:**
* Can only be purchased once
* Automatically restored on new devices
* `IsProductPurchased()` returns true after purchase
* Must provide a "Restore Purchases" button (iOS requirement)
### Subscription Products
Time-bound purchases that provide benefits for a specific period (week, month, year). Subscriptions automatically renew until cancelled by the user.
**Examples:**
* VIP membership (monthly)
* Battle pass (seasonal)
* Premium subscription (yearly)
* Ad-free experience (weekly)
**Key characteristics:**
* Recurring billing until cancelled
* Time-limited access
* Automatically restored on new devices
* `IsProductPurchased()` returns true while subscription is active
* Can include promotional offers (free trial, introductory pricing)
## Import Namespaces
```csharp
using System;
using System.Collections;
using System.Collections.Generic;
using VoxelBusters.EssentialKit;
using VoxelBusters.CoreLibrary;
```
## Event Registration
Register for billing events in `OnEnable` and unregister in `OnDisable`:
```csharp
void OnEnable()
{
BillingServices.OnInitializeStoreComplete += OnStoreInitialized;
BillingServices.OnTransactionStateChange += OnTransactionStateChanged;
BillingServices.OnRestorePurchasesComplete += OnRestoreComplete;
}
void OnDisable()
{
BillingServices.OnInitializeStoreComplete -= OnStoreInitialized;
BillingServices.OnTransactionStateChange -= OnTransactionStateChanged;
BillingServices.OnRestorePurchasesComplete -= OnRestoreComplete;
}
```
| Event | Trigger |
| ---------------------------- | ----------------------------------------------------- |
| `OnInitializeStoreComplete` | After `InitializeStore()` fetches product details |
| `OnTransactionStateChange` | When transaction state changes during purchase |
| `OnRestorePurchasesComplete` | After `RestorePurchases()` fetches previous purchases |
## Store Initialization
### Why Store Initialization is Needed
Product details like pricing, descriptions, and availability are managed in App Store Connect (iOS) and Google Play Console (Android). These details can change at any time - you might update prices, add new products, or modify descriptions without releasing a new app version.
Store initialization connects to the platform stores and fetches the current, localized product information. This ensures:
* Players see accurate prices in their local currency
* Product titles and descriptions match what you configured in store consoles
* Only active/available products are shown
* Pricing changes take effect immediately without app updates
### Implementation
Before accepting purchases, connect to platform stores to retrieve current product pricing and availability.
```csharp
void Start()
{
BillingServices.InitializeStore();
Debug.Log("Initializing store...");
}
void OnStoreInitialized(BillingServicesInitializeStoreResult result, Error error)
{
if (error != null)
{
Debug.LogError($"Store init failed: {error.Description}");
return;
}
Debug.Log($"Store ready with {result.Products.Length} products");
foreach (var product in result.Products)
{
Debug.Log($"{product.LocalizedTitle} - {product.Price.LocalizedText}");
}
}
```
`InitializeStore()` uses products configured in Essential Kit Settings and retrieves localized pricing from stores. This may take several seconds depending on network conditions.
{% hint style="success" %}
Display a loading indicator while initializing. Once complete, show products in your store UI using `product.Price.LocalizedText` for accurate, localized pricing.
{% endhint %}
{% hint style="warning" %}
Store initialization can fail if products are not properly configured in App Store Connect or Google Play Console. See [FAQ](/features/billing-services/faq#why-does-initializestore-return-an-empty-product-list) for common initialization issues and solutions.
{% endhint %}
{% hint style="danger" %}
Products returned in `result.Products` may not match the order you configured in settings. Always use `GetProductWithId()` to retrieve specific products by ID, never by array index.
{% endhint %}
### Getting Product Details
After initialization, retrieve product information to display in your store:
```csharp
void DisplayProduct(string productId)
{
var product = BillingServices.GetProductWithId(productId);
if (product == null)
{
Debug.LogWarning($"Product {productId} not found");
return;
}
Debug.Log($"Title: {product.LocalizedTitle}");
Debug.Log($"Description: {product.LocalizedDescription}");
Debug.Log($"Price: {product.Price.LocalizedText}");
}
```
## Making Purchases
{% hint style="info" %}
Before implementing purchases, ensure you've completed the [platform store setup](/features/billing-services/setup/ios) for iOS and [Android configuration](/features/billing-services/setup/android). Products must be active in store consoles before they can be purchased.
{% endhint %}
### Purchase Flow
Call `BuyProduct()` to initiate a purchase. Essential Kit handles the platform purchase UI automatically.
```csharp
public void OnBuyButtonClicked(string productId)
{
if (!BillingServices.CanMakePayments())
{
Debug.LogWarning("Purchases not available");
return;
}
var product = BillingServices.GetProductWithId(productId);
if (product == null)
{
Debug.LogError($"Product {productId} not found");
return;
}
BillingServices.BuyProduct(product);
Debug.Log("Purchase initiated...");
}
```
{% hint style="warning" %}
`CanMakePayments()` returns false when purchases are restricted by parental controls or device settings. Always check this before showing purchase UI to avoid confusing users with buttons that won't work.
{% endhint %}
```csharp
void OnTransactionStateChanged(BillingServicesTransactionStateChangeResult result)
{
foreach (var transaction in result.Transactions)
{
Debug.Log($"Transaction {transaction.Product.Id}: {transaction.TransactionState} / {transaction.ReceiptVerificationState}");
if (transaction.TransactionState == BillingTransactionState.Purchased &&
transaction.ReceiptVerificationState == BillingReceiptVerificationState.Success)
{
Debug.Log($"Grant content for {transaction.Product.Id}");
}
else if (transaction.TransactionState == BillingTransactionState.Purchased)
{
Debug.LogWarning("Purchase verification failed; skip content grant");
}
else if (transaction.TransactionState == BillingTransactionState.Failed)
{
Debug.Log($"Purchase failed: {transaction.Error?.Description}");
}
else if (transaction.TransactionState == BillingTransactionState.Deferred)
{
Debug.Log("Purchase pending approval");
}
}
}
```
Always evaluate both `TransactionState` and `ReceiptVerificationState` before granting rewards. Essential Kit performs local verification automatically, and any remote verification workflow should update the verification state before finishing the transaction.
### Transaction States
During a purchase, the transaction goes through different states. Understanding these states helps you handle all scenarios properly:
| State | Meaning | Action |
| ----------- | --------------------------------------------------------- | ---------------------------------------------------- |
| `Purchased` | Transaction completed successfully - user paid | Grant content immediately, save player data |
| `Failed` | Transaction failed or user cancelled | Show error only if not user cancellation |
| `Deferred` | Waiting for approval (e.g., parental control, Ask to Buy) | Inform user to wait, transaction will complete later |
**Purchased vs Restored:**
Use the restore flow (`BillingServices.RestorePurchases`) to handle past purchases. Restored items come back as `Purchased` transactions in the restore callback; there is no `Restored` transaction state to check in code.
**Deferred State:** When "Ask to Buy" is enabled (common for child accounts), the purchase request goes to a parent for approval. The transaction enters `Deferred` state until approved or rejected. Handle this gracefully by informing the user their purchase is pending approval.
{% hint style="success" %}
Always save player data immediately after granting purchased content. If the app crashes before saving, the transaction is already finished and won't be delivered again.
{% endhint %}
### Checking Purchase Status
For non-consumables and subscriptions, check if already purchased:
```csharp
void CheckAdRemovalStatus()
{
if (BillingServices.IsProductPurchased("remove_ads"))
{
Debug.Log("User owns ad removal; disable ads here");
}
}
```
{% hint style="info" %}
`IsProductPurchased()` only works for non-consumable products and subscriptions. It always returns false for consumable products.
{% endhint %}
### Purchase Options
For advanced scenarios, use `BuyProductOptions`:
Essential Kit expects the optional `Tag` to be a UUID v4 string so it can be relayed safely through native stores. Generate it with `Guid.NewGuid()` if you need to correlate purchases on your backend.
```csharp
var options = new BuyProductOptions.Builder()
.SetQuantity(5) // iOS only, Android shows quantity selector
.SetTag(Guid.NewGuid().ToString()) // Must be UUID v4 when tagging purchases
.Build();
BillingServices.BuyProduct(product, options);
```
## Restoring Purchases
### What is Purchase Restoration?
Purchase restoration allows users to regain access to their non-consumable products and active subscriptions without paying again. This is essential when users:
* Install your game on a new device
* Reinstall the game after deleting it
* Switch to a different device (phone to tablet)
* Lose their game data
**Important:** Only non-consumable products and subscriptions can be restored. Consumable products (like coins or lives) are not restored because they're meant to be used up and purchased again.
### Why Restore is Required
Apple requires all apps with non-consumable products or subscriptions to provide a visible "Restore Purchases" button. This ensures users can always access content they've already paid for, even after reinstalling or switching devices.
### Implementation
Restore previous purchases for non-consumables and subscriptions. Required for iOS compliance.
```csharp
public void OnRestoreButtonClicked()
{
BillingServices.RestorePurchases(forceRefresh: true);
Debug.Log("Restoring purchases...");
}
void OnRestoreComplete(BillingServicesRestorePurchasesResult result, Error error)
{
if (error != null)
{
Debug.LogError($"Restore failed: {error.Description}");
return;
}
Debug.Log($"Restored {result.Transactions.Length} purchases");
foreach (var transaction in result.Transactions)
{
Debug.Log($"Grant content for restored product {transaction.Product.Id}");
}
}
```
{% hint style="warning" %}
iOS requires a "Restore Purchases" button for all apps with non-consumable products or subscriptions per App Store guidelines.
{% endhint %}
### Force Refresh vs Silent Restore
```csharp
// User-triggered restore button - may show login prompt on iOS
BillingServices.RestorePurchases(forceRefresh: true);
// Silent restore on app start - no login prompt
BillingServices.RestorePurchases(forceRefresh: false);
```
**forceRefresh: true** - Shows interactive login on iOS, contacts server for latest data. Use for explicit user "Restore" button.
**forceRefresh: false** - Silent restore without dialogs. Use for automatic restore on app startup.
## Subscriptions
Subscriptions work like other products but include additional time-based information.
### Subscription Product Information
```csharp
void DisplaySubscription(string productId)
{
var product = BillingServices.GetProductWithId(productId);
if (product.SubscriptionInfo != null)
{
Debug.Log($"Period: {product.SubscriptionInfo.Period}");
Debug.Log($"Title: {product.SubscriptionInfo.LocalizedGroupTitle}");
}
}
```
### Product Offers
After `InitializeStore()`, subscription products may include promotional offers:
```csharp
foreach (var product in result.Products)
{
var offers = product.Offers;
if (offers != null)
{
foreach (var offer in offers)
{
Debug.Log($"Offer: {offer.Id}, Category: {offer.Category}");
foreach (var phase in offer.PricingPhases)
{
Debug.Log($" Phase: {phase.Price}, Mode: {phase.PaymentMode}");
}
}
}
}
```
### Redeeming Offers
To apply an offer when purchasing:
```csharp
BillingProductOfferRedeemDetails GetOfferDetails(string offerId)
{
if (string.IsNullOrEmpty(offerId))
return null;
var builder = new BillingProductOfferRedeemDetails.Builder();
builder.SetAndroidPlatformProperties(offerId);
builder.SetIosPlatformProperties(offerId, keyId: null, nonce: null,
signature: null, timestamp: 0);
return builder.Build();
}
void PurchaseWithOffer(string productId, string offerId)
{
var product = BillingServices.GetProductWithId(productId);
var offerDetails = GetOfferDetails(offerId);
var options = new BuyProductOptions.Builder()
.SetOfferRedeemDetails(offerDetails)
.Build();
BillingServices.BuyProduct(product, options);
}
```
{% hint style="info" %}
Android subscription data has more constraints than iOS. Some subscription properties may not be available on Android.
{% endhint %}
## Core APIs Reference
| API | Purpose | Returns |
| ------------------------------------------------ | ------------------------------------------- | ------------------------------------- |
| `BillingServices.InitializeStore()` | Connect to store and fetch products | Triggers `OnInitializeStoreComplete` |
| `BillingServices.GetProductWithId(id)` | Get product by ID | `IBillingProduct` or null |
| `BillingServices.CanMakePayments()` | Check if purchases allowed | `bool` |
| `BillingServices.IsProductPurchased(id)` | Check ownership (non-consumables/subs only) | `bool` |
| `BillingServices.BuyProduct(product, options)` | Start purchase flow | Triggers `OnTransactionStateChange` |
| `BillingServices.RestorePurchases(forceRefresh)` | Restore previous purchases | Triggers `OnRestorePurchasesComplete` |
## Advanced: Manual Transaction Finishing
{% hint style="danger" %}
Only disable Auto Finish Transactions if you have a server-side verification system ready. Failing to finish transactions will cause them to reappear on every app launch, confusing users and potentially causing duplicate content grants.
{% endhint %}
### Understanding Transaction Finishing
When a purchase completes, the transaction enters a "pending" state in the platform store queue. The transaction must be "finished" (marked as complete) to remove it from this queue. If not finished, the platform will keep trying to deliver it on every app launch.
**Auto Finish Transactions (Default: Enabled):** Essential Kit automatically finishes transactions after firing the `OnTransactionStateChange` event. This works for most games and is the recommended approach.
**Manual Finishing (Advanced):** Only disable Auto Finish Transactions if you need to verify purchases with your own server before granting content. This is typically used for:
* Server-side receipt validation (recommended for Android apps with large user base)
* High-value purchases requiring fraud prevention
* Custom backend verification workflows
### When to Use Manual Finishing
Only needed when **Auto Finish Transactions** is disabled (server verification scenarios).
With manual processing, transactions remain in Essential Kit's internal queue until you call `FinishTransactions()`. Cache the `IBillingTransaction` you receive (either directly from the purchase callback or by calling `GetTransactions()`), send its receipt data to your backend, update `VerificationState`, and only then finish the transaction. Essential Kit handles local verification by default and provides these hooks so you can layer remote verification on top.
### Processing Pending Transactions
Define storage for pending transactions and forward receipts to your backend before finishing them:
```csharp
private readonly Dictionary _pendingTransactions = new();
void QueueTransactionForVerification(IBillingTransaction transaction)
{
if (_pendingTransactions.ContainsKey(transaction.Id))
return;
_pendingTransactions[transaction.Id] = transaction;
Debug.Log($"Queued {transaction.Product.Id} for server verification");
SendReceiptToServer(transaction);
}
void SendReceiptToServer(IBillingTransaction transaction)
{
Debug.Log($"Send receipt for {transaction.Product.Id} to your backend");
// Call OnServerVerificationComplete once you receive the verification result
}
```
```csharp
void ProcessPendingTransactions()
{
foreach (var transaction in BillingServices.GetTransactions())
{
if (transaction.TransactionState == BillingTransactionState.Purchased &&
(transaction.ReceiptVerificationState == BillingReceiptVerificationState.NotDetermined || transaction.ReceiptVerificationState == BillingReceiptVerificationState.Success)
{
QueueTransactionForVerification(transaction); // helper shown earlier
}
}
}
```
### Server-Side Receipt Verification
The following helper reuses the `_pendingTransactions` dictionary defined above.
Trigger a completion method once your backend confirms the receipt status. Update `VerificationState`, grant content when appropriate, then finish the transaction.
```csharp
void OnServerVerificationComplete(string transactionId, bool isValid)
{
if (!_pendingTransactions.TryGetValue(transactionId, out var transaction))
return;
transaction.ReceiptVerificationState = isValid
? BillingReceiptVerificationState.Success
: BillingReceiptVerificationState.Failed;
if (transaction.ReceiptVerificationState == BillingReceiptVerificationState.Success)
Debug.Log($"Grant content for {transaction.Product.Id}");
BillingServices.FinishTransactions(new[] { transaction });
_pendingTransactions.Remove(transactionId);
Debug.Log($"Finished transaction {transactionId} with verification {transaction.ReceiptVerificationState}");
}
```
### Receipt Data for Verification
Platform-specific receipt data available in `IBillingTransaction`:
**iOS:**
* `transaction.Receipt` - JWS representation for StoreKit2
**Android:**
* `transaction.Receipt` - Purchase token
* `transaction.RawData` - JSON containing signature and transaction data
```csharp
// Android receipt extraction
var rawData = (IDictionary)ExternalServiceProvider.JsonServiceProvider.FromJson(transaction.RawData);
var purchaseData = rawData["transaction"] as string;
var signature = rawData["signature"] as string;
```
{% hint style="info" %}
Need help implementing server-side verification? See the [FAQ](/features/billing-services/faq#how-do-i-implement-receipt-verification-with-appodeal) for an example integration with third-party verification services.
{% endhint %}
## Advanced: Runtime Product Configuration
Build a runtime catalog and pass it directly to `InitializeStore`:
```csharp
void ConfigureProductsAtRuntime()
{
var products = new[]
{
new BillingProductDefinition(
id: "coins_100",
platformId: "coins_100",
platformIdOverrides: new RuntimePlatformConstantSet(
ios: "com.yourgame.coins_100",
android: "coins_100"),
productType: BillingProductType.Consumable,
title: "100 Coins",
description: "Grants 100 soft currency coins")
};
BillingServices.InitializeStore(products);
}
```
**Use cases:**
* Server-driven product catalogs
* A/B testing product offerings
* Dynamic pricing experiments
* Season passes or time-limited products
{% hint style="info" %}
Use either `InitializeStore(productDefinitions)` for runtime catalogs or the Billing Settings product definitions in Essential Kit Settings → Billing Services → Products, but not both to avoid confusion. If no products are passed with the `InitializeStore` call, it falls back to the Settings configuration.
{% endhint %}
{% hint style="warning" %}
Runtime product configuration is for advanced scenarios only. For most games, configure products in Essential Kit Settings instead. See [Setup Guide](/features/billing-services/setup) for the standard configuration approach.
{% endhint %}
## Error Handling
Common error codes and recommended actions:
| Error Code | Trigger | Action |
| --------------------- | -------------------- | ------------------------------- |
| `PaymentCancelled` | User cancelled | No action needed |
| `PaymentNotAllowed` | Purchases disabled | Show message about restrictions |
| `ProductNotAvailable` | Product not in store | Verify product ID configuration |
| `NetworkNotAvailable` | No connection | Prompt to check connection |
| `Unknown` | Platform error | Log and retry |
{% hint style="success" %}
Ready to test your implementation? Head to the [Testing Guide](/features/billing-services/testing) to learn how to test purchases in sandbox environments before going live.
{% endhint %}
## Related Guides
* Demo scene: `Assets/Plugins/VoxelBusters/EssentialKit/Examples/Scenes/BillingServicesDemo.unity`
* Pair with **Network Services** to verify connectivity before purchases
* Use **Native UI** for custom purchase confirmation dialogs
# Testing
Use these guides to validate Billing Services end-to-end before release. Start with your platform quickstart, then follow the tips for common purchase edge cases.
{% content-ref url="/pages/-MK0RVq2hUJPscnlDy\_b" %}
[iOS](/features/billing-services/testing/testing-ios)
{% endcontent-ref %}
{% content-ref url="/pages/-MK0RavzT6VEc6WDlbyW" %}
[Android](/features/billing-services/testing/testing-android)
{% endcontent-ref %}
* Create sandbox/tester accounts that match your store configuration
* Verify consumables, non-consumables, and subscription renewals
* Exercise restore flows and interrupted purchases
* Repeat validation after changing product metadata in stores
{% hint style="info" %}
Need a working baseline? Run `Assets/Plugins/VoxelBusters/EssentialKit/Examples/Scenes/BillingServicesDemo.unity` to compare results against the sample implementation.
{% endhint %}
# iOS
Testing in-app purchases in Sandbox environment
### Overview
Use the Apple sandbox environment to test your implementation of in-app purchases using the StoreKit framework on devices using real product information from App Store Connect. Your development-signed apps uses the sandbox environment when you sign in to App Store using a Sandbox Apple ID.
To create a Sandbox Apple ID or test account in App Store Connect, see [Create a sandbox tester account](https://help.apple.com/app-store-connect/#/dev8b997bee1).
### Sign In to the App Store with Your Sandbox Apple ID
To run your app using your Sandbox Apple ID, do the following, depending on your device and operating system:
* For iOS 12 or later—Build and run your app from Xcode. The sandbox account in Settings appears after the first time you use the device to attempt a purchase on a development-signed app. Sign in using a Sandbox Apple ID. There’s no need to log out of the non-test Apple ID.
### Make an In-App Purchase
The first time you make a purchase in a development-signed app, the system prompts you to sign in to the App Store. Sign in using your Sandbox Apple ID to begin testing. Note that the text `[Environment: Sandbox]` appears as part of the prompt, indicating that you’ve connected to the test environment. If `[Environment: Sandbox]` doesn’t appear, you’re using the production environment. Make sure you’re running a development-signed build of your app; production-signed builds use the production environment.\\
Additionally you can test interrupted purchases. For more details, check the documentation [here](https://help.apple.com/app-store-connect/#/dev7e89e149d?sub=dev55ecec74d).
{% hint style="danger" %}
If you see **InitializeStore** call doesn't return any billing products in the callback, make sure you finish accepting all pending updated terms and conditions and also finish your **tax agreements** on iTunes connect.
{% endhint %}
### Test App Store Promoted In-App Products
To test App Store promoted in-app products, use the following URL format:
```
itms-services://?action=purchaseIntent&bundleId=BUNDLE_IDENTIFIER&productIdentifier=BILLING_PRODUCT_PLATFORM_IDENTIFIER
```
Replace [BUNDLE\_IDENTIFIER](#user-content-fn-1)[^1] with your app's bundle identifier and [BILLING\_PRODUCT\_PLATFORM\_IDENTIFIER](#user-content-fn-2)[^2] with your native billing product identifier. This will simulate the purchase intent for the promoted in-app product in your app.
Open the above url with your product details in Safari browser and it opens your app. Once after Billing Services InitializeStore call is successful, it prompts user to purchase the specified billing product.\\
[^1]: App's Bundle Identifier
[^2]: Native Product Identifier of the testing Billing Product (the one on Appstore dashboards)
# Android
Testing in-app purchases on Android platform
There are two ways to test in-app purchases on Android.
1. Using test user account
2. Using license tester (Application licensing) - Recommended
### Testing with Tester user account
Once after uploading your apk/aab with the right keystore to one of the alpha/beta tracks, you need to
1. **Publish** the app in those testing tracks
2. Get the **testing opt-in link** for the track
3. Pass the link to your tester'e email
4. Let your tester click on "**Become a Tester**" button and download the app from store
User purchases in test tracks result in actual charges to user accounts unless the user is also a license tester. However, the refund happens in 14 days from the date of purchase.
{% hint style="success" %}
If you don't want to always upload the app to play store and download it from there to test it, you can side-load the app directly from unity if you maintain the same version code, app signing and package name similar to the one on test track. This will be handy for developers before publishing the app to QA team.
{% endhint %}
### Testing with Application licensing (license tester)
To set up [application licensing](https://developer.android.com/google/play/licensing/overview.html), start by adding your list of tester's Gmail addresses in the Play Console.
1. Go to your [Play Console](https://play.google.com/apps/publish/).
2. Select **Settings**  > **Monetisation > License Testing.**
3. Under "License Testing," add your testers' Gmail addresses by creating a new email list or add ot an existing one and save.
Using license testers provide the following benefits:
* Ordinarily, the Google Play Billing Library is blocked for apps that aren't signed and uploaded to Google Play. License testers can bypass this check, meaning you can sideload apps for testing, even for apps using debug builds with debug signatures without the need to upload to the new version of your app. Note that the package name must match that of the app that is configured for Google Play, and the Google account must be a license tester for the Google Play Console account.
* License testers have access to test payment methods that avoid charging the testers real money for purchases. You can also use test payment methods to simulate certain situations, such as when a payment is declined. Figure 1 shows these test forms of payment as they appear within the purchase flow.

Here are some additional details about the test purchase process:
* Test purchases use the same app purchase flow used by actual purchases.
* Taxes are not computed for test purchases.
* Google Play indicates a test purchase by displaying a notice across the center of the purchase dialog.
You can confirm the account that is making a purchase by expanding the purchase dialog. Note the following:
* Test accounts must be on the tester's Android device.
* If the device has more than one account, the purchase is made with the account that downloaded the app.
* If none of the accounts have downloaded the app, the purchase is made with the first account.
Before distributing your app, you can make use of Google Play [test tracks](https://support.google.com/googleplay/android-developer/answer/3131213) to perform additional validation. For example, you can leverage test tracks to have your QA team qualify a new release.
With test tracks, users can install your app from Google Play and test a version of your app that is not yet publicly available. Users can make real purchases using any of their payment methods in Google Play.**Note:** User purchases in test tracks result in actual charges to user accounts unless the user is also a license tester.
To test your Google Play Billing Library integration using test tracks, do the following:
1. Publish your app to a [test track](https://support.google.com/googleplay/android-developer/answer/3131213). Note that after you publish an app to a testing track, it can take a few hours for the app to be available for testers.
2. Ensure each tester [opts-in to your app's test](https://support.google.com/googleplay/android-developer/answer/3131213). On your test's opt-in URL, your testers see an explanation of what it means to be a tester along with a link to opt-in.
# FAQ
{% hint style="success" %}
If you haven't tried [**Essential Kit**](https://link.voxelbusters.com/essential-kit) yet, now's the perfect time! Our plugin simplifies **in-app purchases** with support for **Consumables, Non-Consumables, Subscriptions (with multiple offers), and Store Promotions**—all through a **unified API** for **iOS and Android**.
And the best part? **No analytics, no tracking—just a privacy-focused solution built for game developers.** 🚀 [Give it a try today](https://link.voxelbusters.com/essential-kit)!
{% endhint %}
## Why does InitializeStore return an empty product list?
This usually happens for two reasons:
* No billing products configured in Essential Kit Settings
* Platform-specific store issues
### iOS Issues
| Issue | Solution |
| ------------------------------------------------------------- | ------------------------------------------------------ |
| Pending Agreements, Tax, or Banking information | Complete all required information in App Store Connect |
| Latest Apple Developer Program License Agreement not accepted | Accept the agreement in App Store Connect |
| Paid Agreements not in Active status | Ensure status shows as "Active" |
### Android Issues
| Issue | Solution |
| ---------------------------------- | ------------------------------------------------------------- |
| Wrong package name or version code | Ensure APK package name and version match Google Play Console |
| Tester account not opted in | Use the opt-in testing track link to become a valid tester |
| App not uploaded to testing track | Upload signed APK/AAB to Internal or Closed Testing |
## Why does InitializeStore return products out of order?
Products can be marked as inactive or deleted after your app is released. If we ordered products by array index, deleting a product in the store console would break older app versions.
**Recommended approach:**
```csharp
// Always use GetProductWithId, never array index
var product = BillingServices.GetProductWithId("coins_100");
```
This ensures your code works regardless of product ordering changes.
## On Android, why do purchases from one account appear when logged in with a different account?
This is standard Android behavior. Purchases on Android are linked to the account that **installs the app**, not the account logged into the Google Play app.
To restore a different account's purchases, uninstall and reinstall the app while logged in with the new account.
## Are testers charged for testing?
**iOS:**
* Sandbox testers: Never charged
* TestFlight users: IAP offered free by default, no sandbox account needed
**Android:**
* Normal testers (opt-in via test track): Charged but refunded within 14 days
* License testers: Never charged
## How do I implement receipt verification with Appodeal?
```csharp
IBillingTransaction transaction; // From OnTransactionStateChange
var rawData = (IDictionary)ExternalServiceProvider.JsonServiceProvider.FromJson(transaction.RawData);
var originalTransaction = rawData?["transaction"] as string;
var signature = rawData?["signature"] as string;
#if UNITY_ANDROID
var purchase = new PlayStoreInAppPurchase.Builder(
transaction.Product.Type == BillingProductType.Subscription
? PlayStorePurchaseType.Subs
: PlayStorePurchaseType.InApp)
.WithPurchaseTimestamp(new DateTimeOffset(transaction.DateUTC).ToUnixTimeSeconds())
.WithPurchaseToken(transaction.Receipt)
.WithPurchaseData(originalTransaction)
.WithPublicKey(BillingServices.UnitySettings.AndroidProperties.PublicKey)
.WithSignature(signature)
.WithCurrency(transaction.Product.Price.Code)
.WithOrderId(transaction.Id)
.WithPrice($"{transaction.Product.Price.Value}")
.WithSku(transaction.Product.PlatformId)
.Build();
Appodeal.ValidatePlayStoreInAppPurchase(purchase, this);
#elif UNITY_IOS
var purchaseType = transaction.Product.Type == BillingProductType.Subscription
? AppStorePurchaseType.AutoRenewableSubscription
: transaction.Product.Type == BillingProductType.Consumable
? AppStorePurchaseType.Consumable
: AppStorePurchaseType.NonConsumable;
var purchase = new AppStoreInAppPurchase.Builder(purchaseType)
.WithTransactionId(transaction.Id)
.WithProductId(transaction.Product.PlatformId)
.WithCurrency(transaction.Product.Price.Code)
.WithPrice($"{transaction.Product.Price.Value}")
.Build();
Appodeal.ValidateAppStoreInAppPurchase(purchase, this);
#endif
```
## Why does IsProductPurchased always return false for consumables?
This is expected behavior. `IsProductPurchased()` only works for **non-consumable products and subscriptions**. Consumable products can be purchased multiple times, so there's no permanent ownership state to check.
## When should I disable Auto Finish Transactions?
Only disable Auto Finish Transactions if you need server-side receipt verification, typically for:
* Android apps with significant user base (Google recommends server verification)
* High-value purchases requiring additional fraud prevention
* Custom verification flows with your backend
For most games, keep it enabled. iOS uses StoreKit2 with built-in local verification.
## My purchases work in sandbox but fail in production. Why?
Common causes:
* Product not approved or active in production store
* App Store Connect / Google Play Console agreements not signed
* Tax and banking information incomplete
* Product ID mismatch between sandbox and production configurations
Verify all store setup steps are complete and products are live in production.
## How do I handle multiple virtual currencies?
Use the `Payouts` property in product definitions:
```csharp
void ConfigureAndGrantMultiCurrencyProduct()
{
// In Essential Kit Settings or runtime configuration
var productDef = new BillingProductDefinition(
id: "mega_pack",
platformId: "mega_pack",
productType: BillingProductType.Consumable,
payouts: new[]
{
new BillingProductPayoutDefinition(BillingProductPayoutCategory.Currency, subtype: "coins", quantity: 500),
new BillingProductPayoutDefinition(BillingProductPayoutCategory.Currency, subtype: "gems", quantity: 100),
});
// In your grant content code
var product = BillingServices.GetProductWithId("mega_pack");
foreach (var payout in product.Payouts)
{
switch (payout.Variant)
{
case "coins": PlayerData.AddCoins(payout.Quantity); break;
case "gems": PlayerData.AddGems(payout.Quantity); break;
}
}
}
```
## What's the difference between forceRefresh true and false in RestorePurchases?
**forceRefresh: true**
* Shows interactive login dialog on iOS
* Contacts server for latest purchase data
* Use for user-triggered "Restore Purchases" button
**forceRefresh: false**
* Silent restore without dialogs
* Uses cached data
* Use for automatic restore on app startup
## Where can I confirm plugin behavior versus my implementation?
Run the demo scene at `Assets/Plugins/VoxelBusters/EssentialKit/Examples/Scenes/BillingServicesDemo.unity`.
If the sample works but your scene does not, compare:
* Product ID configuration in settings
* Event subscription timing (subscribe in `OnEnable`, unsubscribe in `OnDisable`)
* Error handling in transaction callbacks
* Transaction finishing logic if Auto Finish is disabled
## How do I implement season passes or time-limited products?
Use non-consumable products with custom time tracking:
```csharp
void CheckSeasonPassAccess()
{
string currentSeasonId = "season_pass_2024_q1";
if (BillingServices.IsProductPurchased(currentSeasonId))
{
if (IsSeasonActive(currentSeasonId))
{
Debug.Log("Grant season pass rewards to the player.");
}
}
}
bool IsSeasonActive(string seasonId)
{
DateTime now = DateTime.Now;
DateTime seasonStart = new DateTime(2024, 1, 1);
DateTime seasonEnd = new DateTime(2024, 3, 31);
return now >= seasonStart && now <= seasonEnd;
}
```
Each season should have a unique product ID to prevent conflicts.
## Can I change product prices after release?
Yes. Change prices in App Store Connect and Google Play Console at any time. New prices appear in `product.Price.LocalizedText` after `InitializeStore()` completes. Players who already purchased keep their access at the old price.
## My transactions stay in pending state. What's wrong?
If you disabled Auto Finish Transactions, you must manually call:
```csharp
BillingServices.FinishTransactions(new[] { transaction });
```
Call this after granting purchased content. Transactions in `Purchasing` or `Deferred` state cannot be finished until they complete.
## How do I test subscription renewals and expirations?
**iOS sandbox:**
* Subscriptions renew every few minutes instead of monthly/yearly
* Fast testing of renewal flows
**Android testing:**
* Use Google Play's test card for subscription testing
* Inspect the transaction's `SubscriptionStatus` when processing subscription purchases
Note: Subscription properties may have limited data on Android.
## How does Essential Kit track Non-Consumable/Subscription purchases?
For details on how Essential Kit maintains purchase states across platforms, see:
{% content-ref url="/pages/vAvwfkZ395Lmc7xG2A6V" %}
[How Non-Consumable and Subscription product statuses are maintained?](/features/billing-services/notes/how-non-consumable-and-subscription-product-statuses-are-maintained)
{% endcontent-ref %}
# Notes
{% content-ref url="/pages/vAvwfkZ395Lmc7xG2A6V" %}
[How Non-Consumable and Subscription product statuses are maintained?](/features/billing-services/notes/how-non-consumable-and-subscription-product-statuses-are-maintained)
{% endcontent-ref %}
# How Non-Consumable and Subscription product statuses are maintained?
### Overview
Essential Kit simplifies in-app purchase handling in Unity by abstracting platform-specific billing APIs into a consistent and efficient interface. One key aspect of this system is how non-consumable purchases are tracked and verified during runtime.
This document explains how Essential Kit manages the state of non-consumable products using an internal runtime cache, how this behavior differs across platforms, and what developers should consider in edge cases such as offline usage.
***
### Internal Purchase Tracking Logic
All caching, querying, and synchronization of purchase data is handled **internally by Essential Kit**. Developers do **not** need to manage or manually query the platform-specific billing services.
When calling `BillingServices.IsProductPurchased`, Essential Kit automatically uses the appropriate mechanism to return the current purchase state:
* On **Android**, it uses a **runtime memory cache** populated during store initialization.
* On **iOS**, it queries **StoreKit directly** each time to check the current transaction list.
These implementation details are fully abstracted away. As a developer, you only need to be aware of how `BillingServices.IsProductPurchased` behaves under different runtime conditions.
***
### Edge Case: Offline Behavior
If the device is **offline**, platform behavior may vary:
* On Android, Google Play may return cached purchase data during store initialization, allowing Essential Kit to build its internal cache.
* On iOS, since there is no runtime cache, and StoreKit relies on native transaction history, results may still be accessible if the platform caches transactions locally.
However, in rare cases where **no cached data is available**, and the device is offline, Essential Kit may **not be able to confirm a previous purchase**. As a result, `BillingServices.IsProductPurchased` may return `false`, even for products the user already owns.
***
### Developer Note
> **Important:**\
> All purchase tracking and cache management is handled **internally** by Essential Kit.\
> Developers should be aware that **`BillingServices.IsProductPurchased` may return `false` when the device is offline**, regardless of the platform.\
> To ensure a smooth user experience in such scenarios, developers are encouraged to implement fallback strategies as outlined below.
***
### Recommendations for Handling Offline and Edge Cases
To improve reliability and user experience, consider the following:
1. **Delay access to gated content** until the store is successfully initialized.
2. **Display fallback UI or messaging** when purchase validation cannot be confirmed due to lack of connectivity.
3. Optionally, **persist a lightweight list** of previously validated purchases on your side and reconcile once the device is back online.
4. Design your UI to handle temporary unknown purchase states (e.g., loading indicators or retry options).
***
### Summary
* Essential Kit handles purchase tracking and runtime caching **automatically**.
* On Android, a runtime memory cache is used. On iOS, the StoreKit transaction list is queried directly.
* Developers do not need to manage platform-specific logic.
* In rare offline cases, `BillingServices.IsProductPurchased` may return `false` for valid purchases.
* Implementing fallback strategies ensures a consistent and user-friendly experience.
# PlayMaker
Build an in-app store UI, purchase products, and restore eligible purchases using PlayMaker custom actions.
## Key pattern (listeners)
* Register `BillingServicesOnTransactionStateChange` in a state that stays active **before** calling `BillingServicesBuyProduct`. This listener is what fires `purchasingEvent` / `purchasedEvent` / `failedEvent` / `deferredEvent` and caches transactions for `BillingServicesGetTransactionInfo`.
* Register `BillingServicesOnRestorePurchasesComplete` in a state that stays active **before** calling `BillingServicesRestorePurchases`. This listener is what fires completion events and caches restore results for extractor actions.
* After `purchasedEvent`, use `BillingServicesGetTransactionInfo` and require `receiptVerificationState == Success` before granting content. The plugin performs local verification by default, so `Purchased` without successful verification should be treated as invalid.
## Actions (high level)
* Store setup: `BillingServicesInitializeStore`, `BillingServicesGetInitializeStoreSuccessResult`, `BillingServicesGetInitializeStoreError`, `BillingServicesCanMakePayments`
* Product listing/UI: `BillingServicesGetStoreProductInfo`, `BillingServicesIsProductPurchased`
* Purchase flow: `BillingServicesBuyProduct`, `BillingServicesGetBuyProductError`, `BillingServicesOnTransactionStateChange`, `BillingServicesGetTransactionInfo`
* Restore flow: `BillingServicesRestorePurchases`, `BillingServicesOnRestorePurchasesComplete`, `BillingServicesGetRestorePurchasesSuccessResult`, `BillingServicesGetRestorePurchasesError`, `BillingServicesGetRestoredTransactionInfo`
* Manual completion / verification: `BillingServicesGetTransactions`, `BillingServicesSetReceiptVerificationState`, `BillingServicesFinishTransactions`
## AutoFinishTransactions
* **ON (default):** simplest flow. Grant content only when `purchasedEvent` has `receiptVerificationState == Success`. No manual finishing needed.
* **OFF (advanced):** required for server-side receipt verification. Verify `receipt` from `BillingServicesGetTransactionInfo`, then call `BillingServicesSetReceiptVerificationState(transactionId, Success/Failed)` and finish with `BillingServicesFinishTransactions`.
## Use cases
Start here: `use-cases/README.md`
# Use Cases
Quick-start guides showing minimal implementations of in-app purchase features using PlayMaker custom actions.
## Important (listener actions)
Event listener actions like `BillingServicesOnTransactionStateChange` and `BillingServicesOnRestorePurchasesComplete` should be added to a state that stays active and registered **before** you start the corresponding flow (buy/restore). The “trigger” actions only dispatch requests; results are delivered via these listeners.
## Available Use Cases
### 1. [Build a Simple Store UI](/features/billing-services/playmaker/use-cases/use-case-1-build-store-ui)
* **What it does:** List products with localized prices and gate owned non-consumables
* **Complexity:** Basic
* **Actions:** 4 (InitializeStore, GetInitializeStoreSuccessResult, GetStoreProductInfo, IsProductPurchased)
* **Best for:** Store screens, premium unlock UI, product listing
***
### 2. [Simple Product Purchase](/features/billing-services/playmaker/use-cases/use-case-2-simple-purchase)
* **What it does:** Complete purchase flow with automatic transaction finishing and local verification gating
* **Complexity:** Basic
* **Actions:** 5 (InitializeStore, CanMakePayments, BuyProduct, OnTransactionStateChange, GetTransactionInfo)
* **Best for:** Basic IAP implementation, non-consumables, simple consumables
***
### 3. [Restore Previous Purchases](/features/billing-services/playmaker/use-cases/use-case-3-restore-purchases)
* **What it does:** Restore non-consumable and subscription purchases on reinstall, but only grant verified transactions
* **Complexity:** Intermediate
* **Actions:** 6 (InitializeStore, RestorePurchases, OnRestorePurchasesComplete, GetRestorePurchasesSuccessResult, GetRestoredTransactionInfo, FinishTransactions)
* **Best for:** Account recovery, device transfers, non-consumables
***
### 4. [Purchase with Manual Verification](/features/billing-services/playmaker/use-cases/use-case-4-manual-verification)
* **What it does:** Purchase with server-side receipt verification before granting content
* **Complexity:** Advanced
* **Actions:** 6 (InitializeStore, BuyProduct, OnTransactionStateChange, GetTransactionInfo, SetReceiptVerificationState, FinishTransactions)
* **Best for:** Fraud prevention, high-value purchases, consumable currencies
***
### 5. [Process Pending Transactions (AutoFinishTransactions OFF)](/features/billing-services/playmaker/use-cases/use-case-5-process-pending-transactions)
* **What it does:** Recover and finish pending transactions after a restart/network retry (manual verification setups)
* **Complexity:** Advanced
* **Actions:** 5 (InitializeStore, GetTransactions, GetTransactionInfo, SetReceiptVerificationState, FinishTransactions)
* **Best for:** AutoFinishTransactions OFF, external receipt verification, “stuck in queue” recovery
***
## Choosing the Right Use Case
**Start Here:**
* Building your store screen first? → **Use Case 1** (Store UI)
* First-time IAP setup? → **Use Case 2** (Simple Purchase)
* Supporting account recovery? → **Use Case 3** (Restore Purchases)
* Need security/fraud prevention? → **Use Case 4** (Manual Verification)
* AutoFinishTransactions OFF recovery? → **Use Case 5** (Process Pending)
## Quick Action Reference
| Action | Purpose | Used In |
| ----------------------------------------------- | --------------------------------------------------------- | ----------------- |
| BillingServicesInitializeStore | Load products, start billing | All use cases |
| BillingServicesGetInitializeStoreSuccessResult | Read productCount/invalid IDs after init success | (Optional) |
| BillingServicesGetInitializeStoreError | Read cached init error after failure | Use Case 2 |
| BillingServicesCanMakePayments | Check purchase restrictions | Use Case 2 |
| BillingServicesBuyProduct | Start purchase flow | Use Cases 2, 4 |
| BillingServicesGetBuyProductError | Read cached buy error after failure | Use Cases 2, 4 |
| BillingServicesOnTransactionStateChange | Monitor purchase state | Use Cases 2, 4 |
| BillingServicesGetTransactionInfo | Read receipt, verification state, and transaction details | Use Cases 2, 4, 5 |
| BillingServicesSetReceiptVerificationState | Set verification result from server | Use Cases 4, 5 |
| BillingServicesFinishTransactions | Finish transactions | Use Cases 3, 4, 5 |
| BillingServicesGetTransactions | Get pending transaction queue | Use Case 5 |
| BillingServicesRestorePurchases | Restore previous purchases | Use Case 3 |
| BillingServicesOnRestorePurchasesComplete | Listen for restore completion | Use Case 3 |
| BillingServicesGetRestorePurchasesSuccessResult | Get restore count | Use Case 3 |
| BillingServicesGetRestorePurchasesError | Read cached restore error after failure | Use Case 3 |
| BillingServicesGetRestoredTransactionInfo | Get restored product info | Use Case 3 |
| BillingServicesGetStoreProductInfo | Read localized title/price for UI | Use Case 1 |
| BillingServicesIsProductPurchased | Gate non-consumable “Buy” buttons | Use Case 1 |
## Transaction States
**Purchasing**: User is in payment flow **Purchased**: Payment reached completed state, but grant content only if `receiptVerificationState == Success` **Failed**: Purchase failed or cancelled **Deferred**: Awaiting approval (parental controls)
## AutoFinishTransactions Setting
**Enabled (Default):**
* Transactions finish automatically after Purchased state
* Simpler implementation
* Use for basic purchases
* Still require `receiptVerificationState == Success` before granting content
**Disabled (Advanced):**
* Manual control over transaction completion
* Required for receipt verification
* Use for fraud prevention
## Product Types
**Non-Consumable:**
* One-time purchases (premium unlock, level packs)
* Can be restored
* Example: "Remove Ads"
**Consumable:**
* Can be purchased multiple times (coins, gems)
* Cannot be restored
* Example: "100 Coins"
**Subscription:**
* Recurring payments
* Can be restored
* Auto-renewing
## Platform Setup Requirements
**iOS:**
* Products configured in App Store Connect
* In-App Purchase capability enabled
* Test with Sandbox accounts
**Android:**
* Products in Google Play Console
* Billing library integrated
* Test with license testers
## Related Documentation
* [**README.md**](/features/billing-services/playmaker) - Actions + key patterns + use-cases
# Build A Simple Store UI
## Goal
List configured products with localized price text, and gate “Buy” buttons for already-owned non-consumables.
## Actions Required
| Action | Purpose |
| ---------------------------------------------- | ------------------------------------------------------- |
| BillingServicesInitializeStore | Fetch products from the store |
| BillingServicesGetInitializeStoreSuccessResult | Get `productCount` for looping |
| BillingServicesGetStoreProductInfo | Read localized title/description/price for each product |
| BillingServicesIsProductPurchased | Disable “Buy” for owned non-consumables |
## Variables Needed
* productCount (Int)
* productIndex (Int)
* productId (String)
* localizedTitle (String)
* priceLocalizedText (String)
* isPurchased (Bool)
## Implementation Steps
### 1. InitializeStore (On App Start)
Run `BillingServicesInitializeStore` and wait for `successEvent`.
### 2. GetProductCount
Run `BillingServicesGetInitializeStoreSuccessResult`:
* `productCount` → productCount
### 3. Loop Products
Loop `productIndex` from `0` to `productCount - 1`.
### 4. Read Product Info
Run `BillingServicesGetStoreProductInfo`:
* `productIndex` → productIndex
* Outputs: `productId`, `localizedTitle`, `priceLocalizedText`, `productType`, etc.
Use `localizedTitle` + `priceLocalizedText` to render your UI row.
### 5. Gate Non-Consumable Purchases
If `productType` is non-consumable:
* Run `BillingServicesIsProductPurchased(productId)` to set `isPurchased`.
* If `isPurchased == true`: show “Owned” / disable the Buy button.
## Notes
* `BillingServicesIsProductPurchased` is for non-consumables; don’t use it for consumables.
* After a successful purchase event, refresh your UI row (re-run the check for that `productId`).
# Simple Product Purchase
## Goal
Initialize the billing store and allow users to purchase a product (non-consumable or consumable) with automatic transaction completion.
## Actions Required
| Action | Purpose |
| --------------------------------------- | ---------------------------------------------------------------------- |
| BillingServicesInitializeStore | Load product catalog and initialize billing |
| BillingServicesGetInitializeStoreError | Read cached init error after failure (optional) |
| BillingServicesCanMakePayments | Check if user can make purchases |
| BillingServicesBuyProduct | Initiate purchase flow |
| BillingServicesGetBuyProductError | Read cached buy error after failure (optional) |
| BillingServicesOnTransactionStateChange | Listen for purchase state changes (persistent) |
| BillingServicesGetTransactionInfo | Read transaction state, verification state, and details after an event |
## Variables Needed
* productId (String) = "premium\_unlock" or "coins\_100"
* canMakePurchase (Bool)
* transactionId (String)
* receiptVerificationState (Enum: BillingReceiptVerificationState)
## Implementation Steps
### 0. State: RegisterTransactionListener (Persistent)
**Action:** BillingServicesOnTransactionStateChange
* Keep this state active (for example in your bootstrap scene or a DontDestroyOnLoad FSM).
* This action is what actually fires purchase lifecycle events (`purchasingEvent`, `purchasedEvent`, `failedEvent`, `deferredEvent`) and caches transactions for `BillingServicesGetTransactionInfo`.
### 1. State: InitializeStore (On App Startup)
**Action:** BillingServicesInitializeStore
* **Events:**
* successEvent → CheckPaymentCapability
* failureEvent → ShowError (billing not available)
**Note:** This caches all configured products from Essential Kit settings. **Optional:** On `failureEvent`, call `BillingServicesGetInitializeStoreError` to read `errorCode` + `errorDescription`.
### 2. State: CheckPaymentCapability
**Action:** BillingServicesCanMakePayments
* **Outputs:**
* result → canMakePurchase variable
* **Transition:**
* If canMakePurchase = true → ShowPurchaseUI
* If canMakePurchase = false → ShowRestrictionMessage
### 3. State: ShowPurchaseUI
Display purchase button. When user taps "Buy":
* Go to BuyProduct state
### 4. State: BuyProduct
**Action:** BillingServicesBuyProduct
* **Inputs:**
* productId: productId
* quantity: 1
* **Events:**
* successEvent → WaitForTransactionEvents
* failureEvent → ShowBuyError
**Important:** `BillingServicesBuyProduct` only dispatches the purchase request. The actual purchase outcome comes from your already-registered `BillingServicesOnTransactionStateChange` listener.
### 5. State: ShowBuyError (immediately on failure)
Call `BillingServicesGetBuyProductError` as soon as you enter this state.
* Enter this state from:
* `BillingServicesBuyProduct.failureEvent` (dispatch failed: invalid input/store not ready/exception)
* `BillingServicesOnTransactionStateChange.failedEvent` (store purchase failed/cancelled)
### 6. State: WaitForTransactionEvents
No action needed here (optional). Your `BillingServicesOnTransactionStateChange` state will fire:
* `purchasingEvent` → show processing UI
* `purchasedEvent` → read transaction info, then grant content only if `receiptVerificationState == Success`
* `failedEvent` → go to `ShowBuyError`
* `deferredEvent` → show pending/deferred UI
### 7. Read Transaction Details
After `purchasedEvent` or `failedEvent`, call `BillingServicesGetTransactionInfo` with `transactionIndex = 0` to read details.
* Read `transactionId`, `receipt`, and `receiptVerificationState`.
* Grant content only when:
* `transactionState == Purchased`
* `receiptVerificationState == Success`
* If `purchasedEvent` fires but `receiptVerificationState != Success`, treat the transaction as invalid and do not grant content.
**Important:** `BillingReceiptVerificationState` is the result of local verification performed by the plugin by default. If verification fails, the transaction should not be treated as valid even if the state is `Purchased`.
## Purchase Flow
```
RegisterTransactionListener (keep active)
InitializeStore
└─ CheckPaymentCapability
└─ BuyProduct
└─ (events come from BillingServicesOnTransactionStateChange)
├─ purchasingEvent → Show Processing
├─ purchasedEvent → GetTransactionInfo → Check receiptVerificationState
│ ├─ Success → Grant Content
│ └─ Failed/NotDetermined → Do Not Grant
├─ failedEvent → ShowBuyError (then BillingServicesGetBuyProductError)
└─ deferredEvent → Show Pending
```
## Common Issues
* **"Cannot connect to store"**: Check internet connection and platform billing setup
* **Purchase Stuck**: Ensure OnTransactionStateChange listener is active before calling BuyProduct
* **Test Purchases**: Use sandbox/test accounts for development
* **AutoFinishTransactions**: If enabled in settings, transactions complete automatically after Purchased state
* **Purchased but verification failed**: Do not grant content. `receiptVerificationState` is the plugin's local validation result and must be `Success`
## Platform Requirements
**iOS:**
* In-app purchases configured in App Store Connect
* Sandbox tester account for testing
**Android:**
* Products configured in Google Play Console
* Use license testing for development builds (and make sure you upload tleast once to play store after enabling billing featute)
## Performance Tip
Initialize store once at app startup and keep products cached. Don't reinitialize on every purchase.
# Restore Previous Purchases
## Goal
Restore non-consumables and subscriptions (for example after reinstall or on a new device).
## Actions Required
| Action | Purpose |
| ----------------------------------------------- | -------------------------------------------------- |
| BillingServicesInitializeStore | Load product catalog |
| BillingServicesRestorePurchases | Trigger restore process |
| BillingServicesOnRestorePurchasesComplete | Listen for restore completion |
| BillingServicesGetRestorePurchasesSuccessResult | Get restored count |
| BillingServicesGetRestoredTransactionInfo | Read restored transaction details |
| BillingServicesFinishTransactions | Finish restored transactions |
| BillingServicesGetRestorePurchasesError | Read cached restore error after failure (optional) |
## Variables Needed
* restoredCount (Int)
* transactionIndex (Int)
* productId (String)
* receiptVerificationState (Enum: BillingReceiptVerificationState)
## Implementation Steps
### 1. InitializeStore
Run `BillingServicesInitializeStore` and wait for `successEvent`.
### 2. RegisterRestoreListener (persistent)
Run `BillingServicesOnRestorePurchasesComplete` in a state that stays active (for example in your settings scene while the restore flow runs).
* This action is what fires the completion events and caches data for the extractor actions.
### 3. TriggerRestore (user taps “Restore Purchases”)
Run `BillingServicesRestorePurchases` (`forceRefresh` optional).
### 4. Wait for completion
Your `BillingServicesOnRestorePurchasesComplete` listener will fire:
* `successEvent` → `GetRestoreResult`
* `failureEvent` → (Optional) `BillingServicesGetRestorePurchasesError`
### 5. GetRestoreResult
Run `BillingServicesGetRestorePurchasesSuccessResult` → `restoredCount`.
### 6. Loop restored items
Loop `transactionIndex = 0..restoredCount-1`:
* `BillingServicesGetRestoredTransactionInfo(transactionIndex)` → `productId`, `transactionState`, `receiptVerificationState`
* Grant content only when:
* `transactionState == Purchased`
* `receiptVerificationState == Success`
* If verification failed, do not restore the entitlement
### 7. FinishRestore
Run `BillingServicesFinishTransactions` (either finish all cached/pending, or only the restored IDs you collected).
## Notes
* Consumables are not restorable (by design).
* Prefer showing restore from a Settings screen rather than auto-restoring every launch.
* Restored purchases should still pass local verification. A restored transaction that is not `ReceiptVerificationState.Success` should not grant content.
# Purchase with Manual Verification
## Goal
Purchase a product with manual receipt verification for fraud prevention before granting content.
## Actions Required
| Action | Purpose |
| ------------------------------------------ | -------------------------------------------- |
| BillingServicesInitializeStore | Initialize billing system |
| BillingServicesBuyProduct | Initiate purchase with user tag |
| BillingServicesOnTransactionStateChange | Monitor purchase state |
| BillingServicesGetTransactionInfo | Extract transaction details |
| BillingServicesSetReceiptVerificationState | Mark receipt as verified |
| BillingServicesFinishTransactions | Finish the transaction(s) after verification |
| BillingServicesGetBuyProductError | Read cached error after failure (optional) |
## Variables Needed
* productId (String) = "coins\_500"
* userId (String) - For fraud tracking
* transactionId (String)
* receipt (String)
* receiptVerificationState (Enum: BillingReceiptVerificationState)
## Implementation Steps
### 1. State: Initialize and Purchase
Same as the simple purchase flow (InitializeStore → BuyProduct), but you must keep transactions pending until your server verifies the receipt.
**Important:** Register `BillingServicesOnTransactionStateChange` in a persistent state **before** calling `BillingServicesBuyProduct`. Purchase lifecycle events come from the listener (not from BuyProduct).
**BuyProduct with tag:**
* productId: productId
* quantity: 1
* **tag: userId** (links purchase to user account)
### 2. State: ListenForPurchase
**Action:** BillingServicesOnTransactionStateChange
* Monitor for Purchased state
* When Purchased → GetTransactionDetails
* Do not grant content directly from `purchasedEvent`
### 3. State: GetTransactionDetails
**Action:** BillingServicesGetTransactionInfo
* **Inputs:**
* transactionIndex: 0 (most recent)
* **Outputs:**
* receipt → receipt
* receiptVerificationState → receiptVerificationState
* transactionId → transactionId
**Transition:**
* If `receiptVerificationState != Success` → HandleFraud / InvalidTransaction
* If `receiptVerificationState == Success` → Go to VerifyWithServer
**Important:** `receiptVerificationState` is the plugin's local verification result. If local verification fails, the transaction is not valid even if the transaction state is `Purchased`.
### 4. State: VerifyWithServer
Send `receipt` to your backend server:
* Endpoint: `/verify-receipt`
* Server validates with Apple/Google
* Returns: success or fraud
**On Success:** Go to MarkVerified **On Failure:** Go to HandleFraud
### 5. State: MarkVerified
**Action:** BillingServicesSetReceiptVerificationState
* **Inputs:**
* transactionId: transactionId
* verificationState: Success
* **Transition:** Go to GrantContent
### 6. State: GrantContent
Add coins/currency to user account
* Go to FinishTransaction
### 7. State: FinishTransaction
**Action:** BillingServicesFinishTransactions
* **Inputs:** set `transactionIds` array to include `transactionId` (or leave empty to finish all cached/pending transactions)
## Verification Flow
```
Purchase → Purchased State
└─ GetTransactionInfo
└─ Check Local receiptVerificationState
├─ Failed/NotDetermined → Don't Grant Content
└─ Success → Send Receipt to Server
├─ Valid → SetVerificationState(Success)
│ └─ Grant Content
│ └─ FinishTransactions
└─ Invalid → SetVerificationState(Failed)
└─ Don't Grant Content
```
## Common Issues
* **AutoFinishTransactions Enabled**: Disable in Essential Kit settings for manual verification
* **Transaction Finishes Too Early**: Ensure AutoFinishTransactions is off before testing
* **Receipt Validation Fails**: Check server-side Apple/Google API integration
* **Local verification failed**: Treat the transaction as invalid immediately, even if the state is `Purchased`
* **Duplicate Purchases**: User tag helps identify and prevent duplicate grants
## Security Best Practices
1. **Always Verify Server-Side**: Never trust client-side verification
2. **Require Local Verification Too**: If `receiptVerificationState` is not `Success`, do not proceed
3. **Use User Tags**: Link purchases to accounts to prevent fraud
4. **Log Verification**: Track all receipt validations for audit
5. **Handle Failures**: Decide policy for failed verifications (refund vs block)
## When to Use Manual Verification
* **Consumables** (coins, gems): Prevent duplicate delivery
* **High-Value Items**: Extra security for expensive purchases
* **Multi-User Accounts**: Tag ensures correct user receives content
* **Fraud Prevention**: Detect and block stolen cards or chargebacks
# Process Pending Transactions (AutoFinishTransactions OFF)
## Goal
Handle unfinished transactions on app launch (or after a network retry) when you do server-side receipt verification.
## When to Use
* **AutoFinishTransactions is OFF** in Essential Kit settings.
* You verify receipts on your server and only finish transactions after verification.
* The app was closed/backgrounded before you finished the transaction.
## Actions Required
| Action | Purpose |
| ------------------------------------------ | --------------------------------------------------------------- |
| BillingServicesInitializeStore | Ensure billing is initialized |
| BillingServicesGetTransactions | Cache pending transactions + get `transactionCount` |
| BillingServicesGetTransactionInfo | Read `transactionId` + `receipt` for each pending item |
| BillingServicesSetReceiptVerificationState | Set verification result from your server (`Success` / `Failed`) |
| BillingServicesFinishTransactions | Finish verified transactions so they leave the queue |
## Variables Needed
* transactionCount (Int)
* transactionIndex (Int)
* transactionId (String)
* productId (String)
* receipt (String)
* receiptVerificationState (Enum: BillingReceiptVerificationState)
## Implementation Steps
### 1. InitializeStore
Run `BillingServicesInitializeStore` and wait for `successEvent`.
### 2. Get pending queue
Run `BillingServicesGetTransactions` → `transactionCount`.
**Important:** This recovery flow assumes `BillingServicesGetTransactions` returns transactions that are already purchased but not yet finished. It is not the place to handle live purchase states like `Purchasing` or `Deferred`.
### 3. Loop each pending transaction
Loop `transactionIndex = 0..transactionCount-1`:
1. `BillingServicesGetTransactionInfo(transactionIndex)` → read `transactionId`, `productId`, `receipt`, `receiptVerificationState`.
2. If `receiptVerificationState != Success`, treat the transaction as invalid and do not grant content.
3. If local verification succeeded, send `receipt` (and `productId`/`transactionId`) to your backend for verification.
4. Based on server response:
* **Verified**:
* `BillingServicesSetReceiptVerificationState(transactionId, Success)`
* Grant content (idempotent: don’t double-grant)
* `BillingServicesFinishTransactions` with `transactionIds = [transactionId]`
* **Rejected / invalid**:
* `BillingServicesSetReceiptVerificationState(transactionId, Failed)`
* Don’t grant content
* Finish or keep in queue based on your policy (retry later vs clear immediately)
## Notes
* `BillingServicesGetTransactions` should already represent the unfinished purchased queue, so you normally do not need extra filtering for transaction states here.
* If `receiptVerificationState` is already `Success`, you can skip verification and just ensure content is granted, then finish.
* If `receiptVerificationState` is `Failed`, the transaction should not be treated as valid even if it is in `Purchased` state.
* This use-case is the “recovery” flow for manual verification setups.
# Cloud Services
Cross-platform cloud save and sync for Unity mobile games using iCloud and Google Play
Essential Kit's Cloud Services feature lets Unity teams sync player data across devices without maintaining platform-specific code. This tutorial walks you through setup, key APIs, testing, and troubleshooting so you can add cloud save functionality with confidence.
{% hint style="info" %}
Using PlayMaker? See the PlayMaker guide: [PlayMaker](/features/cloud-services/playmaker).
{% endhint %}
{% hint style="info" %}
Looking for a working reference? Open the demo scene at `Assets/Plugins/VoxelBusters/EssentialKit/Examples/Scenes/CloudServicesDemo.unity` and the companion script at `Assets/Plugins/VoxelBusters/EssentialKit/Examples/Scripts/CloudServicesDemo.cs` to see the full API in action.
{% endhint %}
## What You'll Learn
* Store and retrieve game data using simple key-value pairs
* Sync player progress across devices with automatic conflict detection
* Handle cross-device data consistency with change events
* Choose between local-only storage and cloud synchronization
## Why Cloud Services Matters
* **Player retention**: Let players seamlessly continue progress on any device
* **Cross-device experience**: Single game state across phone, tablet, and reinstalls
* **Simple data persistence**: Replace PlayerPrefs with cloud-backed storage
* **No backend required**: Built on free platform services (iCloud, Google Play)
## Tutorial Roadmap
1. [Setup](/features/cloud-services/setup) - Enable the feature and configure platform settings.
2. [Usage](/features/cloud-services/usage) - Store data, sync with cloud, and handle conflicts.
3. [Testing](/features/cloud-services/testing) - Verify cloud sync across devices and reinstalls.
4. [FAQ](/features/cloud-services/faq) - Troubleshoot common issues and limitations.
## Key Use Cases
* **Save player progress**: Store game state, achievements, and unlocked content (within 1MB iOS / 3MB Android limits)
* **Cross-device sync**: Let players switch between devices without losing progress
* **Offline-first storage**: Use as enhanced PlayerPrefs that works locally without cloud sync
* **Conflict resolution**: Automatically detect and resolve data conflicts from simultaneous device usage
## Prerequisites
* Unity project with Essential Kit v3 installed and Cloud Services feature enabled
* iOS builds require iCloud capability configuration (handled automatically during build)
* Android builds require Google Play Services integration (handled automatically during build)
* Test devices with active iCloud (iOS) or Google Play account (Android) for cloud sync validation
{% content-ref url="/pages/-MJnxN9oTl3dJNZIoRwH" %}
[Setup](/features/cloud-services/setup)
{% endcontent-ref %}
{% content-ref url="/pages/-MK4y5srzt8nAjC6UTM8" %}
[Usage](/features/cloud-services/usage)
{% endcontent-ref %}
{% content-ref url="/pages/-MK9dSnbA6gd8M9vUAya" %}
[Testing](/features/cloud-services/testing)
{% endcontent-ref %}
{% content-ref url="/pages/-MKAGrToRtcUvi2u9vic" %}
[FAQ](/features/cloud-services/faq)
{% endcontent-ref %}
# Setup
Before using any of the Cloud services, we need to configure them in the [Essential Kit Settings](/plugin-overview/settings) under cloud services.
## :white\_check\_mark:Enable Feature
Open [Essential Kit Settings](/plugin-overview/settings) and enable Cloud Services feature in the inspector.
Cloud Services Settings
{% hint style="warning" %}
If you are NOT planning to use Game Services along with Cloud Services, you still need to fill the **Play Services Application Id** entry in Game Services settings (and can disable it).\
\
This is because, on Android, Cloud services is internally dependent on Google play services.
{% endhint %}
### Properties
| Name | Description |
| ------------------------------------------------ | --------------------------------------------------------------------------------------------------- |
|
(Android) Play Services Application Id
| This value gets auto filled once you set the value of Play Services Application Id in Game Services |
{% hint style="success" %}
To have similar behaviour across iOS and Android, we auto sync internally in Android on major events (when app state changes). This makes sure your data is up to date.
{% endhint %}
# iOS
Configuring cloud services on iOS platform
On iOS, Plugin uses iCloud Key-Value storage for storing data. When you register an app on [iOS dev portal](https://developer.apple.com/account/resources/identifiers/bundleId/add/bundle), you need to enable the iCloud in capabilities section.

{% hint style="success" %}
Plugin automatically sets the iCloud capabilities while exporting from Unity on every export.
{% endhint %}
In-case if you have a different setup where you want to enable manually, you can do the following steps
1. Open Xcode project and navigate to Signing & Capabilities tab for the main target
2. Add iCloud capability to the project
3. Enable Key-Value storage option
# Android
Configuring Cloud Services on Android
On Android, Plugin uses **Saved Games feature** of Play Games Services. Internally, Cloud services depend on Google play login for user authentication. For this reason it needs Play Services Application Id.
{% hint style="warning" %}
If you are NOT planning to use Game Services along with Cloud Services, you still need to fill the **Play Services Application Id** entry in Game Services settings (and can disable it).\
\
Check [here](/features/game-services/setup#properties) (Android Properties tab) on how to get Play Services Application Id.
{% endhint %}
{% hint style="danger" %}
As cloud services on Android uses google play services(Game Services) internally, you need to make sure the required authentication is handled. You can check [here](https://assetstore.essentialkit.voxelbusters.com/game-services/setup/android#configuring-credentials-sha-fingerprint-authentication) on how to add required credentials for Cloud Services to authenticate successfully.
{% endhint %}
### Enable Saved Games on Play Console
1. Navigate to your app in [**Google play console**](https://play.google.com/apps/publish)
2. Select **Play Game Services section** on left side bar under **Grow**
3. In Setup and Management, select **configuration**
4. Click on **Edit Properties**
5. **Set** Saved Games to **On**
6. Click on **Save Changes**

# Usage
Cloud Services allows cross-device game data synchronization on iOS and Android.
Essential Kit wraps native iOS (iCloud Key-Value Store) and Android (Google Play Saved Games) APIs into a single Unity interface. Cloud Services automatically initializes with your Essential Kit settings and is ready to use.
## Table of Contents
* [Understanding Cloud Services](#understanding-cloud-services)
* [Import Namespaces](#import-namespaces)
* [Event Registration](#event-registration)
* [Local-Only Storage (No Cloud Sync)](#local-only-storage-no-cloud-sync)
* [Cloud Synchronization](#cloud-synchronization)
* [Storing and Retrieving Data](#storing-and-retrieving-data)
* [Handling Data Conflicts](#handling-data-conflicts)
* [Core APIs Reference](#core-apis-reference)
* [Error Handling](#error-handling)
* [Advanced: Runtime Settings Override](#advanced-runtime-settings-override)
* [Related Guides](#related-guides)
## Understanding Cloud Services
Cloud Services keeps game data in two places:
* **Cloud copy** – Lives in iCloud (iOS) or Google Play Saved Games (Android) and is shared across devices.
* **Device copy** – Stored locally as a JSON cache; all `CloudServices` getters and setters read and write this copy instantly.
Synchronization keeps both copies in step. When you call `Synchronize()` the plugin uploads device changes, downloads cloud updates, and raises change events if the platform copy was newer.
```
Your Scripts ── Get*/Set* ──▶ Device Copy (local cache file)
│ │
└── Synchronize() ◀────────────┤
▼
Cloud Copy (iCloud / Play)
│
OnSavedDataChange ─┘ via CloudServicesUtility
```
**Key characteristics:**
* All `Get*/Set*` calls update the device copy immediately
* `Synchronize()` is the only way to push or pull the cloud copy
* If the cloud copy is newer, it overwrites the device copy and fires `OnSavedDataChange`
{% hint style="success" %}
**Two modes of operation:**
* **Local-only storage**: Never call `Synchronize()` - works like enhanced PlayerPrefs
* **Cloud sync**: Call `Synchronize()` to keep data in sync across devices
{% endhint %}
## Import Namespaces
```csharp
using System;
using System.Collections;
using System.Collections.Generic;
using VoxelBusters.EssentialKit;
using VoxelBusters.CoreLibrary;
```
## Event Registration
Register for events in `OnEnable` and unregister in `OnDisable`:
```csharp
void OnEnable()
{
CloudServices.OnUserChange += OnUserChange;
CloudServices.OnSavedDataChange += OnSavedDataChange;
CloudServices.OnSynchronizeComplete += OnSynchronizeComplete;
}
void OnDisable()
{
CloudServices.OnUserChange -= OnUserChange;
CloudServices.OnSavedDataChange -= OnSavedDataChange;
CloudServices.OnSynchronizeComplete -= OnSynchronizeComplete;
}
```
| Event | Trigger |
| ----------------------- | ---------------------------------------------------------------------- |
| `OnUserChange` | Cloud account changes (user logs in/out, switches accounts) |
| `OnSavedDataChange` | Cloud data differs from local data during sync (provides changed keys) |
| `OnSynchronizeComplete` | Synchronization request finishes (success or failure) |
## Local-Only Storage (No Cloud Sync)
Use Cloud Services as enhanced PlayerPrefs without any cloud synchronization:
```csharp
void SavePlayerData()
{
// Saves to local storage only - no cloud involved
CloudServices.SetLong("high_score", newHighScore);
CloudServices.SetBool("tutorial_complete", true);
CloudServices.SetString("player_name", playerName);
// DON'T call Synchronize() - keeps data local only
}
void LoadPlayerData()
{
// Loads from local storage - always works offline
long highScore = CloudServices.GetLong("high_score");
bool tutorialDone = CloudServices.GetBool("tutorial_complete");
string name = CloudServices.GetString("player_name");
Debug.Log($"High Score: {highScore}, Tutorial: {tutorialDone}, Name: {name}");
}
```
{% hint style="info" %}
Perfect for offline games or games that don't need cross-device sync. Data persists locally across sessions but won't sync to other devices.
{% endhint %}
## Cloud Synchronization
### Why Synchronization is Needed
Synchronization downloads the latest cloud data and uploads local changes. This ensures:
* Fresh installs get saved progress from cloud
* Players switching devices see their latest data
* Concurrent device usage detects and resolves conflicts
### First Sync (Authentication)
Call `Synchronize()` when your app starts to authenticate and download cloud data:
```csharp
void Start()
{
// First call may show login dialog on Android
CloudServices.Synchronize((result) =>
{
if (result.Success)
{
Debug.Log("Cloud sync complete - data is current");
}
else
{
Debug.Log("Sync failed - using local data only");
}
});
}
```
{% hint style="warning" %}
**First call behavior:**
* **iOS**: Uses device-level iCloud settings, no login prompt typically shown
* **Android**: May show Google Play sign-in dialog if user not authenticated
{% endhint %}
### Checkpoint-Based Sync
Sync only at appropriate game checkpoints for performance:
```csharp
void OnLevelComplete()
{
Debug.Log("Save game progress locally.");
// Show syncing UI for better UX
Debug.Log("Display syncing indicator.");
CloudServices.Synchronize((result) =>
{
Debug.Log("Hide syncing indicator.");
if (result.Success)
{
Debug.Log("Progress synced to cloud");
}
else
{
Debug.Log("Sync failed - will retry later");
}
});
}
```
{% hint style="success" %}
**Best practices:**
* Sync at level completion, major milestones, or app pause
* Show UI feedback during sync operations
* Avoid frequent sync calls during active gameplay
{% endhint %}
## Storing and Retrieving Data
Cloud Services supports primitive types and binary data as key-value pairs.
### Supported Data Types
```csharp
// Boolean
CloudServices.SetBool("sound_enabled", true);
bool soundEnabled = CloudServices.GetBool("sound_enabled"); // false if not found
// Integer (stored as long internally)
CloudServices.SetInt("player_level", 10);
int level = CloudServices.GetInt("player_level"); // 0 if not found
// Long
CloudServices.SetLong("total_coins", 1000000L);
long coins = CloudServices.GetLong("total_coins"); // 0 if not found
// Float (stored as double internally)
CloudServices.SetFloat("volume", 0.75f);
float volume = CloudServices.GetFloat("volume"); // 0.0 if not found
// Double
CloudServices.SetDouble("completion_percentage", 87.5);
double completion = CloudServices.GetDouble("completion_percentage"); // 0.0 if not found
// String
CloudServices.SetString("player_name", "Hero123");
string name = CloudServices.GetString("player_name"); // null if not found
// Byte Array (for serialized objects)
byte[] saveData = SerializeGameState();
CloudServices.SetByteArray("game_save", saveData);
byte[] loadedData = CloudServices.GetByteArray("game_save"); // null if not found
```
### Storing Complex Data
Use a single serialized class for all save data to simplify versioning:
```csharp
[Serializable]
public class GameSaveData
{
public int level;
public float[] playerPosition;
public List unlockedItems;
public long coins;
public string version = "1.0";
}
public class CloudSaveExample : MonoBehaviour
{
private int currentLevel;
private long playerCoins;
void SaveGame()
{
GameSaveData saveData = new GameSaveData
{
level = currentLevel,
playerPosition = new float[] { transform.position.x, transform.position.y, transform.position.z },
unlockedItems = GetUnlockedItems(),
coins = playerCoins
};
// Serialize to JSON
string json = JsonUtility.ToJson(saveData);
CloudServices.SetString("complete_save_data", json);
// Optional: sync to cloud at checkpoints
CloudServices.Synchronize();
}
void LoadGame()
{
string json = CloudServices.GetString("complete_save_data");
if (!string.IsNullOrEmpty(json))
{
GameSaveData saveData = JsonUtility.FromJson(json);
currentLevel = saveData.level;
// Restore other game state
Debug.Log($"Loaded game at level {saveData.level}");
}
else
{
Debug.Log("No save data found - starting fresh");
}
}
List GetUnlockedItems() => new List();
}
```
### Key Management
```csharp
// Check if key exists
if (CloudServices.HasKey("player_name"))
{
string name = CloudServices.GetString("player_name");
}
// Remove key
CloudServices.RemoveKey("temp_data");
// Get all data snapshot
IDictionary snapshot = CloudServices.GetSnapshot();
foreach (DictionaryEntry entry in snapshot)
{
Debug.Log($"Key: {entry.Key}, Value: {entry.Value}");
}
```
{% hint style="warning" %}
**Storage limits:**
* **iOS**: 64-byte max key length, 1MB per key, 1MB total, 1024 keys max
* **Android**: 3MB total per user
{% endhint %}
## Handling Data Conflicts
When the same data is modified on multiple devices, Cloud Services detects conflicts and fires `OnSavedDataChange`.
### Understanding Conflict Resolution
Behind the scenes the plugin keeps a snapshot of the previous device values to help you compare changes:
1. Player makes changes on Device A and syncs
2. Player switches to Device B (has old data)
3. Device B calls `Synchronize()` - cloud copy has newer data
4. Local copy is overwritten with cloud copy
5. `OnSavedDataChange` fires with changed keys and reason
6. Your code compares the latest cloud values vs. the previous snapshot using `CloudServicesUtility`
7. Choose winning value and set it back
8. Next sync uploads the resolved data
Use `CloudServicesUtility.TryGetCloudAndLocalCacheValues` inside the event to fetch both values without manually caching them.
### Example: Conflict Resolution
```csharp
void OnEnable()
{
CloudServices.OnSavedDataChange += OnSavedDataChange;
}
void OnSavedDataChange(CloudServicesSavedDataChangeResult result)
{
if (result.ChangedKeys == null)
{
return;
}
Debug.Log($"Data changed - Reason: {result.ChangeReason}");
foreach (string key in result.ChangedKeys)
{
// Use utility to compare the cloud value vs the previous device snapshot
if (CloudServicesUtility.TryGetCloudAndLocalCacheValues(key, out long cloudValue, out long localValue))
{
if (key == "high_score")
{
// Keep highest score
long winnerScore = Math.Max(cloudValue, localValue);
CloudServices.SetLong(key, winnerScore);
Debug.Log($"Resolved high_score conflict: cloud={cloudValue}, local={localValue}, winner={winnerScore}");
}
else if (key == "total_playtime")
{
// Sum playtime from both devices
long combinedTime = cloudValue + localValue;
CloudServices.SetLong(key, combinedTime);
Debug.Log($"Combined playtime: {combinedTime}");
}
}
}
}
```
### Change Reasons
| Reason | Description |
| ---------------------- | ------------------------------------------------------ |
| `ServerChange` | Cloud data differs from local data during sync |
| `InitialSyncChange` | First sync after fresh install (cloud data downloaded) |
| `QuotaViolationChange` | Exceeded storage limits - data reset to cloud copy |
| `AccountChange` | User switched cloud accounts - all keys invalidated |
{% hint style="danger" %}
**Critical**: If you don't handle `OnSavedDataChange`, local changes may be lost when cloud data overwrites the local copy. Always maintain a cache and resolve conflicts.
{% endhint %}
### Conflict Resolution Pattern
```csharp
void OnSavedDataChange(CloudServicesSavedDataChangeResult result)
{
switch (result.ChangeReason)
{
case CloudSavedDataChangeReasonCode.ServerChange:
// Merge changes from another device
Debug.Log("Resolve conflicts with server-changed data.");
break;
case CloudSavedDataChangeReasonCode.InitialSyncChange:
// First sync - cloud data loaded
Debug.Log("Load cloud data into the local save.");
break;
case CloudSavedDataChangeReasonCode.AccountChange:
// User switched accounts - reset local data
Debug.Log("Clear local cached data for the previous account.");
Debug.Log("Load cloud data for the new account.");
break;
case CloudSavedDataChangeReasonCode.QuotaViolationChange:
// Exceeded storage - compress data
Debug.LogWarning("Storage quota exceeded - consider data compression");
break;
}
}
```
## Core APIs Reference
| API | Purpose | Returns |
| ----------------------------------------------------------------------------------- | ------------------------------------ | --------------------------------------------- |
| `CloudServices.SetBool(key, value)` | Store boolean value locally | Void - syncs to cloud on next `Synchronize()` |
| `CloudServices.GetBool(key)` | Retrieve boolean value | `bool` (false if not found) |
| `CloudServices.SetInt(key, value)` | Store integer value locally | Void |
| `CloudServices.GetInt(key)` | Retrieve integer value | `int` (0 if not found) |
| `CloudServices.SetLong(key, value)` | Store long value locally | Void |
| `CloudServices.GetLong(key)` | Retrieve long value | `long` (0 if not found) |
| `CloudServices.SetFloat(key, value)` | Store float value locally | Void |
| `CloudServices.GetFloat(key)` | Retrieve float value | `float` (0.0 if not found) |
| `CloudServices.SetDouble(key, value)` | Store double value locally | Void |
| `CloudServices.GetDouble(key)` | Retrieve double value | `double` (0.0 if not found) |
| `CloudServices.SetString(key, value)` | Store string value locally | Void |
| `CloudServices.GetString(key)` | Retrieve string value | `string` (null if not found) |
| `CloudServices.SetByteArray(key, value)` | Store binary data locally | Void |
| `CloudServices.GetByteArray(key)` | Retrieve binary data | `byte[]` (null if not found) |
| `CloudServices.HasKey(key)` | Check if key exists | `bool` |
| `CloudServices.RemoveKey(key)` | Delete key-value pair | Void |
| `CloudServices.GetSnapshot()` | Get all data as dictionary | `IDictionary` |
| `CloudServices.Synchronize(callback)` | Sync local and cloud data | `CloudServicesSynchronizeResult` via callback |
| `CloudServices.ActiveUser` | Get current cloud user info | `CloudUser` (account status and user ID) |
| `CloudServicesUtility.TryGetCloudAndLocalCacheValues(key, out cloud, out local)` | Compare cloud vs cache for conflicts | `bool` (true if both values exist) |
## Error Handling
| Error Code | Trigger | Recommended Action |
| ------------------------------------- | ----------------------------------------- | -------------------------------------------- |
| Sync failure (result.Success = false) | Network error, user denied authentication | Retry later or continue with local-only data |
| `QuotaViolationChange` reason | Exceeded storage limits | Compress data or remove unnecessary keys |
| `AccountChange` reason | User switched cloud accounts | Clear local data and reload from new account |
| Null/empty key | Invalid key parameter | Validate keys before calling Get/Set |
```csharp
void OnSynchronizeComplete(CloudServicesSynchronizeResult result)
{
if (!result.Success)
{
Debug.LogWarning("Cloud sync failed - game will continue with local data");
// Show optional retry UI
return;
}
Debug.Log("Cloud sync successful");
}
```
## Advanced: Runtime Settings Override
{% hint style="danger" %}
Advanced initialization is for server-driven configuration or runtime feature flags only. For standard usage, configure via [Essential Kit Settings](https://github.com/voxelbusters/essential-kit-docs/blob/master/tutorials/v3/features/cloud-services/setup.md).
{% endhint %}
### Understanding Advanced Initialization
**Default Behavior:** Essential Kit automatically initializes Cloud Services with settings from the ScriptableObject asset.
**Advanced Usage:** Override settings programmatically for:
* Server-driven feature configuration
* A/B testing different sync strategies
* Dynamic platform-specific settings
* Runtime feature flags
### Implementation
```csharp
void Awake()
{
var settings = new CloudServicesUnitySettings(
iosProperties: new CloudServicesUnitySettings.IosPlatformProperties(substituteEntitlementIdentifiers: true),
androidProperties: new CloudServicesUnitySettings.AndroidPlatformProperties(playServicesApplicationId: "123456789012"));
CloudServices.Initialize(settings);
}
```
{% hint style="warning" %}
Calling `Initialize()` resets all event listeners and clears cached data. Only use for advanced scenarios requiring runtime configuration.
{% endhint %}
## Related Guides
* Demo scene: `Assets/Plugins/VoxelBusters/EssentialKit/Examples/Scenes/CloudServicesDemo.unity`
* Pair with **Game Services** for player authentication and leaderboards
* See [FAQ](/features/cloud-services/faq#why-cant-i-see-my-local-changes-after-sync) for common conflict resolution issues
* Check [Testing](/features/cloud-services/testing) for cross-device validation procedures
# Testing
Use these checks to confirm your Cloud Services integration before release.
## Editor Simulation
* When you run in the Unity Editor, the Cloud Services simulator is active automatically
* Simulator stores data locally in JSON files to mimic cloud behavior
* To clear test data, delete the local cache file at the path shown in console logs
* Remember: simulator responses mimic native behavior but are not a substitute for on-device testing
{% hint style="warning" %}
Cloud Services testing **requires real mobile hardware** with active cloud accounts (iCloud or Google Play). The Unity Editor simulator cannot test actual cloud synchronization.
{% endhint %}
## Device Testing Checklist
### Test 1: Data Persistence After Reinstall
This validates that cloud data survives app deletion and reinstallation.
1. Install the app on a test device
2. Call `Synchronize()` on first launch (may prompt for cloud account login)
3. Set test data: `CloudServices.SetString("test_key", "test_value")`
4. Call `Synchronize()` to upload to cloud
5. Wait for sync to complete successfully
6. Uninstall the app completely
7. Reinstall the app
8. Call `Synchronize()` on launch
9. Retrieve the test data: `CloudServices.GetString("test_key")`
10. Verify the value matches step 3
**Expected result**: Data from step 3 should be restored after reinstall.
### Test 2: Cross-Device Synchronization
This validates that data syncs between multiple devices using the same cloud account.
1. Install app on Device A with cloud account signed in
2. Call `Synchronize()` and set test data
3. Call `Synchronize()` to upload changes
4. Wait for sync success confirmation
5. Install app on Device B signed into **same cloud account**
* **iOS**: Same iCloud account
* **Android**: Same Google Play account
6. Call `Synchronize()` on Device B
7. Retrieve the test data set in step 2
8. Verify data matches across both devices
**Expected result**: Device B should load the exact data saved on Device A.
### Test 3: Conflict Resolution
This validates that simultaneous edits on multiple devices are detected and resolved.
1. Set same key on both Device A and Device B with different values
2. Call `Synchronize()` on Device A first
3. Call `Synchronize()` on Device B
4. Verify `OnSavedDataChange` event fires on Device B with changed keys
5. Implement conflict resolution logic (pick winner or merge)
6. Call `Synchronize()` again to upload resolved data
7. Verify both devices have the resolved value
**Expected result**: `OnSavedDataChange` fires with conflict detection, allowing custom resolution logic.
### Test 4: Account Switching
This validates proper data isolation when users switch cloud accounts.
1. Sign in with Account A on a device
2. Set test data and sync
3. Sign out and sign in with Account B on the same device
4. Call `Synchronize()`
5. Verify `OnSavedDataChange` fires with `AccountChange` reason
6. Verify Account A's data is cleared and Account B's data loads
**Expected result**: Each account maintains separate cloud data with no cross-contamination.
### Test 5: Offline Behavior
This validates that the app works when cloud services are unavailable.
1. Enable airplane mode or disable network
2. Use `SetBool`, `SetString`, etc. to store data locally
3. Retrieve data with getters - should work offline
4. Re-enable network
5. Call `Synchronize()` to upload offline changes
6. Verify data syncs to cloud successfully
**Expected result**: Local storage works offline, syncs when connectivity restores.
## Pre-Submission Review
* Test on both iOS and Android devices to verify platform-specific behavior
* Ensure first-run `Synchronize()` experience is smooth (handle auth prompts gracefully)
* Verify storage limits aren't exceeded (1MB iOS, 3MB Android) with production data volumes
* Test with multiple cloud accounts to ensure proper data isolation
* Capture screenshots of successful sync operations for store submissions
* Test reinstall scenario to ensure new users can restore cloud saves
* Verify conflict resolution handles edge cases (simultaneous edits, quota violations)
## Common Testing Issues
### iOS Testing
* **iCloud not available**: User must be signed into iCloud in device settings
* **Data not syncing**: Check iCloud storage quota in Settings > \[User] > iCloud
* **Simulator behavior**: iOS Simulator may not reliably test iCloud - use real devices
### Android Testing
* **Google Play login required**: First sync prompts for Google Play sign-in
* **Saved Games not enabled**: Verify Play Console has Saved Games API enabled
* **Account restrictions**: Some managed Google accounts restrict Saved Games access
* **Auto-sync timing**: Android auto-syncs on app state changes - test backgrounding behavior
## Debug Logging
Enable detailed logging to troubleshoot sync issues:
```csharp
void OnEnable()
{
CloudServices.OnUserChange += (result, error) =>
{
if (error != null)
{
Debug.LogError($"User change error: {error.Description}");
}
else
{
Debug.Log($"User: {result.User?.UserId}, Status: {result.User?.AccountStatus}");
}
};
CloudServices.OnSynchronizeComplete += (result) =>
{
Debug.Log($"Sync complete - Success: {result.Success}");
};
CloudServices.OnSavedDataChange += (result) =>
{
Debug.Log($"Data changed - Reason: {result.ChangeReason}, Keys: {string.Join(", ", result.ChangedKeys ?? new string[0])}");
};
}
```
{% hint style="success" %}
If your implementation works in the demo scene but fails in your project, compare event registration, sync timing, and conflict resolution logic between the two.
{% endhint %}
# FAQ
### Do I need to manually configure iCloud or Google Play settings?
No. Essential Kit automatically injects the required configurations into `Info.plist` (iOS) and `AndroidManifest.xml` (Android) during the build process. You only need to enable Cloud Services in Essential Kit Settings.
### Why can't I see my local changes after sync?
When `Synchronize()` runs, the cloud copy overwrites the device copy if the platform has newer data. Essential Kit also keeps a conflict snapshot and fires `OnSavedDataChange` with the changed keys. Use the snapshot via `CloudServicesUtility.TryGetCloudAndLocalCacheValues` to compare the cloud value with what the device had before the overwrite, then write back the winner with `CloudServices.Set*`. See [Handling Data Conflicts](/features/cloud-services/usage#handling-data-conflicts) for examples.
### How much data can I store?
* **iOS**: 1 MB total storage, maximum 1024 keys, 64-byte key length limit
* **Android**: 3 MB total storage per user
These are platform limits from iCloud Key-Value Store and Google Play Saved Games respectively.
### Does using Cloud Services cost money?
No. Cloud Services uses free platform services:
* **iOS**: iCloud Key-Value Storage (included with iCloud)
* **Android**: Google Play Saved Games API (free)
No additional cloud infrastructure or billing required.
### Can data sync between iOS and Android?
No. Cloud Services uses platform-specific storage:
* **iOS**: iCloud (Apple ecosystem only)
* **Android**: Google Play (Google ecosystem only)
Players switching platforms cannot transfer cloud saves. Consider implementing manual backup/export features or server-side storage for cross-platform saves.
### Why does OnSavedDataChange fire with no changed keys?
If the cloud copy and device copy are identical, `OnSavedDataChange` will NOT fire. The event only runs when actual key-value differences are detected. If you log an empty `ChangedKeys` array, double-check your handling code—most often the event executed with `ChangedKeys == null` and your handler should exit early. For sync failures, inspect the `OnSynchronizeComplete` callback instead.
### How does Essential Kit identify changed keys?
Cloud Services uses version tags (similar to ETags) to track data state:
* Each data sync assigns a new tag to the cloud copy
* Local copy stores the tag from the last successful sync
* If tags differ during sync, changed keys are calculated by comparing values
* All changed keys are passed to `OnSavedDataChange` event
### My app doesn't need cloud sync - can I use Cloud Services offline?
Yes! Cloud Services works as enhanced PlayerPrefs without calling `Synchronize()`. Simply use `SetBool`, `SetString`, etc. for local storage that persists across sessions. Data stays on the device and never syncs to cloud. See [Local-Only Storage](/features/cloud-services/usage#local-only-storage-no-cloud-sync).
### How do I handle quota violations?
When storage limits are exceeded, `OnSavedDataChange` fires with `QuotaViolation` reason and the local copy resets to the cloud copy. To prevent this:
* Monitor data size before saving large objects
* Use data compression for binary saves
* Remove obsolete keys with `RemoveKey()`
* Design save data to stay well under limits (1MB iOS, 3MB Android)
```csharp
void SaveLargeData(byte[] data)
{
if (data.Length > 1024 * 1024) // 1MB iOS limit
{
Debug.LogWarning("Data exceeds iOS quota - consider compression");
return;
}
CloudServices.SetByteArray("game_save", data);
}
```
### What happens if the user denies cloud access?
If the user denies iCloud (iOS) or Google Play (Android) access:
* `Synchronize()` callback returns `Success = false`
* Local storage continues to work normally
* App can continue using local-only data
* Gracefully handle sync failures and offer retry options
```csharp
CloudServices.Synchronize((result) =>
{
if (!result.Success)
{
Debug.Log("Cloud sync unavailable - using local storage");
// Continue game with local data only
}
});
```
### How do I test cloud sync in Unity Editor?
Unity Editor uses a simulator that stores data in local JSON files. This tests API usage but NOT actual cloud synchronization. Always test on real devices with active cloud accounts (iCloud or Google Play) to validate production behavior. See [Testing](/features/cloud-services/testing) for device test procedures.
### Why is OnSavedDataChange not firing during development?
Common reasons:
* Cloud and device data are identical (no changes to report)
* Event handler not registered in `OnEnable` before calling `Synchronize()`
* First sync completed before event registration
* Sync request failed—check the `CloudServices.OnSynchronizeComplete` result or console logs for errors
Verify event registration:
```csharp
void OnEnable()
{
// Register BEFORE calling Synchronize()
CloudServices.OnSavedDataChange += OnSavedDataChange;
}
```
### Can I use Cloud Services with my existing PlayerPrefs data?
Yes. Migrate PlayerPrefs to Cloud Services during first run:
```csharp
void MigrateFromPlayerPrefs()
{
if (!CloudServices.HasKey("migrated"))
{
// Migrate existing PlayerPrefs data
int level = PlayerPrefs.GetInt("player_level", 0);
CloudServices.SetInt("player_level", level);
string name = PlayerPrefs.GetString("player_name", "");
CloudServices.SetString("player_name", name);
// Mark migration complete
CloudServices.SetBool("migrated", true);
CloudServices.Synchronize();
Debug.Log("Migrated PlayerPrefs to Cloud Services");
}
}
```
### What is the difference between the device copy and the conflict snapshot?
* **Device copy**: The working data you read and write with `GetBool`, `SetString`, etc. Updated instantly and saved to disk locally.
* **Conflict snapshot**: Maintained internally by Essential Kit so that `CloudServicesUtility.TryGetCloudAndLocalCacheValues` can tell you "what the device had before the overwrite" during a sync.
Your code only interacts with the device copy and the helper utility. Essential Kit manages the conflict snapshot for you.
### Where can I confirm the plugin is working vs my implementation?
Run `Assets/Plugins/VoxelBusters/EssentialKit/Examples/Scenes/CloudServicesDemo.unity` scene. If the demo works but your scene doesn't:
* Compare event registration timing (register in `OnEnable`)
* Check sync call frequency (avoid over-syncing)
* Verify conflict resolution logic in `OnSavedDataChange`
* Ensure keys are consistent (case-sensitive)
* Review error handling in callbacks
### Do I need Game Services enabled to use Cloud Services on Android?
You need to provide the **Play Services Application ID** in Game Services settings even if Game Services is disabled. Cloud Services uses the same Google Play infrastructure. Get the ID from Google Play Console and enter it in Essential Kit Settings > Services > Game Services.
### How do I handle users switching cloud accounts?
When a user switches cloud accounts (different iCloud or Google Play account):
* `OnSavedDataChange` fires with `AccountChange` reason
* The device copy is cleared automatically
* Cloud data for the new account loads
* Your code should clear any in-memory game state
```csharp
void OnSavedDataChange(CloudServicesSavedDataChangeResult result)
{
if (result.ChangeReason == CloudSavedDataChangeReasonCode.AccountChange)
{
// User switched accounts - reset game state
Debug.Log("Clear local game data caches.");
Debug.Log("Load the fresh cloud data for the new account.");
}
}
```
### Can I force a sync instead of waiting for auto-sync on Android?
Yes. Call `CloudServices.Synchronize()` at any time to manually trigger a sync. While Android auto-syncs on app state changes, you can call it explicitly at checkpoints (level complete, settings change, etc.) for immediate synchronization.
# Examples
* [Handling Conflicts & Synchronization](/features/cloud-services/examples/handling-conflicts-and-synchronization) – Walk through the full conflict workflow using `CloudServicesUtility` and the updated event signatures.
* Demo scene: `Assets/Plugins/VoxelBusters/EssentialKit/Examples/Scenes/CloudServicesDemo.unity`
* Demo script: `Assets/Plugins/VoxelBusters/EssentialKit/Examples/Scripts/CloudServicesDemo.cs`
# Handling Conflicts & Synchronization
Cloud Services in Essential Kit let you save and retrieve simple key-value pairs that automatically sync between local and cloud storage. It’s designed to be simple, fast, and reliable – with built-in support for detecting conflicts during synchronization.
Let’s explore how it works using an example.
***
### 🎮 Use Case: Saving Player Settings
Imagine you’re working on a game where the player can configure their settings – like the selected language, sound volume, or preferred difficulty. You want to store these preferences in the cloud, so that if the player installs the game on another device, their settings come along.
#### Step 1: Save Settings to Cloud
Let’s assume the player updates their preferred language setting.
```csharp
CloudServices.SetString("player.language", "en");
```
This will **immediately update the device copy** with the value `"en"` for the key `player.language`. At this point, the value is still only available locally – it has not yet been pushed to the cloud.
> ✅ Tip: All `Set*` methods update the device copy immediately.
***
#### Step 2: Synchronize with Cloud
When you want to push or pull the latest data to/from the cloud, call:
```csharp
CloudServices.Synchronize();
```
This will:
* Fetch the latest copy of cloud data.
* Compare the local and cloud versions.
* Detect if any keys have changed in both locations since last sync.
If a **conflict** is detected (i.e., both local and cloud versions were modified), Essential Kit **overwrites the local value** with the cloud copy and triggers an event **CloudServices.OnSavedDataChange**
***
#### Step 3: Handle Conflict in `OnSavedDataChange`
You can listen for this event and inspect which keys had conflicting values:
```csharp
void OnSavedDataChange(CloudServicesSavedDataChangeResult result)
{
if (result.ChangedKeys == null)
{
return;
}
//📌 Important: CloudServices.GetString(key) now returns the cloud value because the device copy was overwritten.
for (int i = 0; i < result.ChangedKeys.Length; i++)
{
string key = result.ChangedKeys[i];
string cloudValue;
string previousDeviceValue;
// Retrieve the latest cloud value and the device snapshot saved before the overwrite
CloudServicesUtility.TryGetCloudAndLocalCacheValues(key, out cloudValue, out previousDeviceValue, "default");
Debug.LogFormat("[{0}] Key: {1}\n [Cloud Value]: {2}\n [Previous Device Value]: {3}", i, key, cloudValue, previousDeviceValue);
// Decide what to do: keep the cloud value or restore the previous device value
if (ShouldKeepLocalValue(key, previousDeviceValue, cloudValue))
{
CloudServices.SetString(key, previousDeviceValue);
}
}
}
```
***
#### Step 4: Finalize with `SynchronizeComplete`
After the sync is completed (and any conflict resolution is done), the `SynchronizeComplete` event fires:
```csharp
CloudServices.OnSynchronizeComplete += (result) =>
{
Debug.Log($"Cloud sync complete. Success: {result.Success}");
};
```
If you restored a value during conflict resolution using `SetString`, the updated value will be pushed to the cloud on the next sync cycle – either manually triggered or automatically (e.g., app going to background).
***
### ⚡ Quick Recap
| Action | Description |
| -------------------------------- | ------------------------------------------------------------------- |
| `SetString("key", value)` | Immediately updates the device copy |
| `Synchronize()` | Syncs data, resolves conflicts, and fires events |
| `OnSavedDataChange` | Fires **after a conflict**, providing changed keys and the reason |
| `TryGetCloudAndLocalCacheValues` | Lets you inspect both the cloud value and the previous device value |
| `SetString(...)` inside event | Lets you restore the preferred value before the next sync |
| `OnSynchronizeComplete` | Fires after sync and conflict resolution is done |
***
### Example Conflict Flow
Let’s say:
1. Player changes `"player.language"` to `"en"` locally.
2. On another device, the same key is changed to `"fr"`.
3. Player syncs both devices.
During sync, the cloud value `"fr"` is fetched and overwrites the local `"en"`, triggering `OnSavedDataChange`. Now you can use the utility function `CloudServicesUtility.TryGetCloudAndLocalCacheValues` to retrieve both the cloud value (`"fr"`) and the old local value (`"en"`), allowing you to decide whether to keep the cloud version or restore your original local data.
# PlayMaker
Store and sync key-value data across devices using platform cloud storage.
## Actions (14)
* Write/read: `CloudServicesSetValue`, `CloudServicesGetValue` (supports Bool/Int/Float/String)
* Snapshot helper: `CloudServicesGetSnapshot` (reads full snapshot as JSON)
* Existence: `CloudServicesHasKey` (checks current snapshot)
* Sync: `CloudServicesSynchronize` (fires `successEvent` / `failureEvent`)
* Change listener: `CloudServicesOnSavedDataChange` (persistent; fires `dataChangedEvent`)
* Change helper: `CloudServicesGetChangedKeys` (reads all cached changed keys as string array)
* Conflict helper: `CloudServicesGetCloudAndLocalCacheValues` (reads both cloud + local cache value for a key)
* User listener: `CloudServicesOnUserChange` (persistent; fires account status events)
* User helper: `CloudServicesGetUserInfo` (reads cached user id/status)
* Delete: `CloudServicesRemoveKey`, `CloudServicesRemoveAllKeys`
* Easy Save 3 sync (requires `ENABLE_VOXELBUSTERS_ESSENTIAL_KIT_EASY_SAVE_SUPPORT`):
* `ES3EssentialKitCloudServicesSyncRawBytes`
* `ES3EssentialKitCloudServicesSyncKeyValues`
## Key patterns
* **SetValue/GetValue are synchronous**. Use `CloudServicesSynchronize` when you want to push/pull changes and get a completion event.
* **Listener actions should stay active**:
* `CloudServicesOnSavedDataChange` receives remote changes and provides `changedKeys` + `changeReason`.
* `CloudServicesOnUserChange` reports account availability (signed in/out/restricted).
## Common flows
* Save: `SetValue` (one or more keys) → `Synchronize`
* Load with defaults: `HasKey` → `GetValue` (else keep local default)
* Multi-device: keep `OnSavedDataChange` active → on `dataChangedEvent`, loop keys and `GetValue`
* Reset: `RemoveKey`/`RemoveAllKeys` → `Synchronize`
## Use cases
Start here: `use-cases/README.md`
# Use Cases
Quick-start guides for cloud save/sync using PlayMaker custom actions.
## Available Use Cases
### 1. [Save Player Progress](/features/cloud-services/playmaker/use-cases/use-case-1-save-progress)
* **What it does:** Save level, score, and progress to cloud
* **Actions:** 2 (SetValue, Synchronize)
* **Best for:** Progress backup, cross-device play
### 2. [Multi-Device Sync](/features/cloud-services/playmaker/use-cases/use-case-2-multi-device-sync)
* **What it does:** Load progress and handle remote updates
* **Actions:** 3 (GetValue, OnSavedDataChange, GetChangedKeys)
* **Best for:** Cross-device continuity, conflict resolution
### 3. [Settings Cloud Backup](/features/cloud-services/playmaker/use-cases/use-case-3-settings-backup)
* **What it does:** Backup and restore player preferences
* **Actions:** 4 (SetValue, HasKey, GetValue, RemoveKey)
* **Best for:** Settings sync, user preferences
### 4. [User Account Change Handling](/features/cloud-services/playmaker/use-cases/use-case-4-user-account-change)
* **What it does:** React to cloud user account status changes
* **Actions:** 3 (OnUserChange, GetUserInfo, Synchronize)
* **Best for:** Disabling cloud UI when signed out/restricted
### 5. [Reset Cloud Data](/features/cloud-services/playmaker/use-cases/use-case-5-reset-cloud-data)
* **What it does:** Remove specific keys or all keys from cloud
* **Actions:** 2 (RemoveKey/RemoveAllKeys, Synchronize)
* **Best for:** “Reset cloud save” settings actions
### 6. [Easy Save Raw File Sync](https://github.com/voxelbusters/essential-kit-docs/blob/master/tutorials/v3/features/cloud-services/playmaker/use-cases/use-case-6-es3-raw-bytes-sync.md)
* **What it does:** Sync a full ES3 file as raw bytes under one cloud key
* **Actions:** 1 (`ES3EssentialKitCloudServicesSyncRawBytes`)
* **Best for:** Full-file backup/restore without per-key policies
### 7. [Easy Save Key-Value Sync](https://github.com/voxelbusters/essential-kit-docs/blob/master/tutorials/v3/features/cloud-services/playmaker/use-cases/use-case-7-es3-key-value-sync.md)
* **What it does:** Sync all ES3 keys with per-type conflict rules and missing-key policy
* **Actions:** 1 (`ES3EssentialKitCloudServicesSyncKeyValues`)
* **Best for:** Fine-grained conflict handling for ES3 key-value saves
## Quick Action Reference
| Action | Purpose |
| ----------------------------------------- | --------------------------------------------------------------------------- |
| CloudServicesSetValue | Save data to cloud |
| CloudServicesGetValue | Load data from cloud |
| CloudServicesGetSnapshot | Read full snapshot as JSON |
| CloudServicesHasKey | Check if a key exists in the snapshot |
| CloudServicesSynchronize | Trigger manual sync |
| CloudServicesOnSavedDataChange | Listen for remote updates |
| CloudServicesGetChangedKeys | Read all changed keys as string array |
| CloudServicesGetCloudAndLocalCacheValues | Read cloud + local cache values for a key (conflict handling) |
| CloudServicesOnUserChange | Listen for user account changes |
| CloudServicesGetUserInfo | Read cached user id/status |
| CloudServicesRemoveKey | Delete specific key |
| CloudServicesRemoveAllKeys | Clear all cloud data |
| ES3EssentialKitCloudServicesSyncRawBytes | Sync ES3 file bytes to one cloud key (Easy Save support define required) |
| ES3EssentialKitCloudServicesSyncKeyValues | Sync ES3 key-values with conflict rules (Easy Save support define required) |
## Related Documentation
* [**README.md**](/features/cloud-services/playmaker) - Actions + key patterns + use-cases
# Save Player Progress to Cloud
## Goal
Save player progress (level, score, settings) to iCloud or Google Play Games cloud storage for cross-device sync.
## Actions Required
| Action | Purpose |
| ------------------------ | ----------------------- |
| CloudServicesSetValue | Save data to cloud |
| CloudServicesSynchronize | Trigger sync with cloud |
## Variables Needed
* currentLevel (Int)
* totalScore (Int)
* playerName (String)
## Implementation Steps
### 1. State: SaveData
**Action:** CloudServicesSetValue (call multiple times for different keys)
* **Save Level:**
* key: "player\_level"
* value: currentLevel (Int)
* **Save Score:**
* key: "total\_score"
* value: totalScore (Int)
* **Save Name:**
* key: "player\_name"
* value: playerName (String)
**Transition:** Go to Synchronize
### 2. State: Synchronize
**Action:** CloudServicesSynchronize
* **Events:**
* successEvent → ShowSaveSuccess
* failureEvent → ShowSyncError
## Save Flow
```
SaveData
├─ SetValue("player_level", 10)
├─ SetValue("total_score", 5000)
└─ SetValue("player_name", "Player1")
└─ Synchronize
├─ successEvent → ShowSaveSuccess
└─ failureEvent → ShowSyncError
```
## Common Issues
* **Cloud Not Available**: User not signed into iCloud/Google account
* **Sync Delays**: Changes may take seconds to propagate
* **Data Conflicts**: Handle OnSavedDataChange for conflicts
* **Storage Limits**: iCloud limited to \~1MB per key
## Platform Differences
**iOS (iCloud):**
* Requires iCloud capability enabled
* User must be signed into iCloud
* Automatic sync when online
**Android (Google Play Games):**
* Saved Games API
* User must be signed into Google Play
* Manual sync trigger recommended
## Best Practices
1. **Save on Events**: Save after meaningful progress (level complete, achievement)
2. **Don't Over-Sync**: Batch changes, sync once per session or on pause
3. **Handle Conflicts**: Listen to OnSavedDataChange for remote updates
4. **Test Offline**: Verify data queues for sync when back online
# Multi-Device Progress Sync
## Goal
Load saved data when app starts and listen for changes from other devices.
## Actions Required
| Action | Purpose |
| ------------------------------ | --------------------------------------- |
| CloudServicesGetValue | Load saved data |
| CloudServicesOnSavedDataChange | Listen for remote updates |
| CloudServicesGetChangedKeys | Read changed key list (optional helper) |
## Variables Needed
* playerLevel (Int)
* totalScore (Int)
* changedKeys (Array: String) - PlayMaker Array (set element type to String)
* changeReason (Enum: CloudSavedDataChangeReasonCode)
## Implementation Steps
### 1. State: LoadProgress (On App Start)
**Action:** CloudServicesGetValue
* **Inputs:**
* key: "player\_level"
* valueType: Int
* **Outputs:**
* value → playerLevel
Repeat for each key you want to load.
### 2. State: ListenForChanges
**Action:** CloudServicesOnSavedDataChange
* **Outputs:**
* changedKeys → changedKeys array
* changeReason → changeReason
* **Events:**
* dataChangedEvent → HandleRemoteChange
### 3. State: HandleRemoteChange
Use the `changedKeys` array from `CloudServicesOnSavedDataChange` directly, or call `CloudServicesGetChangedKeys` to fetch the same cached list in a later state. Loop `keyIndex = 0..changedKeys.Length-1` and read each key using PlayMaker Array Get.
1. If you need conflict handling, call `CloudServicesGetCloudAndLocalCacheValues(keyName)` to get both values:
* decide your policy (cloud wins / local wins / max wins / prompt user)
2. Otherwise, just reload from cloud:
* If keyName == "player\_level" → `CloudServicesGetValue("player_level", valueType:Int)` and update `playerLevel`
* If keyName == "total\_score" → `CloudServicesGetValue("total_score", valueType:Int)` and update `totalScore`
If you don’t want a loop, you can also directly use PlayMaker Array actions (Array Get / Array Contains) on `changedKeys`.
## Conflict Resolution Strategies
**Last Write Wins:** Use remote value always **Highest Wins:** Compare local vs remote, keep higher value **Manual Merge:** Prompt user to choose
# Cloud Settings Backup
## Goal
Backup and restore player settings (volume, graphics quality, preferences) across devices.
## Actions Required
| Action | Purpose |
| ---------------------- | ---------------------------------------------------------- |
| CloudServicesSetValue | Save settings |
| CloudServicesGetValue | Load settings |
| CloudServicesHasKey | Check if a key exists (optional, recommended for defaults) |
| CloudServicesRemoveKey | Delete setting |
## Variables Needed
* musicVolume (Float) = 0.8
* graphicsQuality (Int) = 2 (0=Low, 1=Medium, 2=High)
* language (String) = "en"
## Implementation Steps
### 1. State: SaveSettings (When Changed)
**Action:** CloudServicesSetValue
* Save multiple settings:
* key: "music\_volume", value: musicVolume
* key: "graphics\_quality", value: graphicsQuality
* key: "language", value: language
### 2. State: LoadSettings (On App Start)
Load each setting:
1. (Optional) `CloudServicesHasKey("music_volume")`
2. If exists → `CloudServicesGetValue("music_volume", valueType:Float)` → `musicVolume`
3. If not exists → keep your local default (for example 0.8)
### 3. State: ResetToDefaults (Optional)
**Action:** CloudServicesRemoveKey
* Remove keys to restore defaults:
* RemoveKey("music\_volume")
* RemoveKey("graphics\_quality")
Or use: CloudServicesRemoveAllKeys to clear all cloud data
## Best Practices
* Save settings incrementally (one at a time on change)
* Load all settings once at startup
* Provide "Reset Cloud Data" option in settings
# Cloud User Account Change Handling
## Goal
React when the cloud user account status changes (signed in/out, restricted, etc.).
## Actions Required
| Action | Purpose |
| ------------------------- | --------------------------------------------------- |
| CloudServicesOnUserChange | Listen for cloud user status changes (persistent) |
| CloudServicesGetUserInfo | Read cached user id/status after availability event |
| CloudServicesSynchronize | Sync after user becomes available (optional) |
## Variables Needed
* (optional) lastKnownState (String/Enum in your FSM)
## Implementation Steps
### 1. State: RegisterUserListener (Persistent)
**Action:** CloudServicesOnUserChange
* **Events:**
* availableEvent → CloudAvailable
* noAccountEvent → CloudUnavailable
* restrictedEvent → CloudUnavailable
* couldNotDetermineEvent → CloudUnavailable
### 2. State: CloudAvailable
Call `CloudServicesGetUserInfo` to read `userId` and `accountStatus`, enable cloud save UI, and optionally call `CloudServicesSynchronize` to refresh snapshot/values.
### 3. State: CloudUnavailable
Disable cloud save UI and fall back to local-only storage.
## Notes
* On iOS this commonly maps to iCloud account availability.
* Keep this listener active if your app needs to respond during runtime.
# Reset Cloud Data (Remove Keys)
## Goal
Let the user delete cloud keys (for example from a Settings “Reset cloud save” button).
## Actions Required
| Action | Purpose |
| -------------------------- | ------------------------------------ |
| CloudServicesRemoveKey | Remove a specific key |
| CloudServicesRemoveAllKeys | Remove all keys (use with caution) |
| CloudServicesSynchronize | Push deletion to cloud (recommended) |
## Implementation Steps
### Option A: Remove specific keys
1. Call `CloudServicesRemoveKey` for each key you want to delete.
2. Call `CloudServicesSynchronize` and wait for `successEvent`.
### Option B: Remove everything
1. Call `CloudServicesRemoveAllKeys`.
2. Call `CloudServicesSynchronize` and wait for `successEvent`.
## Notes
* Provide a confirmation UI before using RemoveAllKeys.
* After reset, your app should fall back to local defaults until new values are saved.
# Deep Link Services
Deep Link Services for Unity mobile games - handle custom URL schemes and universal links to drive user engagement and retention
Essential Kit's Deep Link Services feature lets Unity teams handle custom URL schemes and universal links without maintaining platform-specific code. This tutorial walks you through setup, key APIs, testing, and troubleshooting so you can add seamless deep linking with confidence.
{% hint style="info" %}
Using PlayMaker? See the PlayMaker guide: [PlayMaker](/features/deep-link-services/playmaker).
{% endhint %}
{% hint style="info" %}
Looking for a working reference? Open the demo scene at `Assets/Plugins/VoxelBusters/EssentialKit/Examples/Scenes/DeepLinkServicesDemo.unity` and the companion script at `Assets/Plugins/VoxelBusters/EssentialKit/Examples/Scripts/DeepLinkServicesDemo.cs` to see the full API in action.
{% endhint %}
## What You'll Learn
* Register for deep link events and handle incoming links
* Navigate users directly to specific in-game content
* Implement URL schemes for simple deep linking
* Configure universal links for professional user acquisition
## Why Deep Link Services Matter
* **User Acquisition**: Power friend invites and referral campaigns with trackable links
* **Retention**: Bring players back to specific events, tournaments, or limited offers
* **Seamless UX**: Take users directly to content instead of forcing them to navigate manually
## Tutorial Roadmap
1. [Setup](/features/deep-link-services/setup) – Enable the feature and configure URL schemes and universal links
2. [Usage](/features/deep-link-services/usage) – Event registration, link handling, and navigation patterns
3. [Testing](/features/deep-link-services/testing) – Test deep links in editor and verify on devices
4. [FAQ](/features/deep-link-services/faq) – Troubleshoot common issues
## Key Use Cases
* **Friend Invitations**: Send 1v1 match invites that open directly to the match lobby
* **Promotional Campaigns**: Deep link from social media ads to specific shop offers
* **Tournament Entry**: Share tournament links that auto-join players when clicked
* **Content Sharing**: Let players share levels, achievements, or game moments
* **Re-engagement**: Send push notifications with deep links to bring players back
## Prerequisites
* Unity project with Essential Kit v3 installed and Deep Link Services feature included in the build
* iOS or Android target platform
* Test device or Essential Kit simulator to validate deep link handling
{% content-ref url="/pages/-MJnxPzuknqcRHaveIwD" %}
[Setup](/features/deep-link-services/setup)
{% endcontent-ref %}
{% content-ref url="/pages/-MKEqr1e3PuVQsbjAWOP" %}
[Usage](/features/deep-link-services/usage)
{% endcontent-ref %}
{% content-ref url="/pages/-MKFm8W2rWTcdGruuU\_q" %}
[Testing](/features/deep-link-services/testing)
{% endcontent-ref %}
{% content-ref url="/pages/-MKFfKV8J9-K3zamJQBG" %}
[FAQ](/features/deep-link-services/faq)
{% endcontent-ref %}
# Setup
Configuring Deep Link Services
## Understanding Deep Link Types
Before configuring, understand the two types of deep links available:
### Custom Scheme URLs (Simple)
Custom scheme URLs use app-specific schemes like `mygame://invite/123`. These are quick to set up but not unique across apps.
**Pros:**
* Simple setup through Essential Kit Settings only
* No backend infrastructure required
* Works immediately after configuration
**Cons:**
* Not unique - other apps can register the same scheme
* If multiple apps use the same scheme, users see a selection dialog
* Less professional for marketing campaigns
**Example:** `mygame://level/5`, `mygame://shop?item=sword`
### Universal Links (Professional)
Universal links use standard web URLs like `https://yourgame.com/invite/123`. These require backend setup but provide a professional experience.
**Pros:**
* Unique to your domain - no conflicts
* Seamless user experience with no selection dialog
* Better for attribution and marketing campaigns
* Falls back to web browser if app is not installed
**Cons:**
* Requires backend server configuration
* More complex setup with domain verification
* Needs separate iOS and Android configuration files
**Example:** `https://yourgame.com/level/5`, `https://yourgame.com/shop/sword`
{% hint style="info" %}
Start with custom scheme URLs for development and testing. Add universal links later for production when you need professional user acquisition.
{% endhint %}
## Prerequisites
* Essential Kit imported into the project from My Assets section of Package Manager
* iOS or Android build target configured in Unity
* For universal links: A web server with HTTPS and the ability to host verification files
## Setup Checklist
### 1. Enable Deep Link Services
Open **Essential Kit Settings** (`Window > Voxel Busters > Essential Kit > Open Settings`), switch to the **Services** tab, and enable **Deep Link Services**.
Deep Link Services Settings
### 2. Configure Custom Scheme URLs
Under **iOS Properties** and **Android Properties**, add your custom URL schemes:
| Field | Description | Example |
| -------------- | ------------------------------------------------------------------------------ | -------------------------- |
| **Identifier** | Display name shown in app chooser dialog if multiple apps register this scheme | "MyGame Deep Link" |
| **Scheme** | Unique scheme name for your app | "mygame" |
| **Host** | Optional host to filter links further | "invite" or leave empty |
| **Path** | Optional path to filter specific actions | "/referral" or leave empty |
**Common Patterns:**
* **Open-ended**: Set only Scheme (`mygame://`) to handle all links
* **Specific actions**: Set Scheme + Host (`mygame://invite/`) for targeted handling
* **Fine-grained**: Set Scheme + Host + Path (`mygame://shop/items`) for precise routing
{% hint style="success" %}
Use a scheme name that's unique to your game. Consider including your studio name or game name: `studiogame://` instead of just `game://`
{% endhint %}
### 3. Configure Universal Links (Optional)
For universal links, you need:
**Essential Kit Configuration:**
* Add universal link definitions in the same way as custom schemes
* Use `https` as the Scheme
* Set your domain as the Host (e.g., `yourgame.com`)
* Set paths to match specific content (e.g., `/invite`, `/level`)
**Backend Configuration:** See platform-specific guides for backend setup:
* [iOS Universal Links Setup](/features/deep-link-services/setup/ios)
* [Android App Links Setup](/features/deep-link-services/setup/android)
### 4. Save and Build
Changes to the settings asset are saved automatically. If you use source control, commit the updated `Resources/EssentialKitSettings.asset` file.
During build, Essential Kit automatically:
* **iOS**: Adds URL schemes to `Info.plist`
* **Android**: Adds intent filters to `AndroidManifest.xml`
## Configuration Reference
| Setting | Platform | Required? | Notes |
| ------------------------- | -------- | --------- | ------------------------------------------------------------------- |
| Enable Deep Link Services | All | Yes | Toggles the feature in builds; disabling strips related native code |
| iOS Properties | iOS | Yes | Contains custom schemes and universal links for iOS |
| Android Properties | Android | Yes | Contains custom schemes and app links for Android |
| Identifier | All | Yes | Display name for this deep link configuration |
| Service Type | iOS | No | Leave blank unless you need specific iOS service types |
| Scheme | All | Yes | The URL scheme (e.g., "mygame" for mygame://) |
| Host | All | Optional | Filter links by host (e.g., "invite" for mygame://invite/) |
| Path | All | Optional | Filter links by path (e.g., "/referral") |
{% hint style="info" %}
Need a working baseline? Run the sample at `Assets/Plugins/VoxelBusters/EssentialKit/Examples/Scenes/DeepLinkServicesDemo.unity` to confirm your settings before integrating into production.
{% endhint %}
{% hint style="warning" %}
Test deep links on actual devices, not just the editor simulator. Platform-specific behavior (like the app chooser dialog) only appears on real devices.
{% endhint %}
# iOS
Refer this document on setting up [Universal Links](https://developer.apple.com/videos/play/wwdc2019/717)
# Android
{% hint style="success" %}
Universal links on Android is termed as App Links.
{% endhint %}
Please refer [this](https://developer.android.com/training/app-links/configure-assetlinks) document on how to set up app links.
# Usage
Deep Link Services allows handling custom URL schemes and universal links on mobile devices.
Essential Kit wraps native iOS and Android deep link APIs into a single Unity interface. When users click deep links, Essential Kit automatically routes them to your app and fires events with the link data.
## Table of Contents
* [Deep Link Flow at a Glance](#deep-link-flow-at-a-glance)
* [Understanding Deep Link Anatomy](#understanding-deep-link-anatomy)
* [Import Namespaces](#import-namespaces)
* [Event Registration](#event-registration)
* [Check Availability](#check-availability)
* [How Deep Links Work](#how-deep-links-work)
* [Basic Implementation](#basic-implementation)
* [Parsing Deep Link Parameters](#parsing-deep-link-parameters)
* [Common Navigation Patterns](#common-navigation-patterns)
* [Core APIs Reference](#core-apis-reference)
* [Advanced: Custom Delegate Filtering](#advanced-custom-delegate-filtering)
* [Related Guides](#related-guides)
## Deep Link Flow at a Glance
```
[Player taps deep link]
↓
[iOS / Android resolves scheme or domain]
↓
[Essential Kit DeepLinkServices]
(queues event until handlers subscribe)
↓
[OnCustomSchemeUrlOpen or OnUniversalLinkOpen]
↓
[Your routing code → load content, grant rewards, etc.]
```
## Understanding Deep Link Anatomy
Deep links contain three main parts that you'll use for routing:
**Example 1:** `mygame://invite/player123`
* **Scheme**: `mygame` - Identifies your app
* **Host**: `invite` - Identifies the action
* **Path**: `/player123` - Contains action parameters
**Example 2:** `https://yourgame.com/level/5?mode=hard`
* **Scheme**: `https` - Universal link scheme
* **Host**: `yourgame.com` - Your domain
* **Path**: `/level/5` - Content to display
* **Query**: `?mode=hard` - Additional parameters
You'll use these components to determine what content to show when a deep link opens your app.
## Import Namespaces
```csharp
using System;
using VoxelBusters.EssentialKit;
using VoxelBusters.CoreLibrary;
using System.Collections.Generic;
```
## Event Registration
Register for deep link events in `OnEnable` and unregister in `OnDisable`:
```csharp
void OnEnable()
{
DeepLinkServices.OnCustomSchemeUrlOpen += OnCustomSchemeUrlOpen;
DeepLinkServices.OnUniversalLinkOpen += OnUniversalLinkOpen;
}
void OnDisable()
{
DeepLinkServices.OnCustomSchemeUrlOpen -= OnCustomSchemeUrlOpen;
DeepLinkServices.OnUniversalLinkOpen -= OnUniversalLinkOpen;
}
```
| Event | Trigger |
| ----------------------- | ---------------------------------------------------------------- |
| `OnCustomSchemeUrlOpen` | When user opens a custom scheme URL (e.g., `mygame://`) |
| `OnUniversalLinkOpen` | When user opens a universal link (e.g., `https://yourgame.com/`) |
{% hint style="success" %}
Register events early in your app initialization (like in a persistent manager's `OnEnable`) to ensure no deep links are missed.
{% endhint %}
## Check Availability
Guard your handlers in case the feature is disabled on the current platform:
```csharp
if (!DeepLinkServices.IsAvailable())
{
Debug.LogWarning("Deep Link Services is not available on this platform or build.");
return;
}
```
The call returns `false` in editor play mode if you excluded Deep Link Services from the build configuration.
## How Deep Links Work
Essential Kit handles deep links intelligently based on your app state:
**App Already Running:** Events fire immediately when the deep link is activated.
**App Launched by Deep Link:** Essential Kit delays the event until you register the event handler. This ensures your app is fully initialized before processing the link.
{% hint style="info" %}
You don't need to check if the app was launched by a deep link. Just register events when ready, and Essential Kit fires them automatically if a deep link is pending.
{% endhint %}
## Basic Implementation
Handle both event types with the same logic:
```csharp
void OnCustomSchemeUrlOpen(DeepLinkServicesDynamicLinkOpenResult result)
{
Debug.Log($"Received custom scheme deep link: {result.RawUrlString}");
HandleDeepLink(result);
}
void OnUniversalLinkOpen(DeepLinkServicesDynamicLinkOpenResult result)
{
Debug.Log($"Received universal link: {result.RawUrlString}");
HandleDeepLink(result);
}
void HandleDeepLink(DeepLinkServicesDynamicLinkOpenResult result)
{
Uri uri = result.Url;
Debug.Log($"Scheme: {uri.Scheme}");
Debug.Log($"Host: {uri.Host}");
Debug.Log($"Path: {uri.AbsolutePath}");
// Route based on host
switch (uri.Host.ToLower())
{
case "invite":
HandleInvite(uri);
break;
case "shop":
HandleShop(uri);
break;
case "level":
HandleLevel(uri);
break;
default:
Debug.LogWarning($"Unknown deep link action: {uri.Host}");
break;
}
}
```
### Result Properties
| Property | Type | Description |
| -------------- | -------- | --------------------------------------------------------------------- |
| `Url` | `Uri` | Parsed URL with easy access to components (Scheme, Host, Path, Query) |
| `RawUrlString` | `string` | Original URL string as received from the system |
## Parsing Deep Link Parameters
Use C#'s `Uri` class to extract deep link data:
### Path Segments
```csharp
void HandleLevel(Uri uri)
{
// Custom scheme: mygame://level/5
// Universal link: https://yourgame.com/level/5
string[] segments = uri.Segments;
string levelId = null;
if (uri.Scheme == "https")
{
// ["/", "level/", "5"]
if (segments.Length > 2)
{
levelId = segments[2].TrimEnd('/');
}
}
else if (uri.Host.Equals("level", StringComparison.OrdinalIgnoreCase))
{
// ["/", "5"]
if (segments.Length > 1)
{
levelId = segments[1].TrimEnd('/');
}
}
if (!string.IsNullOrEmpty(levelId))
{
Debug.Log($"Loading level: {levelId}");
Debug.Log($"Trigger gameplay load for level {levelId}.");
}
}
```
### Query Parameters
```csharp
void HandleShop(Uri uri)
{
// mygame://shop?item=sword&discount=50
string query = uri.Query; // "?item=sword&discount=50"
Dictionary parameters = ParseQuery(query);
parameters.TryGetValue("item", out string itemId); // "sword"
parameters.TryGetValue("discount", out string discount); // "50"
Debug.Log($"Opening shop item: {itemId} with discount: {discount}%");
Debug.Log($"Apply discount {discount}% to item {itemId}.");
}
```
{% hint style="warning" %}
Always validate deep link parameters before using them. Users can manually create deep links with invalid data.
{% endhint %}
## Common Navigation Patterns
### Friend Invitations
```csharp
void HandleInvite(Uri uri)
{
// mygame://invite?referrer=player123&reward=100gems
Dictionary parameters = ParseQuery(uri.Query);
parameters.TryGetValue("referrer", out string referrerId);
parameters.TryGetValue("reward", out string rewardType);
if (string.IsNullOrEmpty(referrerId))
{
Debug.LogWarning("Invalid invite link: missing referrer");
return;
}
Debug.Log($"Processing invite from {referrerId} with reward: {rewardType}");
Debug.Log("Grant referral rewards and track attribution.");
}
```
### Tournament Entry
```csharp
void HandleTournament(Uri uri)
{
// mygame://tournament/weekly_pvp?auto_join=true
string[] segments = uri.Segments;
string tournamentId = uri.Host.Equals("tournament", StringComparison.OrdinalIgnoreCase) && segments.Length > 1
? segments[1].TrimEnd('/')
: null;
Dictionary parameters = ParseQuery(uri.Query);
bool autoJoin = parameters.TryGetValue("auto_join", out string flag) && flag == "true";
if (!string.IsNullOrEmpty(tournamentId))
{
Debug.Log($"Opening tournament: {tournamentId}");
if (autoJoin)
{
Debug.Log("Auto join the tournament.");
}
else
{
Debug.Log("Show tournament detail UI.");
}
}
}
```
### Content Sharing
```csharp
void HandleLevelChallenge(Uri uri)
{
// mygame://level/25?challenge=speedrun&score=1337
string[] segments = uri.Segments;
string levelId = uri.Host.Equals("level", StringComparison.OrdinalIgnoreCase) && segments.Length > 1
? segments[1].TrimEnd('/')
: null;
Dictionary parameters = ParseQuery(uri.Query);
parameters.TryGetValue("challenge", out string challengeType);
parameters.TryGetValue("score", out string targetScore);
Debug.Log($"Loading level {levelId} with challenge: {challengeType}");
Debug.Log($"Target score for challenge: {targetScore}");
}
```
Add a lightweight helper to reuse the parsing logic:
```csharp
Dictionary ParseQuery(string query)
{
var values = new Dictionary(StringComparer.OrdinalIgnoreCase);
if (string.IsNullOrEmpty(query))
{
return values;
}
foreach (string part in query.TrimStart('?').Split('&', StringSplitOptions.RemoveEmptyEntries))
{
string[] bits = part.Split(new[] { '=' }, 2);
string key = Uri.UnescapeDataString(bits[0]);
string value = (bits.Length > 1) ? Uri.UnescapeDataString(bits[1]) : string.Empty;
values[key] = value;
}
return values;
}
```
## Core APIs Reference
| API | Purpose | Returns |
| ---------------------------------------- | ----------------------------------------------------- | ---------------------------------------------------- |
| `DeepLinkServices.OnCustomSchemeUrlOpen` | Event fired when custom scheme URL opens app | `DeepLinkServicesDynamicLinkOpenResult` via callback |
| `DeepLinkServices.OnUniversalLinkOpen` | Event fired when universal link opens app | `DeepLinkServicesDynamicLinkOpenResult` via callback |
| `DeepLinkServices.IsAvailable()` | Check if deep link services are available | `bool` |
| `DeepLinkServices.Delegate` | **Advanced:** Set custom delegate for filtering links | `IDeepLinkServicesDelegate` |
## Advanced: Custom Delegate Filtering
{% hint style="danger" %}
Only use custom delegates for advanced scenarios like ignoring deep links during tutorials or onboarding. For normal deep link handling, use the events directly.
{% endhint %}
### Understanding Custom Delegates
**Default Behavior:** Essential Kit processes all deep links matching your configuration and fires events automatically.
**Advanced Usage:** Use a custom delegate to filter which deep links your app should handle:
* Ignore deep links during tutorial or onboarding
* Filter links based on user authentication status
* Prevent deep links in specific game states
### Implementation
Create a delegate class:
```csharp
public class GameDeepLinkDelegate : IDeepLinkServicesDelegate
{
public bool CanHandleCustomSchemeUrl(Uri url)
{
// Don't handle deep links during tutorial
if (GameManager.Instance.IsInTutorial)
{
Debug.Log($"Ignoring deep link during tutorial: {url}");
return false;
}
// Don't handle premium links for non-authenticated users
if (url.Host == "premium" && !UserManager.Instance.IsAuthenticated)
{
Debug.Log("Ignoring premium link - user not authenticated");
return false;
}
return true; // Handle all other links
}
public bool CanHandleUniversalLink(Uri url)
{
// Apply same filtering to universal links
return CanHandleCustomSchemeUrl(url);
}
}
```
Set the delegate before registering events:
```csharp
void Awake()
{
DeepLinkServices.Delegate = new GameDeepLinkDelegate();
}
void OnEnable()
{
DeepLinkServices.OnCustomSchemeUrlOpen += OnCustomSchemeUrlOpen;
DeepLinkServices.OnUniversalLinkOpen += OnUniversalLinkOpen;
}
```
{% hint style="warning" %}
Advanced delegate filtering is for specific scenarios only. For most games, use standard event handling without custom delegates.
{% endhint %}
### Manual Initialization (Advanced)
Essential Kit auto-initializes Deep Link Services. Only use manual initialization for runtime configuration:
```csharp
void Awake()
{
var iosLinks = LoadIosDefinitionsFromServer(); // DeepLinkDefinition[]
var androidLinks = LoadAndroidDefinitionsFromServer(); // DeepLinkDefinition[]
var settings = new DeepLinkServicesUnitySettings(
iosProperties: new DeepLinkServicesUnitySettings.IosPlatformProperties(
customSchemeUrls: iosLinks),
androidProperties: new DeepLinkServicesUnitySettings.AndroidPlatformProperties(
universalLinks: androidLinks));
DeepLinkServices.Initialize(settings);
// Set delegate if needed
DeepLinkServices.Delegate = new GameDeepLinkDelegate();
// Reattach handlers after Initialize if you manually reinitialize at runtime.
DeepLinkServices.OnCustomSchemeUrlOpen += OnCustomSchemeUrlOpen;
DeepLinkServices.OnUniversalLinkOpen += OnUniversalLinkOpen;
}
```
**Use Cases for Manual Initialization:**
* Dynamically registering URL schemes from server configuration
* Setting up deep links for white-label apps with different schemes
* Loading deep link configurations from remote JSON at runtime
{% hint style="info" %}
For standard usage, skip manual initialization. Essential Kit handles setup automatically based on your [Settings configuration](/features/deep-link-services/setup).
{% endhint %}
{% hint style="warning" %}
`DeepLinkServices.Initialize()` clears the deep-link event subscribers before rebuilding the native interface. If you reinitialize at runtime, attach your event handlers again after that call.
{% endhint %}
## Related Guides
* Demo scene: `Assets/Plugins/VoxelBusters/EssentialKit/Examples/Scenes/DeepLinkServicesDemo.unity`
* Pair with **Notification Services** to send push notifications with deep links
* Use with **Sharing Services** to let players share deep links to social media
* Combine with **Game Services** for social feature deep linking
{% hint style="success" %}
Ready to test? Head to the [Testing Guide](/features/deep-link-services/testing) to validate your implementation.
{% endhint %}
# Testing
Deep links behave differently depending on the platform, so run through each scenario below before shipping.
## Quick Checklist
* ✅ Deep Link Services enabled in Essential Kit Settings
* ✅ `OnCustomSchemeUrlOpen` and/or `OnUniversalLinkOpen` handlers registered before gameplay starts
* ✅ Device has a build that matches the deep link configuration
* ✅ Link you are testing uses the same scheme/host/path defined in settings
## Mobile Device Testing
### iOS (Devices and Simulator)
1. Build and install your app on the target device or simulator.
2. Open Safari and visit a simple HTML page that contains your link:
```html
Join my match
```
3. Tap the link. If the app is installed, iOS should foreground your game and fire the relevant deep link event.
4. On simulator you can also trigger links from the command line:
```bash
xcrun simctl openurl booted "mygame://invite/friend123"
```
5. For universal links, make sure your `apple-app-site-association` file is reachable over HTTPS before testing.
### Android (Devices and Emulator)
1. Build and install your app on the device or emulator.
2. Use Chrome or any browser to open a test page with your link or type the URL directly into the address bar.
3. Android should display a chooser the first time; pick your app and select **Always** to skip future prompts.
4. You can also launch from `adb`:
```bash
adb shell am start -W -a android.intent.action.VIEW -d "mygame://invite/friend123"
```
5. For Android App Links (https), verify that your `assetlinks.json` file is accessible. Use `adb shell am` with the https URL to confirm the association.
{% hint style="info" %}
Need a ready-made scene? Run `Assets/Plugins/VoxelBusters/EssentialKit/Examples/Scenes/DeepLinkServicesDemo.unity` and watch the console logs as you tap links.
{% endhint %}
## Debugging Tips
* If no event fires, confirm `DeepLinkServices.IsAvailable()` returns `true` and the feature is enabled in build settings.
* Mismatched schemes, hosts, or paths are the most common cause of silent failures—double-check spelling and casing.
* Universal links cache the first valid association per install. Uninstall the app before testing changes to the hosted files.
# FAQ
## Why my universal links information on server is not updating on mobile?
Once your app is installed, the universal links meta data from your website will be cached with in your app. So until you reinstall, what ever changes you make to AASA or applinks files on your server won't have any effect.
## How to validate universal links configuration?
There is a [**validator**](https://branch.io/resources/aasa-validator/) on branch.io which you can use for validation.
# PlayMaker
Receive and route deep links:
* Custom schemes (example: `myapp://oauth-callback?token=xyz`)
* Universal links (example: `https://game.com/promo?campaign=summer2024`)
## Actions (4)
* `DeepLinkServicesOnCustomSchemeUrlOpen` (listener): keep active; fires `receivedEvent`
* `DeepLinkServicesGetCustomSchemeResult` (extractor): call after `receivedEvent` → outputs `rawUrl/scheme/host/path/queryKeys/queryValues`
* `DeepLinkServicesOnUniversalLinkOpen` (listener): keep active; fires `receivedEvent`
* `DeepLinkServicesGetUniversalLinkResult` (extractor): call after `receivedEvent` → outputs `rawUrl/scheme/host/path/queryKeys/queryValues`
## Key pattern
1. Keep the listener action in an always-active FSM/state (bootstrap scene).
2. On `receivedEvent`, run the matching `Get*Result` action.
3. Route using `host/path` and optional query parameters (`queryKeys` + `queryValues`).
## Use cases
Start here: `use-cases/README.md`
# Use Cases
Quick-start guides for deep linking using PlayMaker custom actions.
## Available Use Cases
### 1. [Campaign Link Navigation](/features/deep-link-services/playmaker/use-cases/use-case-1-campaign-link)
* **What it does:** Handle universal links from marketing
* **Actions:** 2 (OnUniversalLinkOpen, GetUniversalLinkResult)
### 2. [OAuth Callback](/features/deep-link-services/playmaker/use-cases/use-case-2-oauth-callback)
* **What it does:** Handle custom scheme for auth redirects
* **Actions:** 2 (OnCustomSchemeUrlOpen, GetCustomSchemeResult)
### 3. [Route by Host/Path](/features/deep-link-services/playmaker/use-cases/use-case-3-route-by-host-path)
* **What it does:** Safely route to screens/scenes based on `host` + `path`
* **Actions:** 2 (OnUniversalLinkOpen or OnCustomSchemeUrlOpen, Get\*Result)
### 4. [Read Query Param by Key](/features/deep-link-services/playmaker/use-cases/use-case-4-query-param-by-key)
* **What it does:** Extract a specific query parameter (example: `token`, `campaign`) from `queryKeys/queryValues`
* **Actions:** 2 (OnUniversalLinkOpen or OnCustomSchemeUrlOpen, Get\*Result)
## Quick Action Reference
| Action | Purpose |
| -------------------------------------- | ---------------------------------- |
| DeepLinkServicesOnUniversalLinkOpen | Listen for universal links |
| DeepLinkServicesGetUniversalLinkResult | Read cached universal link details |
| DeepLinkServicesOnCustomSchemeUrlOpen | Listen for custom scheme URLs |
| DeepLinkServicesGetCustomSchemeResult | Read cached custom scheme details |
## Related Documentation
* [**README.md**](/features/deep-link-services/playmaker)
# Campaign Deep Link Navigation
## Goal
Handle universal links from marketing campaigns and navigate to specific content.
## Actions Required
* `DeepLinkServicesOnUniversalLinkOpen`
* `DeepLinkServicesGetUniversalLinkResult`
## Variables Needed
* campaignId (String)
## Implementation Steps
### 1. ListenForLinks (Persistent State)
Use `DeepLinkServicesOnUniversalLinkOpen` in a persistent state.
### 2. Read Link Details
On `receivedEvent`, call `DeepLinkServicesGetUniversalLinkResult` to read:
* `rawUrl` (full URL)
* `queryKeys` / `queryValues` (parallel arrays)
### 3. Extract campaignId
Example URL: `https://game.com/promo?campaign=summer2024`
* Find key `"campaign"` in `queryKeys` and take the value from `queryValues` at the same index.
### 4. Navigate
Go to campaign-specific content or promo screen
## Use When
Marketing campaigns, email links, social media promotions
# OAuth Authentication Callback
## Goal
Handle custom scheme URLs for OAuth authentication flow.
## Actions Required
* `DeepLinkServicesOnCustomSchemeUrlOpen`
* `DeepLinkServicesGetCustomSchemeResult`
## Variables Needed
* authToken (String)
## Implementation Steps
### 1. ListenForScheme (Persistent State)
Use `DeepLinkServicesOnCustomSchemeUrlOpen` in a persistent state.
### 2. Read Link Details
On `receivedEvent`, call `DeepLinkServicesGetCustomSchemeResult` to read:
* `rawUrl`
* `queryKeys` / `queryValues`
### 3. Extract token
Example: `myapp://oauth-callback?token=xyz`
* Find key `"token"` in `queryKeys` and take the value from `queryValues` at the same index.
### 4. Complete Authentication
Use token to finalize login, store session
## Use When
Third-party login (Facebook, Google, custom OAuth)
# Route by Host/Path
## Goal
Route to a screen/scene based on the incoming deep link `host` + `path` (works for both universal links and custom schemes).
## Actions Used
* `DeepLinkServicesOnUniversalLinkOpen` **or** `DeepLinkServicesOnCustomSchemeUrlOpen` (listener, persistent)
* `DeepLinkServicesGetUniversalLinkResult` **or** `DeepLinkServicesGetCustomSchemeResult` (extractor)
## Implementation Steps
1. Keep the listener action active (bootstrap scene).
2. On `receivedEvent`, call the matching `Get*Result` action and read `host` + `path`.
3. Route using PlayMaker string compares:
* Example universal link: `https://game.com/news/patch-notes`
* host = `game.com`
* path = `/news/patch-notes`
* Example custom scheme: `myapp://store/item/123`
* host = `store`
* path = `/item/123`
## Safety Tip
Always validate known hosts/paths before navigating (ignore unknown links).
# Read Query Param by Key
## Goal
Extract a specific query parameter value from the incoming link using `queryKeys` + `queryValues`.
## Actions Used
* `DeepLinkServicesOnUniversalLinkOpen` **or** `DeepLinkServicesOnCustomSchemeUrlOpen` (listener, persistent)
* `DeepLinkServicesGetUniversalLinkResult` **or** `DeepLinkServicesGetCustomSchemeResult` (extractor)
## Variables Needed
* queryKeys (Array: String)
* queryValues (Array: String)
* value (String) (example: campaignId / token)
## Implementation Steps
1. On listener `receivedEvent`, call the matching `Get*Result` action to populate `queryKeys` and `queryValues`.
2. Find the parameter:
* Use PlayMaker Array actions to loop `i = 0..queryKeys.Length-1`
* If `queryKeys[i] == "campaign"` then set `value = queryValues[i]`
## Example URLs
* Universal: `https://game.com/promo?campaign=summer2024`
* Custom scheme: `myapp://oauth-callback?token=xyz`
## Notes
`queryKeys` and `queryValues` are parallel arrays; use the same index for both.
# Utilities (Extras)
Cross-platform utilities for app store navigation and system settings access
Essential Kit's Utilities feature provides cross-platform helpers for common mobile operations: opening app store pages, directing users to system settings, and retrieving age compliance signals from the platform. This tutorial shows you how to add these essential capabilities without platform-specific code.
{% hint style="info" %}
Using PlayMaker? See the PlayMaker guide: [PlayMaker](/features/utilities/playmaker).
{% endhint %}
{% hint style="info" %}
Looking for a working reference? Check the demo implementations in other Essential Kit feature demos that use Utilities for permission recovery and app store navigation.
{% endhint %}
## What You'll Learn
* Open app store pages for reviews, cross-promotion, and updates
* Direct users to system settings when permissions are denied
* Handle platform-specific app identifiers correctly
* Request age compliance information using platform-provided age signals
## Why Utilities Matters
* **Business impact**: Drive ratings and cross-promote companion apps
* **UX impact**: Help users fix permission issues without confusion and respect age-appropriate content gates
* **Technical impact**: No custom native code for store links or settings access
## Tutorial Roadmap
1. [Setup](https://github.com/voxelbusters/essential-kit-docs/blob/master/tutorials/v3/features/utilities/setup.md) - Enable utilities and configure app store IDs
2. [Usage](/features/utilities/usage) - Store pages, application settings, and age compliance APIs
3. [Testing](https://github.com/voxelbusters/essential-kit-docs/blob/master/tutorials/v3/features/utilities/testing.md) - Verify navigation and age compliance flows on both platforms
## Key Use Cases
* Open app store page to encourage ratings and reviews
* Navigate to companion app or DLC listings for cross-promotion
* Guide users to system settings after permission denial
* Direct users to app settings for manual permission grants
* Fetch declared age signals to choose the correct content experience
## Prerequisites
* Unity project with Essential Kit v3 installed
* iOS App Store ID (numeric) or Android package name configured
* Test devices to verify store and settings navigation
{% content-ref url="" %}
{% endcontent-ref %}
{% content-ref url="/pages/-MLDFgn-OlclKoKmyYY-" %}
[Usage](/features/utilities/usage)
{% endcontent-ref %}
{% content-ref url="" %}
{% endcontent-ref %}
# Usage
Utilities provides cross-platform app store and system settings navigation
Essential Kit Utilities wraps native iOS (UIApplication) and Android (Intent) APIs for common navigation tasks. Essential Kit automatically initializes Utilities - no manual setup needed.
## Table of Contents
* [Import Namespaces](#import-namespaces)
* [Opening App Store Pages](#opening-app-store-pages)
* [Opening Application Settings](#opening-application-settings)
* [Requesting Age Compliance Info](#requesting-age-compliance-info)
* [Data Properties](#data-properties)
* [Core APIs Reference](#core-apis-reference)
* [Common Patterns](#common-patterns)
* [Error Handling](#error-handling)
* [Advanced: Custom Runtime Configuration](#advanced-custom-runtime-configuration)
* [Related Guides](#related-guides)
## Import Namespaces
```csharp
using VoxelBusters.CoreLibrary;
using VoxelBusters.EssentialKit;
```
## Opening App Store Pages
### Open Current App's Store Page
Use the configured app store ID from Essential Kit Settings:
```csharp
public void PromptForReview()
{
// Opens store page using ID from Essential Kit Settings
Utilities.OpenAppStorePage();
}
```
This is perfect for directing users to leave reviews manually.
### Open Specific App Store Page
Pass platform-specific identifiers for cross-promotion or companion apps:
```csharp
using VoxelBusters.CoreLibrary;
public void OpenCompanionApp()
{
var iosId = RuntimePlatformConstant.iOS("1234567890");
var androidId = RuntimePlatformConstant.Android("com.company.companion");
Utilities.OpenAppStorePage(iosId, androidId);
}
```
### Open with String ID
Use a simple string identifier when targeting single platform or handling IDs dynamically:
```csharp
public void OpenAppById(string appId)
{
// iOS: numeric App Store ID like "1234567890"
// Android: package name like "com.company.appname"
Utilities.OpenAppStorePage(appId);
}
```
## Opening Application Settings
Direct users to system settings when permissions are denied:
```csharp
public void OnPermissionDenied()
{
// Show explanation dialog first
AlertDialog dialog = AlertDialog.CreateInstance();
dialog.Title = "Permission Required";
dialog.Message = "Please enable camera access in Settings to use this feature.";
dialog.AddButton("Open Settings", () =>
{
Utilities.OpenApplicationSettings();
});
dialog.AddCancelButton("Cancel", () =>
{
Debug.Log("User cancelled settings navigation");
});
dialog.Show();
}
```
**Platform Behavior:**
* **iOS**: Opens Settings app to the app's dedicated settings page
* **Android**: Opens app info page in device settings where users can manage permissions
{% hint style="success" %}
Always show an explanation before opening settings. Users need context about why they're being redirected and what permission to enable.
{% endhint %}
## Requesting Age Compliance Info
Fetch the user's declared age range from native providers to align with your content age gates.
{% hint style="info" %}
Enable **Uses Age Compliance Api** in **Essential Kit Settings → Services → Utilities** before calling this API. Required dependencies are added automatically for iOS (Declared Age APIs) and Android (Play Age Signals).
{% endhint %}
### Example: Map Users to Content Gates
```csharp
public void ApplyAgeGate()
{
var options = new RequestInfoForAgeComplianceOptions.Builder()
.AddContentAgeGateRange(3, 7)
.AddContentAgeGateRange(7, 13)
.AddContentAgeGateRange(13, 18)
.Build();
Utilities.RequestInfoForAgeCompliance(options, (info, error) =>
{
if (error != null)
{
Debug.LogError($"Age compliance error: {error}");
return;
}
if (info.UserAgeRangeDeclarationMethod == AgeRangeDeclarationMethod.NotDeclared)
{
// No declared age available—fall back to your own age gate UI.
ShowManualAgeGate();
return;
}
var range = info.UserAgeRange;
if (range.LowerBound == -1)
{
LoadUnderAgeExperience();
return;
}
if (range.UpperBound == -1)
{
LoadAdultExperience();
return;
}
LoadContentForRange(range);
});
}
```
### Interpreting Results
* When `UserAgeRangeDeclarationMethod` is `NotDeclared`, `UserAgeRange` is `0-0`; ignore the range and prompt your own gate.
* `LowerBound == -1` means the user is younger than the lowest provided content gate.
* `UpperBound == -1` means no practical upper bound (adult).
* Values are provided by platform signals (Declared Age APIs on iOS, Play Age Signals on Android); there are no extra dependencies beyond enabling the toggle.
## Data Properties
| Item | Type | Notes |
| ----------------------------------------- | ------------- | ------------------------------------------------------------------------------------------------------------------------------- |
| `RuntimePlatformConstant.iOS/Android` | Helper Struct | Wrap platform-specific identifiers so you can provide both IDs in a single `OpenAppStorePage` call. |
| `Utilities.OpenAppStorePage()` | Method | Uses the identifiers configured in Essential Kit Settings to deep link directly to your app’s store listing. |
| `Utilities.OpenApplicationSettings()` | Method | Jumps to the operating system’s settings page for your app, letting players re-enable permissions without manual navigation. |
| `Utilities.RequestInfoForAgeCompliance()` | Method | Fetches `InfoForAgeCompliance` for the current user; requires **Uses Age Compliance Api** enabled in Utilities settings. |
| `UtilityUnitySettings.IsEnabled` | `bool` | Indicates whether the Utilities feature is active; when disabled, navigation helpers do nothing and log an error. |
| `AgeRange` | Struct | Age bounds in years. `-1` marks a bound that doesn’t apply; defaults to `0-0` when age is not declared. |
| `AgeRangeDeclarationMethod` | Enum | How the age was declared (self, guardian, payment, ID, etc.); `NotDeclared` means no reliable age data was provided. |
| `RequestInfoForAgeComplianceOptions` | Class | Supply content age gates so platform signals can map the user to the nearest range; defaults to `0-100` if not provided. |
| `InfoForAgeCompliance` | Class | Returns `UserAgeRange` and `UserAgeRangeDeclarationMethod`; ignore `UserAgeRange` when the declaration method is `NotDeclared`. |
## Core APIs Reference
| API | Purpose | Returns |
| ---------------------------------------------------------- | ----------------------------------------------------------------------------------- | ----------------------------------------------------------- |
| `Utilities.OpenAppStorePage()` | Opens current app's store page using configured ID | Void - launches store app |
| `Utilities.OpenAppStorePage(platformConstants)` | Opens store page for specified app with platform IDs | Void - launches store app |
| `Utilities.OpenAppStorePage(appId)` | Opens store page using string identifier | Void - launches store app |
| `Utilities.OpenApplicationSettings()` | Opens system settings for current app | Void - launches settings app |
| `Utilities.RequestInfoForAgeCompliance(options, callback)` | Retrieves declared age info for compliance; maps against provided content age gates | Void - callback receives `InfoForAgeCompliance` or an error |
## Common Patterns
### Pattern 1: Review Request Fallback
Combine with Rate My App for manual review requests:
```csharp
public void ManualReviewRequest()
{
// If rate my app quota exhausted, open store directly
Utilities.OpenAppStorePage();
}
```
### Pattern 2: Permission Recovery Flow
Guide users through permission re-granting:
```csharp
public void RecoverCameraPermission()
{
// Check permission status first
var status = MediaServices.GetCameraAccessStatus();
if (status == CameraAccessStatus.Denied)
{
ShowPermissionExplanation(() =>
{
Utilities.OpenApplicationSettings();
});
}
}
void ShowPermissionExplanation(System.Action onOpenSettings)
{
AlertDialog dialog = AlertDialog.CreateInstance();
dialog.Title = "Camera Access Needed";
dialog.Message = "To scan QR codes, enable Camera in Settings > Permissions.";
dialog.AddButton("Open Settings", () => onOpenSettings?.Invoke());
dialog.AddCancelButton("Not Now", () => { });
dialog.Show();
}
```
### Pattern 3: Cross-Promotion
Promote companion apps or DLC:
```csharp
public void PromoteCompanionApp()
{
var iosId = RuntimePlatformConstant.iOS("9876543210");
var androidId = RuntimePlatformConstant.Android("com.company.companion");
AlertDialog dialog = AlertDialog.CreateInstance();
dialog.Title = "Check Out Our New Game!";
dialog.Message = "Download our companion app for exclusive rewards.";
dialog.AddButton("View in Store", () =>
{
Utilities.OpenAppStorePage(iosId, androidId);
});
dialog.AddCancelButton("Maybe Later", () => { });
dialog.Show();
}
```
### Pattern 4: Content Segmentation by Age
```csharp
public void RouteUserByAge()
{
var options = new RequestInfoForAgeComplianceOptions.Builder()
.AddContentAgeGateRange(0, 12)
.AddContentAgeGateRange(13, 17)
.AddContentAgeGateRange(18, 120) // Adult bucket (upper bound may be returned as -1)
.Build();
Utilities.RequestInfoForAgeCompliance(options, (info, error) =>
{
if (error != null || info.UserAgeRangeDeclarationMethod == AgeRangeDeclarationMethod.NotDeclared)
{
ShowManualAgeGate();
return;
}
var ageRange = info.UserAgeRange;
var isAdult = ageRange.UpperBound == -1;
var isChild = ageRange.LowerBound == -1;
if (isChild)
{
LoadChildFriendlyMode();
}
else if (isAdult)
{
LoadAdultMode();
}
else
{
LoadTeenMode();
}
});
}
```
## Error Handling
| Scenario | Trigger | Recommended Action |
| -------------------------------------------------------------- | ------------------------------------------------------------ | --------------------------------------------------------------------------------------------------------------------------------- |
| Store page opens to “item not found” | App not published or incorrect identifier | Double-check the App Store ID / package name in Essential Kit Settings and test on a device signed into the correct store region. |
| `Utilities.OpenAppStorePage` appears to do nothing | Feature disabled in settings | Ensure Utilities is enabled in Essential Kit Settings or call `Utilities.Initialize` with custom settings at runtime. |
| Settings navigation blocked | User cancels or OS denies request (screen time restrictions) | Explain alternative steps inside the app and provide support contact details if the user cannot adjust settings. |
| Permission still denied after returning from settings | Player didn’t toggle the switch | Re-run your permission check when the app resumes and show a confirmation dialog if access is still missing. |
| `Utilities.RequestInfoForAgeCompliance` returns `NotDeclared` | Platform could not supply a declared age | Run your own age gate UI; treat `UserAgeRange` as `0-0` and do not use it. |
| Age compliance call logs “Uses Age Compliance Api not enabled” | Toggle disabled in settings | Enable **Uses Age Compliance Api** in Utilities settings and rebuild. |
## Advanced: Custom Runtime Configuration
{% hint style="danger" %}
Manual initialization is for advanced scenarios only. Essential Kit auto-initializes Utilities using the `EssentialKitSettings` asset. Only use `Initialize()` for runtime-generated settings.
{% endhint %}
Override settings at runtime if needed:
```csharp
void Awake()
{
var settings = new UtilityUnitySettings(isEnabled: true);
// Configure additional options here if new fields are added in future versions
Utilities.Initialize(settings);
}
```
**Use cases for manual initialization:**
* Loading settings from remote configuration
* Environment-specific utility behaviors (dev vs production)
* Custom logging or debug output preferences
{% hint style="warning" %}
For most games, configure settings in the ScriptableObject instead of manual initialization.
{% endhint %}
## Related Guides
* Pair with **Rate My App** to provide fallback review options when quota is exhausted
* Use with **permission-based features** (Camera, Contacts, Notifications) for settings navigation
* Combine with **Native UI** dialogs for user-friendly permission explanations
# PlayMaker
Access system utilities like app store navigation and settings using Essential Kit's Utilities feature via PlayMaker custom actions.
## Actions (6)
* `UtilitiesOpenAppStorePageDefault` (sync): Opens the app store page using the configured app ID from Essential Kit settings.
* `UtilitiesOpenAppStorePageById` (sync): Opens the app store page using platform-specific IDs passed as parameters.
* `UtilitiesOpenApplicationSettings` (sync): Opens the native application settings page (iOS: Settings app, Android: system settings).
* `UtilitiesRequestInfoForAgeCompliance` (async): Requests age compliance info using optional age gate ranges.
* `UtilitiesGetInfoForAgeComplianceSuccessResult` (sync): Reads the last age compliance info result cached by the request action.
* `UtilitiesGetInfoForAgeComplianceError` (sync): Reads the last age compliance error cached by the request action.
## Quick flow
1. `UtilitiesOpenAppStorePageDefault` → Opens app store for ratings/reviews
* OR `UtilitiesOpenAppStorePageById` with explicit platform-specific app IDs
2. `UtilitiesOpenApplicationSettings` → Directs users to grant permissions
## Notes
* App store and settings actions are fire-and-forget (no success/failure callbacks).
* Age compliance is async; use `UtilitiesRequestInfoForAgeCompliance` with success/failure events, then read cached outputs if needed.
## Common uses
* **App Store Reviews**: Use `UtilitiesOpenAppStorePageDefault` to prompt users for ratings
* **Permission Flow**: Use `UtilitiesOpenApplicationSettings` when permissions are denied
* **Cross-App Promotion**: Use `UtilitiesOpenAppStorePageById` to promote other apps
* **Age Compliance**: Use `UtilitiesRequestInfoForAgeCompliance` to collect age range info and handle gating
## Use cases
Start here: `use-cases/README.md`
## Platform notes
* **iOS**: App ID is the numeric App Store ID (e.g., "1234567890")
* **Android**: App ID is the bundle identifier (e.g., "com.example.myapp")
* Configure default app IDs in Essential Kit Settings for platform-specific values
# Use Cases
Quick-start guides showing minimal implementations of common system utility tasks using PlayMaker custom actions.
## Available Use Cases
### 1. [Prompt for App Store Review](/features/utilities/playmaker/use-cases/use-case-1-app-store-review)
* **What it does:** Open the app store page to encourage user ratings/reviews
* **Complexity:** Basic
* **Actions:** 1 (UtilitiesOpenAppStorePageDefault)
* **Best for:** In-app rating prompts, post-level completion rewards
***
### 2. [Direct Users to App Settings](/features/utilities/playmaker/use-cases/use-case-2-permission-settings)
* **What it does:** Guide users to enable permissions in system settings
* **Complexity:** Basic
* **Actions:** 1 (UtilitiesOpenApplicationSettings)
* **Best for:** Permission denied flows, settings tutorials
***
### 3. [Cross-Promote Another App](/features/utilities/playmaker/use-cases/use-case-3-cross-promotion)
* **What it does:** Open the app store page for a different app
* **Complexity:** Basic
* **Actions:** 1 (UtilitiesOpenAppStorePageById)
* **Best for:** Publisher portfolios, related app promotions
***
### 4. [Request Age Compliance Info](https://github.com/voxelbusters/essential-kit-docs/blob/master/tutorials/v3/features/utilities/playmaker/use-cases/use-case-4-age-compliance.md)
* **What it does:** Requests user age range info and declaration method for compliance flows
* **Complexity:** Intermediate
* **Actions:** 1 (UtilitiesRequestInfoForAgeCompliance) + optional (UtilitiesGetInfoForAgeComplianceSuccessResult, UtilitiesGetInfoForAgeComplianceError)
* **Best for:** Age gating, regional compliance requirements
***
## Choosing the Right Use Case
**Start Here:**
* Want ratings/reviews for THIS app? → **Use Case 1**
* Users need to grant permissions? → **Use Case 2**
* Promoting a DIFFERENT app? → **Use Case 3**
* Need age compliance info? → **Use Case 4**
## Quick Action Reference
| Action | Purpose | Used In |
| --------------------------------------------- | --------------------------------- | ---------- |
| UtilitiesOpenAppStorePageDefault | Open store for this app | Use Case 1 |
| UtilitiesOpenApplicationSettings | Open app settings | Use Case 2 |
| UtilitiesOpenAppStorePageById | Open store with iOS + Android IDs | Use Case 3 |
| UtilitiesRequestInfoForAgeCompliance | Request age compliance info | Use Case 4 |
| UtilitiesGetInfoForAgeComplianceSuccessResult | Read cached age compliance result | Use Case 4 |
| UtilitiesGetInfoForAgeComplianceError | Read cached age compliance error | Use Case 4 |
## Related Documentation
* [**README.md**](/features/utilities/playmaker) - Actions + quick flow
# Prompt for App Store Review
## Goal
Open the app store page for your app to encourage users to leave ratings and reviews.
## Actions Required
| Action | Purpose |
| -------------------------------- | --------------------------------------- |
| UtilitiesOpenAppStorePageDefault | Opens app store using configured app ID |
## Variables Needed
None required (uses Essential Kit Settings)
## Implementation Steps
### 1. State: OpenAppStore
**Action:** UtilitiesOpenAppStorePageDefault
**Note:** The app will suspend and the App Store will open. Users can return via multitasking.
## Configuration Required
In Essential Kit Settings, configure:
* **iOS**: Set App Store ID (numeric, e.g., "1234567890")
* **Android**: Set Package Name (e.g., "com.yourcompany.yourapp")
## Common Issues
* **App Store doesn't open**: Verify app IDs are correctly configured in Essential Kit Settings
* **Wrong app opens**: Check that platform-specific app IDs match your published app
* **Action fails in Editor**: App Store links only work on device (iOS/Android)
## Flow Diagram
```
OpenAppStore
└─ App Store opens, app suspends
```
## Best Practices
* Prompt after positive experiences (level completion, achievement unlocked)
* Don't show too frequently (once per version, or after significant milestones)
* Use a friendly message before opening: "Enjoying the game? Rate us!"
# Direct Users to App Settings
## Goal
Guide users to the native app settings page where they can enable permissions (camera, contacts, notifications, etc.).
## Actions Required
| Action | Purpose |
| -------------------------------- | ---------------------------------- |
| UtilitiesOpenApplicationSettings | Opens native settings for this app |
## Variables Needed
None required
## Implementation Steps
### 1. State: DetectPermissionDenied
Check permission status (e.g., AddressBookGetContactsAccessStatus, camera, etc.)
* If DENIED → ShowSettingsPrompt
* If AUTHORIZED → Continue
### 2. State: ShowSettingsPrompt
Display UI message: "This feature requires \[Permission Name]. Please enable it in Settings."
* Button: "Open Settings" → OpenSettings state
### 3. State: OpenSettings
**Action:** UtilitiesOpenApplicationSettings
**Note:** The app will suspend and Settings app will open. Users can return via multitasking.
## Common Issues
* **Settings don't open**: Only works on device (iOS/Android), not in Editor
* **User doesn't grant permission**: App needs to re-check permission when returning from settings
* **Wrong settings page**: On older Android versions, may open general settings instead of app-specific
## Flow Diagram
```
DetectPermissionDenied
└─ Denied → ShowSettingsPrompt
ShowSettingsPrompt
└─ User taps "Open Settings" → OpenSettings
OpenSettings
└─ Settings app opens, app suspends
```
## Best Practices
* Explain WHY permission is needed before opening settings
* Use clear, friendly language: "We need photo access to save your avatar"
* Don't automatically open settings - let users tap a button
* Handle app resume gracefully (re-check permission status)
## Example UI Message
```
"Camera Access Required"
"To take photos for your profile, please enable camera
access in Settings."
[Cancel] [Open Settings]
```
# Cross-Promote Another App
## Goal
Open the app store page for a different app (e.g., to promote another game in your portfolio).
## Actions Required
| Action | Purpose |
| ----------------------------- | ---------------------------------------------- |
| UtilitiesOpenAppStorePageById | Opens app store with platform-specific app IDs |
## Variables Needed
* iosAppStoreId (String): iOS numeric App Store ID (e.g., "1234567890")
* androidPackageId (String): Android bundle ID (e.g., "com.publisher.anotherapp")
## Implementation Steps
### 1. State: SetTargetIds
Set the platform-specific IDs for the app you want to promote:
* **iOS**: `iosAppStoreId` = numeric App Store ID (e.g., "1234567890")
* **Android**: `androidPackageId` = package name (e.g., "com.publisher.anotherapp")
### 2. State: OpenTargetApp
**Action:** UtilitiesOpenAppStorePageById
* **Inputs:**
* iosAppStoreId → iosAppStoreId (optional, iOS only)
* androidPackageName → androidPackageName (optional, Android only)
**Note:** The app will suspend and the App Store will open for the target app.
## Common Issues
* **Wrong app opens**: Verify app ID is correct for the platform
* **App not found**: Ensure the target app is published on the current platform
* **Action fails in Editor**: App Store links only work on device
## Flow Diagram
```
SetTargetIds
├─ iosAppStoreId = "1234567890"
└─ androidPackageId = "com.publisher.anotherapp"
OpenTargetApp
└─ App Store opens for target app
```
## Best Practices
* Show a preview/description of the promoted app before opening
* Use compelling call-to-action: "Try our NEW game!"
* Track conversions using analytics before opening store
* Consider showing promotions after natural breaks (level end, menu screen)
## Example Configuration
### For iOS:
```
targetAppId = "123456789" // Numeric App Store ID
```
### For Android:
```
targetAppId = "com.yourpublisher.anothergame" // Package name
```
### Platform-Aware Setup:
Use PlayMaker's platform detection or FsmString with different values per build.
## Notes
* You can set only the ID for the platform you ship on, or set both to support cross-platform builds.
# Game Services
Cross-platform game services integration for mobile games with player authentication, leaderboards, achievements, and social features
Essential Kit's Game Services feature lets Unity teams integrate Game Center (iOS) and Google Play Games (Android) without maintaining platform-specific code. This tutorial walks you through setup, authentication, leaderboards, achievements, and troubleshooting so you can add competitive social features with confidence.
{% hint style="info" %}
Using PlayMaker? See the PlayMaker guide: [PlayMaker](/features/game-services/playmaker).
{% endhint %}
{% hint style="info" %}
Looking for a working reference? Open the demo scene at `Assets/Plugins/VoxelBusters/EssentialKit/Examples/Scenes/GameServicesDemo.unity` and the companion script at `Assets/Plugins/VoxelBusters/EssentialKit/Examples/Scripts/GameServicesDemo.cs` to see the full API in action.
{% endhint %}
## What You'll Learn
* Authenticate players with Game Center and Google Play Games seamlessly
* Submit scores to leaderboards and display competitive rankings
* Report achievement progress and show achievement UI
* Handle authentication states and error scenarios
* Access friends list for social features
## Why Game Services Matters
* **Player Retention**: Games with leaderboards see 23% higher retention rates
* **Engagement**: Achievements provide progression goals that keep players returning
* **Social Competition**: Friends integration builds community and drives session time
* **Cross-Platform**: Unified API works on both iOS Game Center and Android Play Games
## Tutorial Roadmap
1. [Setup](/features/game-services/setup) – Configure platform dashboards and Essential Kit settings
2. [Usage](/features/game-services/usage) – Authentication, leaderboards, achievements, and social features
3. [Testing](https://github.com/voxelbusters/essential-kit-docs/blob/master/tutorials/v3/features/game-services/testing.md) – Simulate in editor and verify on devices
4. [FAQ](/features/game-services/faq) – Troubleshoot common issues
## Key Use Cases
* Display global leaderboards to showcase top players and drive competition
* Unlock progressive achievements to reward player milestones
* Show friend leaderboards for personalized social competition
* Integrate server authentication using server credentials for backend validation
## Prerequisites
* Unity project with Essential Kit v3 installed and Game Services feature enabled
* iOS: App configured in App Store Connect with Game Center enabled
* Android: App configured in Google Play Console with Play Games Services enabled
* Test device or Essential Kit simulator for authentication testing
{% content-ref url="/pages/-MKFtq8NAiXb3Q6mDBgn" %}
[Setup](/features/game-services/setup)
{% endcontent-ref %}
{% content-ref url="/pages/-MKGWeY2sioNf8Dx7z-N" %}
[Usage](/features/game-services/usage)
{% endcontent-ref %}
{% content-ref url="" %}
{% endcontent-ref %}
{% content-ref url="/pages/-MKQjTcHa\_4dKPwmls6P" %}
[FAQ](/features/game-services/faq)
{% endcontent-ref %}
# Setup
Configuring Game Services for iOS Game Center and Android Play Games
Game Services requires platform-specific configuration in App Store Connect (iOS) and Google Play Console (Android), plus Essential Kit settings configuration.
## Prerequisites
* Essential Kit imported into the project from My Assets section of Package Manager
* iOS builds require Game Center configuration in App Store Connect
* Android builds require Play Games Services setup in Google Play Console
* Leaderboards and achievements must be created on both platforms with unique IDs
## Setup Checklist
1. **Platform Configuration**: Configure leaderboards and achievements in App Store Connect and Google Play Console (see platform-specific guides below)
2. **Enable Feature**: Open **Essential Kit Settings** (`Window > Voxel Busters > Essential Kit > Open Settings`), switch to the **Services** tab, and enable **Game Services**
3. **Add Definitions**: In Game Services settings, add leaderboard and achievement definitions matching your platform configurations
4. **Configure Properties**: Set achievement completion banner preference and friends access permissions
5. **Verify Settings**: Changes save automatically. If using source control, commit the updated `Resources/EssentialKitSettings.asset` file
## Platform-Specific Setup
Game Services requires creating leaderboards and achievements on each platform's developer console before configuring Essential Kit.
{% content-ref url="/pages/-MKPy4y2SwfuoAixuozT" %}
[iOS](/features/game-services/setup/ios)
{% endcontent-ref %}
{% content-ref url="/pages/-MKPyA0dlIZkS\_u7c\_me" %}
[Android](/features/game-services/setup/android)
{% endcontent-ref %}
## Essential Kit Configuration
After creating leaderboards and achievements in platform dashboards, configure them in Essential Kit Settings.
Game Services Settings
### Leaderboard Configuration
Each leaderboard needs a common ID for your code and platform-specific IDs matching your dashboard configuration.
**Example Configuration:**
```
Leaderboard ID: "high_score"
├─ iOS Platform ID: "com.yourcompany.yourgame.highscore"
├─ Android Platform ID: "CgkI7_abc123HIGHSCORE"
└─ Title: "High Scores"
```
**To add leaderboards:**
1. In Game Services settings, click **Add Leaderboard**
2. Set **Id** - common identifier used in code (e.g., "high\_score")
3. Enter **iOS Platform ID** from App Store Connect Game Center configuration
4. Enter **Android Platform ID** from Google Play Console leaderboards
5. Set **Title** for debugging reference (optional)

### Achievement Configuration
Each achievement needs a common ID for your code and platform-specific IDs from platform dashboards.
**Example Configuration:**
```
Achievement ID: "first_win"
├─ iOS Platform ID: "com.yourcompany.yourgame.firstwin"
├─ Android Platform ID: "CgkI7_ghi789FIRSTWIN"
├─ Title: "First Victory"
└─ Steps to Unlock: 1 (use >1 for incremental achievements)
```
**To add achievements:**
1. In Game Services settings, click **Add Achievement**
2. Set **Id** - common identifier used in code (e.g., "first\_win")
3. Enter **iOS Platform ID** from App Store Connect Game Center configuration
4. Enter **Android Platform ID** from Google Play Console achievements
5. Set **Title** for debugging reference (optional)
6. Set **Number of Steps to Unlock** (1 for single unlock, >1 for incremental)

{% hint style="danger" %}
On iOS, if you plan to deploy to multiple Apple platforms (macOS, tvOS), use leaderboard/achievement groups from the start. Group IDs must start with "grp." prefix and be unique.
**Recommended format:** `grp.com.companyname.gamename.itemname` **Example:** `grp.com.voxelbusters.flappybird.highscoreleaderboard`
This avoids changing IDs later once you have live versions on different platforms.
{% endhint %}
## Configuration Reference
### General Settings
| Setting | Platform | Default | Notes |
| ---------------------------------- | -------- | ------- | --------------------------------------------------- |
| Enable Game Services | All | Off | Must be enabled to include Game Services in builds |
| Leaderboards | All | Empty | Array of leaderboard definitions |
| Achievements | All | Empty | Array of achievement definitions |
| Show Achievement Completion Banner | iOS | On | Displays native iOS banner when achievements unlock |
| Allow Friends Access | All | Off | Adds permissions for friends list access |
| Android Properties | Android | Auto | OAuth client and Android-specific options |
### Leaderboard Properties
| Property | Type | Required | Notes |
| --------------------- | ------ | ------------- | --------------------------------------------------- |
| Id | string | Yes | Common identifier used in code across all platforms |
| iOS Platform ID | string | Yes (iOS) | Leaderboard ID from App Store Connect Game Center |
| Android Platform ID | string | Yes (Android) | Leaderboard ID from Google Play Console |
| Platform Id Overrides | object | Optional | Per-platform ID overrides if IDs differ |
| Title | string | Optional | Debugging label (not shown to players in game) |
### Achievement Properties
| Property | Type | Required | Notes |
| ------------------------- | ------ | ------------- | ----------------------------------------------------------- |
| Id | string | Yes | Common identifier used in code across all platforms |
| iOS Platform ID | string | Yes (iOS) | Achievement ID from App Store Connect Game Center |
| Android Platform ID | string | Yes (Android) | Achievement ID from Google Play Console |
| Platform Id Overrides | object | Optional | Per-platform ID overrides if IDs differ |
| Title | string | Optional | Debugging label (not shown to players in game) |
| Number of Steps to Unlock | int | Yes | Set to 1 for single unlock, >1 for incremental achievements |
### Android Properties
| Property | Type | Required | Notes |
| ---------------------------- | --------- | -------- | -------------------------------------------------------------------------------------------------- |
| Play Services Application Id | string | Yes | Project ID from Google Play Console → Play Games Services → Configuration |
| Server Client Id | string | Optional | **Web** OAuth Client ID for backend access to player data (not Android OAuth) |
| Force Refresh Token | bool | On | Enables refresh tokens for long-lived access to Play Games data |
| Achieved Description Formats | string\[] | Optional | Format strings for Android achievement completion text; `#` is replaced with the achievement title |
| Show Error Dialogs | bool | On | Shows Play Games error dialogs automatically (sign-in failures, etc.) |
| Enable Auto Initialization | bool | On | Starts Play Games initialization on app launch (see note below) |
{% hint style="warning" %}
**Enable Auto Initialization (Android)** is experimental. Google Play Games Services **does not officially support disabling auto-init**(By default Auto Init is enabled); Essential Kit uses an undocumented workaround. Use with caution and test thoroughly because there can be side effects.
{% endhint %}
\| Show Alert Dialogs | bool | Optional | Display native error dialogs for sign-in failures |
{% hint style="success" %}
**Android Server Client ID:** Only required if you access Play Games profile data from your backend server. Use **Web Platform OAuth Client** ID, NOT Android OAuth Client ID. Using the wrong OAuth client will cause sign-in failures.
To create: Google Cloud Console → Credentials → Create OAuth Client → Web Application
{% endhint %}
{% hint style="warning" %}
Leaderboard and achievement IDs must exactly match the platform IDs configured in App Store Connect and Google Play Console. Mismatched IDs will cause runtime errors when calling Game Services APIs.
{% endhint %}
{% hint style="info" %}
Need a working baseline? Run the sample at `Assets/Plugins/VoxelBusters/EssentialKit/Examples/Scenes/GameServicesDemo.unity` to confirm your settings before wiring the feature into production screens.
{% endhint %}
## Automatic Platform Integration
Essential Kit automatically handles platform-specific configuration during build:
* **iOS**: Adds GameKit.framework, configures capabilities, injects Info.plist entries
* **Android**: Adds Play Games Services dependencies, configures AndroidManifest permissions
You don't need to manually configure Xcode projects or AndroidManifest.xml files.
## Next Steps
After completing setup, proceed to the [Usage Guide](/features/game-services/usage) to learn how to authenticate players and implement leaderboards and achievements in your game.
# iOS
Plugin internally uses Game Center to provide game services funtionality.
> Game Center is an Apple service that provides social gaming functionality to games. Game Center allows users to track their scores on a leaderboard, view achievement progress.
Adding support for certain Game Center features, like leaderboards and achievements, requires you to provide additional assets and metadata. Some examples include achievement images and descriptions, as well as leaderboard artwork. You provide and manage all of these within your App Store Connect account.
In App Store Connect, [add an app to your account](https://help.apple.com/app-store-connect/#/dev2cd126805) that matches the bundle ID in Xcode, then configure Game Center components such as leaderboards, achievements.
## Configure leaderboards
1. Open [Appstore connect](https://appstoreconnect.apple.com/)
2. From My Apps, select the app you wish to enable for Game Center.
3. In the toolbar, click Features. The page opens with the Game Center tab selected.
4. Click the add button (+) in the Leaderboards section.
5. Select Choose next to Classic Leaderboard.
6. Input your leaderboard metadata. For more information, see [Leaderboard properties](https://help.apple.com/app-store-connect/#/dev2cc707039?sub=devf6a794ff1).
* Leaderboard Reference Name
* Leaderboard ID
* Score Format
* Score Submission Type
* Sort Order
* Score Range (Optional)
7. Under Leaderboard Localization, add one or more languages by clicking Add Language.
8. Enter the required information:
* In the dialog that appears, choose a language from the Language menu.
* In the Name field, enter a localized reference name for the leaderboard. For example, if you choose Finnish from the Language menu, enter the Finnish name for the leaderboard in the Name field.
* Choose a localized score format from the Score Format menu, then enter the singular and plural version of your score format suffix. If Score Format Suffix Plural doesn’t appear, it’s not needed for the selected language. Additionally, if you want a space to appear between the score and the suffix, you can enter a space followed by the suffix text.
* Optionally, you can click Choose File to add a localized image for your leaderboard.
* Click Save. To add additional language support for your leaderboards, repeat the above steps for each language.
8\. Click Save.
{% hint style="success" %}
The Leaderboard ID you set while creating the Leaderboard meta data on Appstore connect will be the **platform Id** for iOS platform on [Essential Kit Settings](/features/game-services/setup#properties).
{% endhint %}
## Configure achievements
1. Open [Appstore connect](https://appstoreconnect.apple.com/)
2. From My Apps, select your app.
3. In the toolbar, click Features. The page opens with the Game Center tab selected.
4. Click the add button (+) under the Achievements section.
5. Input your achievement metadata. For more information, see [Achievement properties](https://help.apple.com/app-store-connect/#/dev928049713?sub=dev95e709d24).
* Achievement Reference Name
* Achievement ID
* Point Value
* Hidden: Select Yes if you want the achievement to be hidden until the user earns it; otherwise, select No.
* Achievable More Than Once: Select Yes if the user can earn the achievement multiple times; otherwise, select No.
6. Add one or more language in the Achievement Localization section by clicking Add Language.
7. Enter your [Achievement language properties](https://help.apple.com/app-store-connect/#/dev928049713?sub=deve0ca0402a):
* In the dialog that appears, choose a language from the Language menu.
* Title: Enter a localized name for the achievement.
* Pre-earned Description: Enter a localized description of the achievement.
* Earned Description: Enter a localized description of the achievement.
* Add a localized image by selecting Choose File.
* Click Save. To add additional language support for your achievements, repeat the above steps for each language.
8. Click Save.
{% hint style="success" %}
The Achievement ID you set while creating the Achievement meta data on Appstore connect will be the platform Id for iOS on [Essential Kit Settings](/features/game-services/setup#properties).
{% endhint %}
# Android
Plugin uses Google Play Services to provide the functionalities of Game Services.
> Google Play games services save you from having to implement popular game features yourself. Using the google game play services you can help players to challenge themselves and measure themselves against others, and receive rewards. Players who take advantage of Google Play games services features are more likely to engage with and make purchases from your game.
## Configuring Leaderboards
> For creating a new Leaderboard
1. Navigate to [Google Play Console](https://play.google.com/apps/publish) and select your app
2. Select Grow -> Play Games Services -> Setup and Management -> Leaderboards tab on the left and click on **Create Leaderboard**
3. Input your leaderboard metadata. For more information, see [Leaderboard properties](https://developers.google.com/games/services/common/concepts/leaderboards#the_basics).
* Name
* Format
* Icon
* Sort Order
* Tamper protection (optional)
* Limits (Optional)
* Order
4. Click Save

{% hint style="success" %}
Once after saving the created leaderboard, you can see the leaderboard id in the leaderboards section and this will be the **platform Id** for Android platform on [Essential Kit Settings](/features/game-services/setup#properties) for each leaderboard you configure.
{% endhint %}
## Configuring Achievements
> For creating a new Achievement
1. Navigate to [Google Play Console](https://play.google.com/apps/publish) and select your app
2. Select Grow -> Play Games Services -> Setup and Management -> Achievements tab on the left and click on **Create Achievement**
3. Input your leaderboard metadata. For more information, see [Leaderboard properties](https://developers.google.com/games/services/common/concepts/leaderboards#the_basics).
* Name
* Description
* Icon
* Incremental Achievements (If enabled [NumberOfStepsToUnlock](/features/game-services/setup#properties) will be the value thats set here. Else it will be 1)
* Initial state (Revealed/Hidden)
* Points
* List Order
4. Click Save

{% hint style="success" %}
Once after saving the created leaderboard, you can see the achievement id in the achievements section and this will be the **platform Id** for Android platform on [Essential Kit Settings](/features/game-services/setup#properties) for Achievements for each achievement you configure.
{% endhint %}
## Configuring Credentials (SHA fingerprint authentication)
For using google play services, the player needs to login. For logging in successfully, the apk from which the player is logging in needs to be authenticated by google servers.
One way google servers authenticate is by checking if the request is from an apk/aab which has a valid SHA fingerprint added in the google play console.
{% hint style="success" %}
For your apk to login successfully, you need to add a SHA fingerprint to google play console. This makes google servers aware that your apk requests are valid.
{% endhint %}
### Adding a SHA fingerprint?
1. Navigate to [Google Play Console](https://play.google.com/apps/publish) and select your app
2. Select Grow -> Play Games Services -> Setup and Management -> Configuration tab on the left and click on **Add Credential**
3. If you are accessing login from your Android apk, select Android else Game Server for type
4. Under Authorization section
1. Click on Create OAuth Client button
2. Open **Create OAuth Client Id**
3. Enter your package name
4. Fill in the SHA fingerprint (For creating one, check [FAQ](/features/game-services/faq#what-are-different-sha-fingerprints-that-needs-to-be-used-for-logging-in-successfully-on-different-environments-and-how-to-create-them))
5. Click Save
6. Come back to Authorization section (step 4) and select the created OAuth client
5. Click on Save
### Authenticate APK's built in different environments
There are usually 3 environments when creating the apk/aab and each environment uses a different keystore leading to a unique SHA
* Debug - Uses default android debug keystore when development build is on
* Release - Uses release key store when release build is on
* Play Store - Uses google play signing keystore for all the apks downloaded from play store( including tracks - Alpha/Beta)
If you want to login successfully in the apk's built in those above environments, you need to add credential in Google play console by repeating the process mentioned above(**Adding a SHA fingerprint**) for each SHA fingerprint.
{% hint style="success" %}
For authenticating successfully, SHA fingerprint of the built APK needs to be added in the Google play console -> Play Games Services -> Setup and Management -> Configuration -> Credentials section.
{% endhint %}
{% hint style="danger" %}
99% of the errors related to sign in failure are because of not adding the SHA of your apk thus letting the google servers to block the login.
{% endhint %}
# Usage
Game Services provides cross-platform access to Game Center and Google Play Games for authentication, leaderboards, achievements, and social features
Essential Kit wraps iOS Game Center and Android Google Play Games into a unified API. Game Services handles authentication automatically - just call the APIs and Essential Kit manages platform differences.
## Table of Contents
* [Import Namespaces](#import-namespaces)
* [Understanding Authentication](#understanding-authentication)
* [Event Registration](#event-registration)
* [Player Authentication](#player-authentication)
* [Leaderboards](#leaderboards)
* [Achievements](#achievements)
* [Social Features](#social-features)
* [Server Integration](#server-integration)
* [Core APIs Reference](#core-apis-reference)
* [Data Properties](#data-properties)
* [Error Handling](#error-handling)
* [Advanced: Runtime Settings Initialization](#advanced-runtime-settings-initialization)
* [Related Guides](#related-guides)
## Import Namespaces
```csharp
using System;
using System.Collections.Generic;
using VoxelBusters.CoreLibrary;
using VoxelBusters.EssentialKit;
```
## Understanding Authentication
Game Services requires player authentication before accessing leaderboards, achievements, or social features. Essential Kit auto-initializes Game Services on app start using your configured settings.
**Authentication Flow:**
1. Call `GameServices.Authenticate()` when you want the player to sign in
2. On first call, platform shows native login UI (Game Center or Play Games)
3. `OnAuthStatusChange` event fires with authentication result
4. Once authenticated, `GameServices.LocalPlayer` contains player info
5. Subsequent app launches may auto-authenticate silently if enabled by platform
**Key Concepts:**
* **Interactive Authentication**: Shows login UI if player not signed in
* **Silent Authentication**: Attempts sign-in without showing UI (useful for automatic login)
* **LocalPlayer**: Represents the authenticated player with display name, ID, and avatar
* **IsAuthenticated**: Check if player is currently signed in
## Event Registration
Register for authentication events in `OnEnable` and unregister in `OnDisable`:
```csharp
void OnEnable()
{
GameServices.OnAuthStatusChange += OnAuthStatusChange;
}
void OnDisable()
{
GameServices.OnAuthStatusChange -= OnAuthStatusChange;
}
```
| Event | Trigger | Data |
| -------------------- | ----------------------------------------------------------- | ------------------------------------------------------------------------ |
| `OnAuthStatusChange` | Player signs in, signs out, or authentication state changes | `GameServicesAuthStatusChangeResult` with `LocalPlayer` and `AuthStatus` |
## Player Authentication
### Authenticate Player
Call `Authenticate()` to sign in the player. On first call, shows platform login UI.
```csharp
void SignInPlayer()
{
Debug.Log("Starting authentication...");
GameServices.Authenticate(interactive: true);
}
void OnAuthStatusChange(GameServicesAuthStatusChangeResult result, Error error)
{
if (error != null)
{
Debug.Log($"Authentication failed: {error.Description}");
return;
}
Debug.Log($"Auth status: {result.AuthStatus}");
if (result.AuthStatus == LocalPlayerAuthStatus.Authenticated)
{
ILocalPlayer player = result.LocalPlayer;
Debug.Log($"Signed in as {player.DisplayName}");
// Access player info
Debug.Log($"Player Identifier: {player.Identifier}");
// Load player avatar
player.LoadImage((imageData, loadError) =>
{
if (loadError == null && imageData != null)
{
Texture2D avatar = imageData.GetTexture();
// Display avatar in UI
}
});
}
}
```
{% hint style="info" %}
`GameServices.Authenticate()` immediately succeeds when the player is already signed in, so you can call it directly without first checking `GameServices.IsAuthenticated`. Use `IsAuthenticated` when you need to query status (for example, to toggle UI) rather than to guard the authentication call.
{% endhint %}
### Silent Authentication
Use silent authentication to auto-sign in without showing UI:
```csharp
void Start()
{
// Try silent authentication on app start
GameServices.Authenticate(interactive: false);
}
```
If player previously signed in and platform supports auto-authentication, this succeeds silently. Otherwise, `OnAuthStatusChange` returns not authenticated without showing UI.
{% hint style="success" %}
**UX Best Practice**: Call silent authentication on app start. If it fails, show a "Sign In" button that calls `Authenticate(interactive: true)` to show login UI only when player explicitly wants to sign in.
{% endhint %}
### Check Authentication Status
Use `IsAuthenticated` or `LocalPlayer` to check current state:
```csharp
if (GameServices.IsAuthenticated)
{
ILocalPlayer player = GameServices.LocalPlayer;
Debug.Log($"Player signed in: {player.DisplayName}");
}
else
{
Debug.Log("Player not signed in");
}
```
### Sign Out
```csharp
void SignOut()
{
GameServices.Signout();
Debug.Log("Player signed out");
}
```
After sign out, `IsAuthenticated` returns `false` and game services operations will fail until player re-authenticates.
## Leaderboards
Leaderboards display competitive rankings. Essential Kit supports submitting scores, loading scores, and showing native leaderboard UI.
### Submit Score
**Using leaderboard ID** (simplest approach):
```csharp
void SubmitScore(long score)
{
if (!GameServices.IsAuthenticated)
{
Debug.Log("Player must be authenticated to submit scores");
return;
}
GameServices.ReportScore("high_score", score, (success, error) =>
{
if (success)
{
Debug.Log($"Score {score} submitted successfully");
}
else if (error != null)
{
Debug.Log($"Score submission failed: {error.Description}");
}
});
}
```
**Using leaderboard object** (for advanced operations):
```csharp
void SubmitScoreAdvanced(long score)
{
ILeaderboard leaderboard = GameServices.CreateLeaderboard("high_score");
if (leaderboard == null)
{
Debug.Log("Leaderboard 'high_score' not found in settings");
return;
}
leaderboard.ReportScore(score, (success, error) =>
{
if (success)
{
Debug.Log($"Score {score} submitted");
}
else if (error != null)
{
Debug.Log($"Score submission failed: {error.Description}");
}
});
}
```
**With optional score tag** (8 ASCII characters max):
```csharp
void SubmitTaggedScore(long score, string levelId)
{
string tag = levelId.Substring(0, Math.Min(8, levelId.Length));
GameServices.ReportScore("level_scores", score, (success, error) =>
{
if (success)
{
Debug.Log($"Score {score} submitted with tag {tag}");
}
else if (error != null)
{
Debug.Log($"Score submission failed: {error.Description}");
}
}, tag);
}
```
### Load Leaderboard Scores
**Load top scores** from a leaderboard:
```csharp
void LoadTopScores()
{
ILeaderboard leaderboard = GameServices.CreateLeaderboard("high_score");
if (leaderboard == null) return;
// Configure score query
leaderboard.TimeScope = LeaderboardTimeScope.AllTime;
leaderboard.PlayerScope = LeaderboardPlayerScope.Global;
leaderboard.LoadTopScores((result, error) =>
{
if (error != null)
{
Debug.Log($"Failed to load scores: {error.Description}");
return;
}
Debug.Log($"Loaded {result.Scores.Length} scores");
foreach (ILeaderboardScore score in result.Scores)
{
Debug.Log($"{score.Rank}. {score.Player.DisplayName}: {score.Value}");
}
});
}
```
**Load player-centered scores** (scores around authenticated player):
```csharp
void LoadPlayerCenteredScores()
{
ILeaderboard leaderboard = GameServices.CreateLeaderboard("high_score");
if (leaderboard == null) return;
leaderboard.TimeScope = LeaderboardTimeScope.Week;
leaderboard.LoadPlayerCenteredScores((result, error) =>
{
if (error == null)
{
Debug.Log($"Loaded {result.Scores.Length} scores around player");
}
});
}
```
### Leaderboard Time Scopes
Control which scores are displayed:
```csharp
// All-time scores (default)
leaderboard.TimeScope = LeaderboardTimeScope.AllTime;
// This week's scores
leaderboard.TimeScope = LeaderboardTimeScope.Week;
// Today's scores
leaderboard.TimeScope = LeaderboardTimeScope.Today;
```
### Show Leaderboard UI
**Show all leaderboards**:
```csharp
void ShowAllLeaderboards()
{
GameServices.ShowLeaderboards(LeaderboardTimeScope.AllTime, (result, error) =>
{
Debug.Log("Leaderboard UI closed");
});
}
```
**Show specific leaderboard**:
```csharp
void ShowHighScoreLeaderboard()
{
GameServices.ShowLeaderboard("high_score", LeaderboardTimeScope.Week, (result, error) =>
{
Debug.Log("Leaderboard UI closed");
});
}
```
The native platform UI shows:
* iOS: Game Center leaderboard overlay
* Android: Play Games leaderboard screen
{% hint style="info" %}
Native leaderboard UI pauses your game automatically. Resume game logic in the callback if needed.
{% endhint %}
### Load Leaderboard Metadata
Load all configured leaderboards with metadata:
```csharp
void LoadLeaderboardsData()
{
GameServices.LoadLeaderboards((result, error) =>
{
if (error == null)
{
Debug.Log($"Loaded {result.Leaderboards.Length} leaderboards");
foreach (ILeaderboard lb in result.Leaderboards)
{
Debug.Log($"Leaderboard: {lb.Id}, Title: {lb.Title}");
}
}
});
}
```
## Achievements
Achievements reward player milestones. Essential Kit supports reporting progress and showing achievement UI.
### Understanding Achievement Types
**Standard Achievements** (single unlock):
* Unlock once when player completes a task
* Example: "Complete first level"
* Set `PercentageCompleted = 100.0` to unlock
**Incremental Achievements** (progressive unlock):
* Track progress over time
* Example: "Win 100 games" (0-100% progress)
* Update `PercentageCompleted` as player progresses
### Report Achievement Progress
**Using achievement ID** (simplest approach):
```csharp
void UnlockAchievement(string achievementId)
{
if (!GameServices.IsAuthenticated)
{
Debug.Log("Player must be authenticated");
return;
}
GameServices.ReportAchievementProgress(achievementId, 100.0, (success, error) =>
{
if (success)
{
Debug.Log($"Achievement {achievementId} unlocked!");
}
else if (error != null)
{
Debug.Log($"Achievement failed: {error.Description}");
}
});
}
```
**For incremental achievements**:
```csharp
void UpdateAchievementProgress(string achievementId, int currentProgress, int maxProgress)
{
double percentage = ((double)currentProgress / maxProgress) * 100.0;
GameServices.ReportAchievementProgress(achievementId, percentage, (success, error) =>
{
if (success)
{
Debug.Log($"Achievement progress: {percentage:F1}%");
}
else if (error != null)
{
Debug.Log($"Progress update failed: {error.Description}");
}
});
}
void TrackWinsExample()
{
// Example: Track wins
int wins = 45;
int targetWins = 100;
UpdateAchievementProgress("win_100_games", wins, targetWins); // Reports 45% progress
}
```
**Using achievement object** (for advanced control):
```csharp
void ReportProgressAdvanced()
{
IAchievement achievement = GameServices.CreateAchievement("first_win");
if (achievement == null)
{
Debug.Log("Achievement 'first_win' not found in settings");
return;
}
achievement.PercentageCompleted = 100.0;
achievement.ReportProgress((success, error) =>
{
if (success)
{
Debug.Log("Achievement reported successfully");
}
else if (error != null)
{
Debug.Log($"Achievement report failed: {error.Description}");
}
});
}
```
### Load Achievement Descriptions
Load metadata for all configured achievements:
```csharp
void LoadAchievementDescriptions()
{
GameServices.LoadAchievementDescriptions((result, error) =>
{
if (error != null)
{
Debug.Log($"Failed to load: {error.Description}");
return;
}
Debug.Log($"Loaded {result.AchievementDescriptions.Length} achievements");
foreach (IAchievementDescription desc in result.AchievementDescriptions)
{
Debug.Log($"{desc.Id}: {desc.Title}");
Debug.Log($" Points: {desc.MaximumPoints}");
Debug.Log($" Hidden: {desc.IsHidden}");
}
});
}
```
### Load Player Achievement Progress
Load player's current achievement progress:
```csharp
void LoadPlayerAchievements()
{
GameServices.LoadAchievements((result, error) =>
{
if (error == null)
{
Debug.Log($"Loaded {result.Achievements.Length} achievements");
foreach (IAchievement achievement in result.Achievements)
{
Debug.Log($"{achievement.Id}: {achievement.PercentageCompleted:F1}%");
if (achievement.IsCompleted)
{
Debug.Log($" Unlocked on {achievement.LastReportedDate}");
}
}
}
});
}
```
### Show Achievements UI
Display native achievement progress screen:
```csharp
void ShowAchievementsUI()
{
GameServices.ShowAchievements((result, error) =>
{
Debug.Log("Achievements UI closed");
});
}
```
The native UI shows:
* iOS: Game Center achievements overlay
* Android: Play Games achievements screen
{% hint style="success" %}
**Achievement Completion Banners**: On iOS, Essential Kit can show a native banner when achievements unlock. Enable "Show Achievement Completion Banner" in Game Services settings to display automatic unlock notifications.
{% endhint %}
## Social Features
Access friends list and add friends for social competition.
### Load Friends
```csharp
void LoadPlayerFriends()
{
if (!GameServices.IsAuthenticated)
{
Debug.Log("Player must be authenticated to load friends");
return;
}
GameServices.LoadFriends((result, error) =>
{
if (error != null)
{
Debug.Log($"Failed to load friends: {error.Description}");
return;
}
Debug.Log($"Found {result.Players.Length} friends");
foreach (IPlayer friend in result.Players)
{
Debug.Log($"Friend: {friend.DisplayName}");
// Load friend avatar
friend.LoadImage((imageData, imgError) =>
{
if (imgError == null && imageData != null)
{
Texture2D avatar = imageData.GetTexture();
// Display in friends UI
}
});
}
});
}
```
{% hint style="warning" %}
**Privacy Permissions**: Friends access requires additional privacy permissions. Enable "Allow Friends Access" in Game Services settings and provide clear usage descriptions on iOS.
{% endhint %}
### Add Friend
Send friend request to a player:
```csharp
void SendFriendRequest(string playerId)
{
GameServices.AddFriend(playerId, (success, error) =>
{
if (error == null && success)
{
Debug.Log("Friend request sent successfully");
}
else
{
Debug.Log($"Friend request failed: {error?.Description}");
}
});
}
```
## Server Integration
### Load Server Credentials
For backend integration, load server credentials to validate player identity on your game server:
```csharp
void GetServerCredentials()
{
if (!GameServices.IsAuthenticated)
{
Debug.Log("Player must be authenticated");
return;
}
var additionalScopes = new List
{
ServerCredentialAdditionalScope.Email
};
GameServices.LoadServerCredentials(additionalScopes, (result, error) =>
{
if (error != null)
{
Debug.Log($"Failed to load credentials: {error.Description}");
return;
}
ServerCredentials credentials = result.ServerCredentials;
Debug.Log("Server credentials loaded");
foreach (ServerCredentialAdditionalScope scope in result.AdditionalGrantedScopes)
{
Debug.Log($"Granted additional scope: {scope}");
}
// Send to your backend for validation
SendToBackend(credentials);
});
}
void SendToBackend(ServerCredentials credentials)
{
// Example: Send credentials to your game server
// Server can validate with Game Center or Play Games backend
Debug.Log("Sending credentials to backend...");
}
```
{% hint style="info" %}
Server credentials expire and need periodic refresh. Credentials contain platform-specific authentication data your backend can use to verify player identity with Game Center or Google Play Games servers.
{% endhint %}
{% hint style="warning" %}
On Android, additional scopes (such as email) require user consent. Inspect `result.AdditionalGrantedScopes` to confirm which scopes were approved before relying on them server-side.
{% endhint %}
## Core APIs Reference
### Authentication APIs
| API | Purpose | Returns |
| ---------------------------------------- | -------------------------------------------------- | ------------------------------------------ |
| `GameServices.Authenticate(interactive)` | Authenticate player (shows UI if interactive=true) | Result via `OnAuthStatusChange` event |
| `GameServices.Signout()` | Sign out current player | Immediate, no callback |
| `GameServices.IsAuthenticated` | Check if player signed in | `bool` |
| `GameServices.LocalPlayer` | Get authenticated player info | `ILocalPlayer` (null if not authenticated) |
| `GameServices.Initialize(settings)` | (Advanced) Override settings at runtime | `void` |
### Leaderboard APIs
| API | Purpose | Returns |
| ------------------------------------------------------- | ---------------------------------------- | ------------------------------------------ |
| `GameServices.CreateLeaderboard(id)` | Create leaderboard object for operations | `ILeaderboard` |
| `GameServices.ReportScore(id, score, callback, tag)` | Submit score to leaderboard | Result via callback |
| `ILeaderboard.LoadTopScores(callback)` | Load highest scores | Result via callback with scores array |
| `ILeaderboard.LoadPlayerCenteredScores(callback)` | Load scores around player | Result via callback with scores array |
| `ILeaderboard.LoadNext(callback)` | Load next page of scores | Result via callback with scores array |
| `ILeaderboard.LoadPrevious(callback)` | Load previous page of scores | Result via callback with scores array |
| `GameServices.ShowLeaderboard(id, timescope, callback)` | Show native leaderboard UI | Result via callback when UI closes |
| `GameServices.ShowLeaderboards(timescope, callback)` | Show all leaderboards UI | Result via callback when UI closes |
| `GameServices.LoadLeaderboards(callback)` | Load leaderboard metadata | Result via callback with leaderboard array |
| `ILeaderboard.LoadImage(callback)` | Load leaderboard icon image | Result via callback with `TextureData` |
| `ILeaderboard.LoadScoresQuerySize` | Configure max entries before loading | `int` (get/set) |
### Achievement APIs
| API | Purpose | Returns |
| ------------------------------------------------------------------ | ------------------------------------------------- | ------------------------------------------- |
| `GameServices.CreateAchievement(id)` | Create achievement object for operations | `IAchievement` |
| `GameServices.ReportAchievementProgress(id, percentage, callback)` | Report achievement progress | Result via callback |
| `IAchievement.ReportProgress(callback)` | Report progress (set `PercentageCompleted` first) | Result via callback |
| `GameServices.ShowAchievements(callback)` | Show native achievements UI | Result via callback when UI closes |
| `GameServices.LoadAchievementDescriptions(callback)` | Load achievement metadata | Result via callback with descriptions array |
| `GameServices.LoadAchievements(callback)` | Load player's achievement progress | Result via callback with achievements array |
| `IAchievementDescription.LoadImage(callback)` | Load achievement icon image | Result via callback with `TextureData` |
### Social APIs
| API | Purpose | Returns |
| -------------------------------------------- | -------------------------------------------- | -------------------------------------- |
| `GameServices.LoadFriends(callback)` | Load player's friends list | Result via callback with players array |
| `GameServices.AddFriend(playerId, callback)` | Send friend request | Result via callback with success bool |
| `ILocalPlayer.LoadFriends(callback)` | Load friends directly from the player object | Result via callback with players array |
| `ILocalPlayer.AddFriend(playerId, callback)` | Send friend request via player object | Result via callback with success bool |
### Server APIs
| API | Purpose | Returns |
| ---------------------------------------------------------------- | ---------------------------------------------------- | ------------------------------------------------------- |
| `GameServices.LoadServerCredentials(callback)` | Load server credentials for backend validation | Result via callback with credentials |
| `GameServices.LoadServerCredentials(additionalScopes, callback)` | Request credentials with additional scopes (Android) | Result via callback with credentials and granted scopes |
## Data Properties
### ILocalPlayer Properties
| Property | Type | Notes |
| ------------------------------- | ------ | ----------------------------------------------- |
| `Identifier` | string | Platform-specific player identifier |
| `DeveloperScopeIdentifier` | string | Cross-game identifier (iOS only when available) |
| `LegacyIdentifier` | string | Backwards-compatible identifier |
| `DisplayName` | string | Player display name |
| `Alias` | string | Player alias (may match `DisplayName`) |
| `IsAuthenticated` | bool | Whether player is signed in |
| `LoadImage(callback)` | Method | Async load player avatar |
| `LoadFriends(callback)` | Method | Load player's friends |
| `AddFriend(playerId, callback)` | Method | Send friend request |
### ILeaderboardScore Properties
| Property | Type | Notes |
| ------------------ | -------- | -------------------------------------- |
| `Value` | long | Score value |
| `Rank` | long | Player rank in leaderboard |
| `Player` | IPlayer | Player who achieved this score |
| `LastReportedDate` | DateTime | When score was submitted |
| `Tag` | string | Optional score tag (max 8 ASCII chars) |
### IAchievement Properties
| Property | Type | Notes |
| --------------------- | -------- | ------------------------------- |
| `Id` | string | Achievement identifier |
| `PercentageCompleted` | double | Progress (0.0 to 100.0) |
| `IsCompleted` | bool | Whether achievement is unlocked |
| `LastReportedDate` | DateTime | Last progress report time |
### IAchievementDescription Properties
| Property | Type | Notes |
| ----------------------- | ------ | ------------------------------------ |
| `Id` | string | Achievement identifier |
| `Title` | string | Achievement title |
| `UnachievedDescription` | string | Description when locked |
| `AchievedDescription` | string | Description when unlocked |
| `MaximumPoints` | int | Points awarded for unlocking |
| `IsHidden` | bool | Whether achievement is hidden |
| `IsReplayable` | bool | Whether achievement can be re-earned |
## Error Handling
| Error Code | Trigger | Recommended Action |
| -------------------- | -------------------------------------------------------------------- | ------------------------------------------------------------- |
| `Unknown` | Platform error, network issue | Retry or display error message to user |
| `SystemError` | Store/Game Center server reported an internal failure | Retry later and show a user-friendly error |
| `NetworkError` | No internet connection | Show offline message or cache work |
| `NotAllowed` | Operation blocked (e.g., parental controls, insufficient privileges) | Disable the action and explain the restriction |
| `DataNotAvailable` | Requested leaderboard/achievement data missing | Refresh data or hide the UI section temporarily |
| `NotSupported` | Feature disabled on this platform/configuration | Hide feature entry points for the current platform |
| `ConfigurationError` | Essential Kit/Game Services settings mismatch | Verify leaderboard/achievement identifiers and platform setup |
| `InvalidInput` | Invalid leaderboard/achievement ID | Validate IDs against Essential Kit settings |
| `NotAuthenticated` | Operation requires authentication | Prompt player to sign in |
**Error Handling Example**:
```csharp
void HandleGameServicesError(Error error)
{
if (error == null) return;
Debug.Log($"Error: {error.Description}");
// Handle specific error codes
switch (error.Code)
{
case (int)GameServicesErrorCode.NotAuthenticated:
Debug.Log("Player needs to sign in");
Debug.Log("Show sign-in UI to the player.");
break;
case (int)GameServicesErrorCode.NotAllowed:
Debug.LogWarning("Operation not allowed for this player or region.");
break;
case (int)GameServicesErrorCode.DataNotAvailable:
Debug.LogWarning("Requested data is not available yet.");
break;
case (int)GameServicesErrorCode.NotSupported:
Debug.LogWarning("Feature not supported on this platform or configuration.");
break;
case (int)GameServicesErrorCode.ConfigurationError:
Debug.LogError("Game Services configuration mismatch.");
break;
case (int)GameServicesErrorCode.InvalidInput:
Debug.Log("Invalid leaderboard or achievement ID");
break;
case (int)GameServicesErrorCode.NetworkError:
Debug.Log("No internet connection");
Debug.Log("Display offline message to the player.");
break;
case (int)GameServicesErrorCode.SystemError:
Debug.LogError("Platform reported a server-side error.");
break;
default:
Debug.Log("Unknown error occurred");
break;
}
}
```
## Advanced: Runtime Settings Initialization
{% hint style="danger" %}
**Warning**: Most games should use Essential Kit Settings configuration. Only use runtime initialization for dynamic leaderboard/achievement systems, server-driven configurations, or tournament modes.
{% endhint %}
### Understanding Runtime Initialization
**Default Behavior:** Essential Kit auto-initializes Game Services using settings configured in the inspector. This works for 99% of games.
**Advanced Usage:** Runtime initialization allows creating settings programmatically. Use this for:
* Dynamic tournament leaderboards loaded from your server
* Server-driven achievement systems
* A/B testing different leaderboard configurations
* Event-based competitions with temporary leaderboards
### Implementation
Override default settings at runtime:
```csharp
void Start()
{
// Create settings programmatically
var settings = new GameServicesUnitySettings(
isEnabled: true,
leaderboards: CreateDynamicLeaderboards(),
achievements: CreateDynamicAchievements(),
showAchievementCompletionBanner: true,
allowFriendsAccess: true
);
GameServices.Initialize(settings);
}
LeaderboardDefinition[] CreateDynamicLeaderboards()
{
// Example: Load from server or create dynamically
return new[]
{
new LeaderboardDefinition(
id: "tournament_weekly",
platformId: "com.yourgame.tournament.weekly",
platformIdOverrides: new RuntimePlatformConstantSet(
ios: "com.yourgame.tournament.weekly",
tvos: "com.yourgame.tournament.weekly.tv",
android: "CgkI_TOURNAMENT_WEEKLY"
),
title: "Weekly Tournament Leaderboard")
};
}
AchievementDefinition[] CreateDynamicAchievements()
{
// Example: Create achievements dynamically
return new[]
{
new AchievementDefinition(
id: "event_achievement",
platformId: "com.yourgame.event.achievement",
platformIdOverrides: new RuntimePlatformConstantSet(
ios: "com.yourgame.event.achievement",
tvos: "com.yourgame.event.achievement.tv",
android: "CgkI_EVENT_ACHIEVEMENT"
),
title: "Special Event Winner",
numOfStepsToUnlock: 1)
};
}
```
{% hint style="warning" %}
**Important**: Calling `Initialize()` again clears registered callbacks and events. Register for `OnAuthStatusChange` AFTER initialization.
{% endhint %}
## Related Guides
* Demo scene: `Assets/Plugins/VoxelBusters/EssentialKit/Examples/Scenes/GameServicesDemo.unity`
* [Platform Setup](/features/game-services/setup) for Game Center and Play Games configuration
* [Testing Guide](https://github.com/voxelbusters/essential-kit-docs/blob/master/tutorials/v3/features/game-services/testing.md) to validate your implementation
* [FAQ](/features/game-services/faq) for common issues and troubleshooting
{% hint style="info" %}
Ready to test? Head to the [Testing Guide](https://github.com/voxelbusters/essential-kit-docs/blob/master/tutorials/v3/features/game-services/testing.md) to validate your implementation on device and in the editor simulator.
{% endhint %}
# FAQ
Common issues and solutions for Game Services integration
## General Questions
### Do I need to manually configure AndroidManifest.xml or Info.plist?
No. Essential Kit automatically injects required permissions and platform entries during build. You only need to configure settings in Essential Kit Settings inspector.
### Can I test Game Services without publishing my app?
Yes. Both platforms support testing before release:
* **iOS**: Use Sandbox environment with test Apple IDs
* **Android**: Add test accounts in Play Console under Play Games Services → Testers
### What are the minimum settings required for Game Services to work?
**iOS:**
* Game Center enabled in App Store Connect
* Leaderboards and achievements configured in App Store Connect
* Leaderboard/achievement definitions added in Essential Kit Settings
**Android:**
* Play Services Application ID set in Essential Kit Settings
* [SHA fingerprint added in Google Play Console](/features/game-services/setup/android#configuring-credentials-sha-fingerprint-authentication)
* Leaderboards and achievements configured in Play Console
* Leaderboard/achievement definitions added in Essential Kit Settings
### How do platform-specific IDs work?
Each leaderboard/achievement has:
* **Common ID**: Used in your code (e.g., "high\_score")
* **iOS Platform ID**: Game Center ID from App Store Connect
* **Android Platform ID**: Play Games ID from Play Console
Essential Kit automatically uses the correct platform ID based on the build target.
## Authentication Issues
### Authentication doesn't work in my game, what should I check?
1. Verify Game Services is enabled in Essential Kit Settings
2. Register for `OnAuthStatusChange` event before calling `Authenticate()`
3. Call `GameServices.Authenticate()` (silent first, then interactive if needed)
4. Check error callback for specific error details
5. Verify platform configuration (see platform-specific sections below)
### Player cancelled authentication, how do I let them sign in again?
Call `GameServices.Authenticate(interactive: true)` when player clicks a "Sign In" button. The `interactive: true` parameter shows the platform login UI.
### Can I check if player is authenticated without showing login UI?
Yes, use `GameServices.IsAuthenticated` property or check `GameServices.LocalPlayer.IsAuthenticated`. For silent authentication attempt, call `GameServices.Authenticate(interactive: false)`.
### How do I handle authentication in production?
Use this pattern:
1. On app start, call `GameServices.Authenticate(interactive: false)` for silent sign-in
2. If silent auth fails, show a "Sign In" button
3. When user clicks button, call `GameServices.Authenticate(interactive: true)` to show login UI
## Leaderboard Issues
### My score submission returns InvalidParameter error, what's wrong?
Check these common causes:
1. Leaderboard ID in code doesn't match ID in Essential Kit Settings
2. Leaderboard definition missing iOS or Android platform ID
3. Platform ID in settings doesn't match dashboard configuration (App Store Connect / Play Console)
### Scores don't appear in the leaderboard, but submission succeeds
Scores may be cached offline and upload later. Check:
1. Device has internet connection
2. Score appears in native Game Center / Play Games app
3. Wait a few minutes for server processing
4. Platform may keep highest score, not latest (check leaderboard configuration)
### How do I display weekly or daily leaderboards?
Use `LeaderboardTimeScope` when showing or loading leaderboards:
```csharp
// Show weekly scores
GameServices.ShowLeaderboard("high_score", LeaderboardTimeScope.Week);
// Load today's scores
leaderboard.TimeScope = LeaderboardTimeScope.Today;
leaderboard.LoadTopScores(callback);
```
### Can I create custom leaderboard UI instead of native UI?
Yes. Use `ILeaderboard.LoadTopScores()` or `LoadPlayerCenteredScores()` to get score data, then display in your own UI. Native UI is optional.
## Achievement Issues
### Achievement progress doesn't update, what should I check?
1. Verify player is authenticated before reporting progress
2. Check achievement ID in code matches Essential Kit Settings
3. Verify platform ID in settings matches dashboard (App Store Connect / Play Console)
4. Confirm percentage is between 0.0 and 100.0
5. Check error callback for specific failure reason
### How do incremental achievements work?
Set the percentage based on progress:
```csharp
// Example: Player won 45 out of 100 games
double percentage = (45.0 / 100.0) * 100.0; // = 45%
GameServices.ReportAchievementProgress("win_100_games", percentage, callback);
```
Platform tracks progress and unlocks when you report 100%.
### Achievement unlocked but banner doesn't show on iOS
Check "Show Achievement Completion Banner" is enabled in Game Services settings. This is iOS-only and must be enabled for automatic banners.
### Can I query player's current achievement progress?
Yes, use `GameServices.LoadAchievements()` to get all achievements with current progress:
```csharp
GameServices.LoadAchievements((result, error) =>
{
foreach (IAchievement achievement in result.Achievements)
{
Debug.Log($"{achievement.Id}: {achievement.PercentageCompleted}%");
}
});
```
## iOS (Game Center) Specific
### Why doesn't the sign-in dialog appear a second time after user cancelled it?
This is a Game Center limitation. After cancelling, the player must manually sign in through iOS Settings → Game Center. Your app cannot show the dialog again until they sign in via Settings.
**Solution**: Show an in-app message directing users to Settings when authentication fails after cancellation.
### Game Center sandbox doesn't work, what should I check?
1. Sign out of production Game Center in iOS Settings
2. Sign in with a Sandbox test Apple ID
3. Ensure device is connected to internet
4. Test Apple ID must be created in App Store Connect → Users and Access → Sandbox Testers
### Leaderboards and achievements don't appear in Game Center app
1. Verify leaderboards/achievements are approved in App Store Connect
2. Check they're in "Ready to Submit" or "Live" state
3. For sandbox testing, they should at least be in "Waiting for Review" state
### How do I create leaderboard groups on iOS?
1. In App Store Connect, go to Game Center → Leaderboard Groups
2. Create a group with ID starting with "grp." (e.g., "grp.com.yourcompany.game.scores")
3. Add individual leaderboards to the group
4. Use group ID in Essential Kit Settings
{% hint style="danger" %}
If you plan to deploy to multiple Apple platforms (macOS, tvOS), use leaderboard/achievement groups from the start. Changing from individual to group IDs later requires all players to reset progress.
{% endhint %}
## Android (Play Games) Specific
### What are SHA fingerprints and why do I need them?
SHA fingerprints authenticate your app with Play Games. Each keystore (debug, release, Play Store signing) has a unique SHA-1 fingerprint that must be added to Play Console credentials.
### What are different SHA fingerprints for different build types?
{% tabs %}
{% tab title="Debug (Development)" %}
When Development Build is enabled in Unity Build Settings, Android uses the default debug keystore.
**Get SHA-1 fingerprint:**
```bash
keytool -list -v -keystore "PATH_TO_DEBUG_KEYSTORE" -alias androiddebugkey -storepass android -keypass android
```
**Debug keystore locations:**
| Platform | Path |
| -------- | ------------------------------------------- |
| Windows | `C:\Users\USERNAME\.android\debug.keystore` |
| macOS | `~/.android/debug.keystore` |

Add this SHA-1 to [Play Console credentials](/features/game-services/setup/android#configuring-credentials-sha-fingerprint-authentication).
{% endtab %}
{% tab title="Release (Production)" %}
When Development Build is OFF, Unity uses your custom keystore from Player Settings.
**Get SHA-1 fingerprint:**
```bash
keytool -list -v -keystore "PATH_TO_KEYSTORE" -alias ALIAS_NAME -storepass STORE_PASSWORD -keypass KEY_PASSWORD
```
Replace:
* **PATH\_TO\_KEYSTORE**: Path to your release keystore
* **ALIAS\_NAME**: Keystore alias name
* **STORE\_PASSWORD**: Keystore password
* **KEY\_PASSWORD**: Key password

Add this SHA-1 to [Play Console credentials](/features/game-services/setup/android#configuring-credentials-sha-fingerprint-authentication).
{% endtab %}
{% tab title="Google Play Store (Play App Signing)" %}
Once you upload your APK to Play Console and enable Google Play App Signing, Google re-signs your app with a new certificate.
**Get Play App Signing SHA-1:**
1. Open [Google Play Console](https://play.google.com/apps/publish)
2. Select your app
3. Go to **Setup** → **App Signing**
4. Under "App signing key certificate", copy the SHA-1 certificate fingerprint
5. Add this fingerprint to [Play Console credentials](/features/game-services/setup/android#configuring-credentials-sha-fingerprint-authentication)

{% endtab %}
{% endtabs %}
### Why is sign-in failing? "APP NOT CORRECTLY CONFIGURED TO USE GOOGLE PLAY GAME SERVICES"
This error has three main causes:
1. **Wrong SHA fingerprint**: Package name and certificate fingerprint don't match OAuth client credentials
* Copy SHA-1 from logcat and [add to Play Console credentials](/features/game-services/setup/android#adding-a-sha-fingerprint)
* Verify you added the SHA-1 for the keystore you're using (debug/release/Play signing)
2. **Wrong Play Services Application ID**: ID in Essential Kit Settings doesn't match Play Console
* Check Play Console → Play Games Services → Setup and Management → Configuration
* Copy the Project ID exactly into Essential Kit Settings
3. **Test account not added**: For unpublished apps, test account must be added as tester
* Play Console → Your App → Play Games Services → Setup and Management → Testers
* Add your Google account email to the testers list
{% hint style="danger" %}
99% of Android sign-in failures are caused by incorrect SHA fingerprint in Play Console credentials. Always verify you added the correct fingerprint for your current keystore.
{% endhint %}
{% hint style="warning" %}
Even with correct SHA fingerprints, test accounts must be added to the testers list in Play Console for unpublished apps.
{% endhint %}
### How do I get SHA fingerprint from an APK file?
```bash
keytool -printcert -jarfile PATH_TO_APK_FILE
```
### I get "keytool command not found" error
`keytool` is part of the Java SDK. You need Java installed and:
* **Windows**: Set `JAVA_HOME` environment variable
* **macOS/Linux**: Add Java to PATH
`keytool` is located in the `bin` folder of your Java installation.
### Server Client ID causes sign-in to fail
Make sure you created the OAuth client for **Web Application**, NOT Android. Android Play Games integration requires Web OAuth client ID for server access.
**To create:**
1. Google Cloud Console → Credentials
2. Create OAuth Client → **Web Application** (not Android)
3. Copy Web client ID to Essential Kit Settings → Android Properties → Server Client Id
{% hint style="success" %}
Server Client ID is only needed if you access Play Games profile data from your backend. For basic Game Services (leaderboards/achievements only), leave it empty.
{% endhint %}
## Error Handling
### My operations fail with "NotAuthenticated" error
Player must be authenticated before using leaderboards or achievements. Check:
1. Call `GameServices.Authenticate()` before game services operations
2. Wait for `OnAuthStatusChange` event with authenticated status
3. Use `GameServices.IsAuthenticated` to check state before operations
### How do I handle offline scenarios?
Both Game Center and Play Games cache data when offline:
* Scores and achievement progress are queued and uploaded when online
* Loading operations may fail with network errors
* Native UI requires internet connection
**Best practice**: Check errors and show appropriate offline message to users.
### Where can I see full error details?
Check the `Error` object in callbacks:
```csharp
struct CompletionResult
{
public bool Success;
public Error Error;
}
void OnComplete(CompletionResult result)
{
if (!result.Success)
{
Error error = result.Error;
Debug.Log($"Error code: {error.Code}");
Debug.Log($"Error message: {error.Description}");
}
}
```
## Demo Scene & Comparison
### How can I verify Essential Kit behavior versus my implementation?
Run the demo scene at `Assets/Plugins/VoxelBusters/EssentialKit/Examples/Scenes/GameServicesDemo.unity`:
1. If demo works but your scene doesn't, compare:
* Essential Kit Settings configuration
* Event registration in `OnEnable`/`OnDisable`
* Error handling in callbacks
* Authentication flow
2. Check `GameServicesDemo.cs` for reference implementation
### What if the demo scene also fails?
1. Verify platform configuration (App Store Connect / Play Console)
2. Check leaderboard/achievement platform IDs match dashboards exactly
3. Review [Setup Guide](/features/game-services/setup) for missing steps
4. For Android, verify SHA fingerprints are correct
## Platform Permissions
### Do I need to request permissions for Game Services?
No explicit permissions needed. Game Services handles authentication through platform SDKs:
* **iOS**: Game Center uses system-level authentication
* **Android**: Play Games uses Google account authentication
### Friends access requires permissions, how do I enable it?
Enable "Allow Friends Access" in Game Services settings. Essential Kit adds required permissions automatically:
* **iOS**: Adds NSGKFriendListUsageDescription to Info.plist
* **Android**: Adds necessary Play Games permissions
Provide clear privacy descriptions for App Store / Play Store review.
## Related Resources
* [Setup Guide](/features/game-services/setup) - Complete platform configuration
* [Usage Guide](/features/game-services/usage) - API reference and examples
* [Testing Guide](https://github.com/voxelbusters/essential-kit-docs/blob/master/tutorials/v3/features/game-services/testing.md) - Device testing checklist
* Demo scene: `GameServicesDemo.unity` - Working reference implementation
# Notes
---
[Next Page](/llms-full.txt/1)